exe.dev Documentation
Introduction
What is exe.dev?
exe.dev is a subscription service that gives you virtual machines, with persistent disks, quickly and without fuss. These machines are immediately accessible over HTTPS, with sensible and secure defaults. You can share your web server as easily as you can share a Google Doc. With built-in optional authentication, so you can focus on your thing.
Your VMs share CPU/RAM—you pay for underlying resources, not per VM. Make a bunch!
Release Notes
May 2026
- Reflection integration. Reflection is a new integration that lets a VM discover what it can connect to. It's on by default for new users.
- Custom domain allow-listing. Custom domains must now be allow-listed
with the
domaincommand before traffic is forwarded. - Bigger resizes. The
resizecommand now supports--cpuand--memoryflags, so users on larger plans can take advantage of larger VMs.
Migrating to exe
exe.dev VMs are just Linux VMs.
The secret ninja trick is to let your LLM of choice do the migration for you. Give your coding agent an SSH key to access the VM, point it at https://exe.dev/llms.txt, and give it a goal.
To migrate a web app, have it listen on localhost:8000 (the default share
port for the exeuntu image) and it will be available at
https://vm-name.exe.xyz/. If your app is containerized, run docker or
docker-compose on your VM.
To migrate your dev environment, connect the GitHub integration so you don't have to log into GitHub on every VM (or manage personal access tokens by hand), then ask Shelley or your agent of choice to implement a task.
Getting Help
We love feedback and we want to help. Here are a few ways to reach us:
- Email: support@exe.dev
- Discord: Join our Discord community
Please share your vm-name with us so we can help you best.
Optionally, you can run grant-support-root <vm-name> on, which allows us to SSH into your VM.
Revoke access anytime with grant-support-root <vmname> off.
Features
exe.dev HTTP Proxies
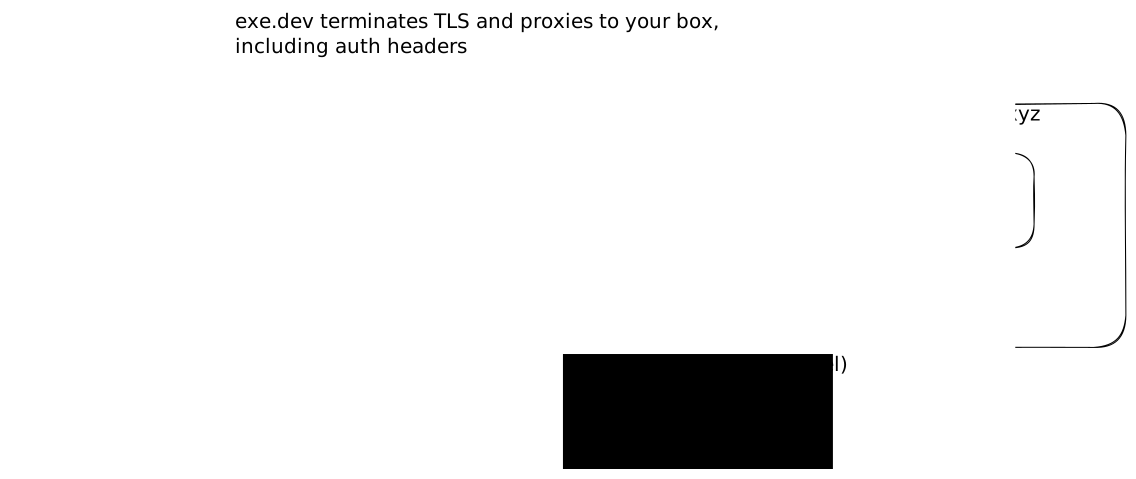
exe.dev proxies traffic to https://vmname.exe.xyz/ to your VM seamlessly, handling
certificates, TLS termination, and optionally offering basic authentication.
Configuring which port to proxy
By default, exe.dev attempts to automatically pick a good port.
It works from the set of ports exposed by the EXPOSE directive in a Dockerfile,
preferring port 80 and falling back to the smallest exposed TCP port >= 1024.
You can change the port chosen with ssh exe.dev share port <vmname> <port>.
This updates the proxy target while keeping the current visibility setting
(private by default).
Private vs Public Proxies
By default, only users with access to the VM can access the HTTP proxy. Users
accessing https://vmname.exe.xyz/ for the first time will be redirected to log
into exe.dev.
To share your site publicly, run ssh exe.dev share set-public <vmname>.
Return it to private access with ssh exe.dev share set-private <vmname>.
To use exe.dev authentication in your application, see Login with exe.dev.
Reverse proxy headers
Requests proxied by exe.dev include standard X-Forwarded-* headers so your
application can reconstruct the original public request information:
X-Forwarded-Proto:httpswhen the client connected over TLS, otherwisehttpX-Forwarded-Host: The full host header (including port) that the client requestedX-Forwarded-For: A comma-separated list containing any priorX-Forwarded-Forvalue plus the client's IP as seen by exe.dev
Additional Ports
The proxy transparently forwards ports between 3000 and 9999.
For example, if you are serving on port 3456 on your VM, you can access that at https://vmname.exe.xyz:3456/.
You may only mark a single port public (with the share set-public and share port commands); these alternate ports can only be accessed by users with access
to the VM.
Sharing
You can share either a web app running on your VM or the VM itself.
Choose an access level
- Web access lets someone open the VM's private HTTPS proxy after logging into exe.dev. It does not give them a shell.
- Root access includes Web access plus SSH, the browser Terminal, and Shelley. A Root collaborator can read, change, or delete anything inside the VM, so only grant it to someone you trust. It does not transfer ownership of the VM.
Root access requires an existing exe.dev account. Unlike a Web share, a Root share does not invite an unregistered email address.
Share with a person
Grant Web access and send an email invitation if needed:
share add <vm> <email>
Grant Root access to an existing exe.dev user, or upgrade their Web access:
share add <vm> <email> --root
For example:
share add mybox collaborator@example.com --root
A team's sharing controls may restrict grants to people outside the team. When you share a VM, recipients can see your email address.
Share with your team
Share only the private web server with everyone on your team:
share add <vm> team
Grant the whole team Root access:
share add <vm> team --root
Team shares follow current membership: new members gain access and former members lose it. See Team VMs for details.
Share with a link
Create a link that grants Web access after the recipient registers and logs in:
share add-link <vm>
Revoke a link with share remove-link <vm> <token>. Revoking the link prevents
new people from using it, but does not remove people who already accepted it.
Remove those people individually with share remove <vm> <email>.
Share links grant Web access only, never Root access.
Make the web server public
To let anyone access the web server without logging in:
share set-public <vm>
To choose a different port first, run share port <vm> <port>. Return the web
server to private access with share set-private <vm>.
Change or remove access
Downgrade a person's Root access to Web access:
share remove <vm> <email> --root
Remove all of a person's access, including Root access:
share remove <vm> <email>
Revoke whole-team Root access with share remove <vm> team --root. Any
separately configured team Web share remains. Remove that with share remove <vm> team.
Run share show <vm> to inspect the current settings.
Customizing VMs
Customize your exe.dev VMs!
Just Use SSH
The simplest and most common approach is to create a VM,
and then use ssh, scp, rsync, etc. to customize
your VM. Some users clone a repo (possibly using the GitHub
integration) and others have a script they run.
See How do I copy files to/from my VM? for more.
Use a custom Docker image
You can customize a Docker image, publish it, and create new VMs using it. The Dockerfile for exeuntu is open source, so you can use that as a base if you'd like. You can also use a private Docker registry to host your images.
ssh exe.dev new --image=myorg/my-custom-image:latest
Custom Image Properties
OCI container labels can change the behavior of how exe.dev treats the image:
LABEL exe.dev/install-shelley=true
exe.dev/install-shelley=true makes exe.dev automatically
install a recent Shelley in /usr/local/bin on creation
and makes the UI assume that Shelley is installed.
exe.dev/login-user=... configures the user that SSH
connections come in as.
Setup scripts
The exeuntu image runs /exe.dev/setup at first boot, once. This
file can be specified with new --setup-script as well
as cat script | ssh exe.dev defaults write dev.exe new.setup-script.
It is easiest to create a script and pipe it into the new command:
$ cat setup.sh
#!/bin/sh
touch /tmp/foo
$ cat setup.sh | ssh exe.dev new --setup-script /dev/stdin
...
$ ssh scarlet-nebula.exe.xyz ls -l /tmp/foo
-rw-r--r-- 1 exedev exedev 0 Mar 28 00:49 /tmp/foo
You can do it inline as well:
$ ssh exe.dev new --name my-vm --setup-script '"touch /tmp/no-shebang"'
...
$ ssh my-vm.exe.xyz ls -l /tmp/no-shebang
-rw-r--r-- 1 exedev exedev 0 Mar 28 00:52 /tmp/no-shebang
Or, multi-line:
exe.dev ▶ new --name lynx-zebra --setup-script "#!/bin/python3\nopen('/tmp/foo', 'w')"
...
exe.dev ▶ ssh lynx-zebra ls -l /tmp/foo
-rw-r--r-- 1 exedev exedev 0 Mar 28 00:50 /tmp/foo
If you want a default for all your VMs:
$ (echo '#!/bin/bash'; echo touch /tmp/fine) | ssh exe.dev defaults write dev.exe new.setup-script
To read the default back, in full:
$ ssh exe.dev defaults read dev.exe new.setup-script > confirm-setup.sh
To clear the default:
$ ssh exe.dev defaults delete dev.exe new.setup-script
Setup scripts have a maximum size. Use indirection.
Private Docker Registries
Private images come up at two different moments, and they have different answers:
- Booting a VM from a private image (
new --image=...): the boot image is pulled by the exe.dev host before your VM exists. Pass--registry-auth. - Pulling private images inside a running VM (
docker pull, CI jobs, agents): attach a container registry integration — nodocker login, no credential on the VM.
Booting from a private image
If the image you give to the new command lives in a
private registry (ghcr.io, Docker Hub, GitLab, ECR, ...), pass
--registry-auth=USERNAME:PASSWORD:
new --image=ghcr.io/OWNER/IMAGE:TAG \
    --registry-auth=USERNAME:TOKEN
The boot image is pulled host-side, before your VM exists — so the
integration hostnames described below (<name>.int.exe.xyz) are not
available to this pull; don't use one as the registry host in --image.
Provide the registry credential with --registry-auth.
ghcr.io requires a classic Personal Access
Token
with read:packages.
Docker Hub accepts a personal access token with read scope.
Pulling private images inside your VM
Once a VM is running, a
container registry integration lets it
pull private images without docker login and without placing a registry
credential on the VM. Attach a ghcr or quay integration from the
catalog, then use the integration hostname as
the registry:
docker pull <name>.int.exe.xyz/OWNER/IMAGE:TAG
exe.dev holds the registry credential and presents it only at the
registry's own token endpoint; stock docker, podman, skopeo, and
crane work unmodified. See
Container Registry Integrations for
the full picture, and
attaching integrations for how attachment
works.
Run a registry on an exe.dev VM
By default, the new command assumes that the image you
give it is stored in a public Docker repository. As an alternative, you can run
a Docker registry on exe.dev, and use that registry to store other images
for your VMs.
First, create a VM:
$ ssh exe.dev new --name private-registry-test
Then, run a Docker container that runs the Docker registry on it:
$ ssh private-registry-test.exe.xyz docker run -d --name registry -p 8000:5000 registry:2
Then, on the registry machine (or elsewhere), build the image:
$ cat > Dockerfile <<EOF
FROM alpine:latest
RUN echo exe.dev > /hello.txt
EOF

$ docker build -t localhost:8000/my-image:v1 .
$ docker push localhost:8000/my-image:v1
Finally, create a new VM, using the VM hostname as the registry host.
$ ssh exe.dev new --image private-registry-test.exe.xyz/my-image:v1
Creating oboe-hydra using image my-image:v1...
And observe it working:
$ ssh oboe-hydra.exe.xyz cat /hello.txt
exe.dev
Custom Domains
You can point your own domain at your exe.dev VM. TLS certificates are issued automatically.
Using a custom domain is a two-step process:
- Set up DNS (CNAME or ALIAS) at your DNS provider, pointing your
domain at
vmname.exe.xyz. See below. - Register the domain with exe.dev:
exe.dev verifies the DNS resolves to your VM, then accepts traffic for that hostname. Until a domain is registered, requests for it are rejected with assh exe.dev domain add <vm> <domain>421 Misdirected Requestpage.
List your domains with ssh exe.dev domain ls <vm> (one VM) or
ssh exe.dev domain ls -a (all your VMs). Remove with
ssh exe.dev domain rm <vm> <domain>.
Check Your DNS
Enter your domain name and the VM name it should point to. We'll check that the records resolve to that VM.
Setting Up DNS
To point your domain at an exe.dev VM, edit the records in your domain's DNS provider. (If you have not setup a DNS provider, your domain registrar usually provides one.)
Which records you need to edit depend on whether it is a subdomain
e.g. app.example.com or an apex domain, e.g. example.com:
Subdomains (CNAME)
For non-apex domains like app.example.com, create a CNAME record:
app.example.com CNAME vmname.exe.xyz
Apex Domains (ALIAS + CNAME)
For apex domains like example.com, you need two DNS records.
-
CNAME record on
wwwpointing to your VM:www.example.com CNAME vmname.exe.xyz -
An A record on the apex pointing to the IP of
vmname.exe.xyz. This requires looking up that IP address, such as by using the commandhost vmname.exe.xyz. Note that this IP address may change occasionally, requiring an update.Fortunately, many providers offer a convenient way to maintain this IP address dynamically, calling these types of records ALIAS or ANAME or flattened CNAME.
# Lowest Common Denominator
example.com  A  1.2.3.4
# Cloudflare
example.com  CNAME vmname.exe.xyz
# Many others
example.com  ALIAS vmname.exe.xyz
The table below points you to the documentation for many common DNS providers.
Provider Mechanism Documentation Cloudflare CNAME docs AWS Route 53 ALIAS docs DNSimple ALIAS docs Azure DNS ALIAS docs Google Cloud DNS ALIAS docs Namecheap DNS ALIAS docs Porkbun DNS ALIAS docs DigitalOcean DNS A docs
Cloudflare: Disable Proxy Mode or Configure Snippets
If you use Cloudflare for DNS, they tend to default you
to Proxied (orange cloud) rather than DNS Only (grey cloud).
Cloudflare's proxy replaces your desired CNAME/ALIAS targets
with Cloudflare IP addresses, and therefore breaks exe.dev's
custom domain support. To fix this, either disable their
proxy, or use Cloudflare Snippets (or Workers) to re-write
the request to point to vmname.exe.xyz. Snippets are a paid
feature.
Also set Cloudflare's CNAME flattening (DNS → Settings) to Flatten CNAME at root rather than Flatten all CNAMEs. The latter collapses CNAMEs into A records, which prevents us from learning the VM name.
Why Registration Is Required
exe.dev only forwards requests for custom domains that you have
registered via domain add. Unregistered hostnames receive a
421 Misdirected Request page — even if the DNS points at your VM.
This prevents random hostnames from being routed to your VM and stops
attackers from issuing CNAMEs that funnel traffic at you.
Wildcard TLS certificates
Each custom domain routed to a VM gets its own TLS certificate. Certificate issuance is rate limited, so if you're setting up lots of subdomains, you'll exhaust your quota.
Teams customers can instead get one wildcard certificate covering a
whole domain suffix, using ACME DNS-01 validation. Every subdomain
still needs its own CNAME and its own domain add --wildcard call;
what the wildcard removes is the per-subdomain certificate issuance.
The certificate covers the parent of the domain you register, so
registering temp.example.com gets you a *.example.com certificate.
To set that up:
- (Suggested) Start a throwaway VM to use during setup:
ssh exe.dev new --name=temp-vm. - At your DNS provider, add a CNAME:
temp.example.com→temp-vm.exe.xyz. - Run
ssh exe.dev domain add --wildcard temp-vm temp.example.com. This won't complete. Instead it prints a second CNAME to add, which delegates ACME challenges forexample.comto exe.dev. - Add that record, then re-run the same command. It might be slow if it has to wait for DNS caches to expire.
- Test! Confirm the served certificate covers
*.example.com:echo | openssl s_client -connect temp.example.com:443 \ -servername temp.example.com 2>/dev/null | openssl x509 -noout -text | awk '/Subject Alternative Name/{getline; print}' - Add your remaining subdomains the same way: a CNAME pointing to the relevant VM,
then
domain add --wildcard. (Don't omit the--wildcard.) This reuses the certificate from step 4, so there's no further issuance delay.
Login with exe
You can leverage exe.dev's authentication system to identify users accessing your services through the HTTP proxy. This lets you build authorization without managing passwords or e-mails yourself.
The "Login with exe" feature is complementary with Sharing. If a site is public, all users can access it, and the developer can implement their own authorization, including bouncing users through the /__exe.dev/login to require an e-mail address. Private sites always have the authentication headers, because the site must have been shared to be accessed.
Authentication Headers
When a user is authenticated via exe.dev, the following headers are added to requests coming into your VM:
X-ExeDev-UserID: A stable, unique user identifierX-ExeDev-Email: The user's email address
These headers are only present when the user is authenticated. If your proxy is public, unauthenticated requests will not have these headers.
Special Authentication URLs
The following special URLs are available for authentication flows:
-
Login:
https://vmname.exe.xyz/__exe.dev/login?redirect={path}Redirects the user to log in, then returns them to the specified path.
-
Logout: POST
https://vmname.exe.xyz/__exe.dev/logoutLogs the user out, removing the cookie for your domain.
Development
If you're using an agent to develop on your exe.dev VM itself, your server might be listening, for example, on http://localhost:8000/, and nothing is providing these headers. Use an http proxy to add the headers for testing. For example:
mitmdump \
  --mode reverse:http://localhost:8000 \
  --listen-port 3000 \
  --set modify_headers='/~q/X-Exedev-Email/user@example.com' \
  --set modify_headers='/~q/X-Exedev-Userid/usr1234'
Example: nginx authorization
The following nginx configuration allows only specified email addresses to access a protected location:
server {
    listen 80;
    server_name _;

    location / {
        # Check if X-ExeDev-Email header matches allowed addresses
        set $allowed "false";
        if ($http_x_exedev_email = "alice@example.com") {
            set $allowed "true";
        }
        if ($http_x_exedev_email = "bob@example.com") {
            set $allowed "true";
        }

        # Return 403 if not allowed
        if ($allowed = "false") {
            return 403 "Access denied. Please log in with an authorized account.";
        }

        # Serve content for authorized users
        root /var/www/html;
        index index.html;
        try_files $uri $uri/ =404;
    }
}
LLM Gateway
Direct LLM Gateway access through the VM metadata endpoint is deprecated and
is unavailable to accounts created on or after 2026-08-03 00:00 UTC. Use the
default LLM integration at
https://llm.int.exe.xyz instead.
The exe.dev LLM gateway provider source within an LLM integration remains
supported. It provides exe.dev-managed access to Anthropic, OpenAI, Fireworks, and xAI models, plus
Deepgram recorded-audio transcription. Your subscription includes a monthly token allocation, and
you can purchase additional tokens at https://exe.dev/user/shelley.
See the full list of supported models (JSON).
New accounts get a default LLM integration named
llm, attached to auto:all. That integration exposes managed models at
https://llm.int.exe.xyz inside attached VMs, with no provider API keys stored
on the VM.
The gateway is only for exe.dev-managed model access. If you want to use your own provider API key or a ChatGPT subscription, configure those as provider sources on an LLM integration; those sources are not part of the gateway or its token allocation.
Use the LLM Integration guide to configure provider sources, connect a ChatGPT subscription, attach the integration to VMs, or use the integration with Shelley, Codex, Claude Code, and curl.
Shelley
Shelley automatically discovers attached LLM
integrations through the reflection integration. On new accounts, Shelley
sees the default llm integration and shows its managed models in the
Model: picker without custom model setup.
If Shelley does not show the integration models, see Use with Shelley.
Deprecated direct endpoint
Do not use the legacy metadata endpoint:
http://169.254.169.254/gateway/llm/<provider>
Use the default LLM integration instead:
$ curl https://llm.int.exe.xyz/v1/models
See the LLM Integration guide for provider-specific examples.
Regions
Each account is associated with a region. All of that account's VMs are hosted in that region.
The lobby (main exe.dev server) is located in the United States for all accounts.
- PDX: Oregon, USA
- LAX: Los Angeles, USA
- NYC: New York, USA
- DAL: Dallas, USA
- FRA: Frankfurt, Germany
- TYO: Tokyo, Japan
- SYD: Sydney, Australia
- SGP: Singapore
- LON: London, UK
The PDX region is not accepting new accounts; LAX is the nearest substitute. Accounts associated with PDX may have some VMs located in LAX.
API
The exe.dev API is SSH. Run commands like ssh exe.dev ls --json or ssh exe.dev new --json
directly from scripts and automation. See the CLI Reference for the full list of commands.
For example:
$ ssh exe.dev ls --json | jq '.vms[0]'
{
  "https_url": "https://bloggy.exe.xyz",
  "region": "lon",
  "region_display": "London, UK",
  "ssh_dest": "bloggy.exe.xyz",
  "ssh_host": "bloggy.exe.xyz",
  "status": "running",
  "vm_name": "bloggy"
}
ssh_dest is a ready-to-use ssh/scp destination and may carry a
username prefix (e.g. vm+bloggy@vm.exe.xyz) when the VM's hostname can't
route SSH directly. Tools
that need the parts separately should use ssh_host (the network host to
dial) and ssh_user (the SSH username the routing requires; absent when any
username works).
HTTPS API
The HTTPS API enables programmatic HTTPS access both to exe.dev and to individual VMs.
exe.dev
The exe.dev HTTPS API is nothing but the SSH API shoved into a POST body.
This might seem crazy, but it means you have only one API to learn, and you can develop and debug all your API calls interactively over SSH.
All requests use the same endpoint:
POST https://exe.dev/exec
The POST body is the ssh command to run, exactly as if it were typed into the REPL or exec'd via ssh. JSON output is always enabled for API responses (equivalent to --json). The returned body is the ssh output. That's it.
See the CLI reference for the full list of available commands.
Authentication
Authentication uses bearer tokens. To have exe.dev generate a token, run:
ssh exe.dev ssh-key generate-api-key --exp=30d
Alternatively, you can generate bearer tokens locally using your SSH key. See HTTPS API Local Key Creation for details.
For programmatic access to VMs, see HTTPS Tokens for VMs.
Example
After generating a token as described above, run commands by passing it as a bearer token:
curl -X POST https://exe.dev/exec \
     -H "Authorization: Bearer exe1.AAA" \
     -d whoami
Executing commands on VMs
You can run commands inside your VMs over this same endpoint. See Run commands on VM.
Token details
Granular permissions
Token permissions are specified using (signed) JSON. The empty object {} gives you the defaults, and each field you add overrides a default.
The permissions JSON is public and embedded as plaintext in your token. Do not put secrets in it.
Available fields:
-
exp: specifies an integer UTC unix timestamp after which the token is no longer valid. For example,{"exp":1922918400}means this token cannot be used after Dec 5, 2030. The defaultexpis the distant future, that is, it never expires. We strongly recommend always settingexp. -
nbf: specifies a UTC unix timestamp before which the token is not yet valid. For example,{"nbf": 1922918400}means this token cannot be used until Dec 5, 2030. The defaultnbfis the distant past. -
cmds: specifies which exe.dev commands this token can execute. Subcommands are specified as a single string, such as"ssh-key list". Including a parent command like"ssh-key"does not grant access to its subcommands. Flags, arguments, and options (like--json) are always allowed when the base command is permitted;cmdscontrols command names only. The one exception is"ssh <vm-name>", which limitssshto a single VM (see Run commands on VM). The defaultcmdsis["help","ls","new","whoami","ssh-key list","share show","exe0-to-exe1","team","team members"]. -
ctx: uninterpreted by exe.dev. Can be used to differentiate otherwise-identical tokens, or to pass data to your VM server (see HTTPS Tokens for VMs). Must contain valid JSON that complies with the restrictions in the next section.
Need a new type of permission? Let us know: support@exe.dev or Discord.
JSON recommendations and restrictions
We recommend compacting the JSON to keep tokens short: remove all whitespace, or pipe through jq -c.
There are a few JSON restrictions, including inside ctx, for good security hygiene.
- No leading or trailing whitespace.
- No newlines (
\n,\r). - No null bytes.
- No duplicate keys, at any level.
- Known fields only: Only
exp,nbf,cmds, andctxare allowed at the top level. - Integers:
expandnbfmust be integers. No decimals like2000000000.0, no exponents like2e9. - Timestamp range:
expandnbfmust be between Jan 1, 2000 (946684800) and Jan 1, 2100 (4102444800). - Size limit: The entire token must not exceed 8KB.
The ctx field is passed through to your server verbatim, but we do validate its internal structure against these rules.
Troubleshooting
Invalid token (401)
The token is malformed, expired, signed with an unrecognized key, or the signature doesn't verify. Common causes:
- The key used to sign the token hasn't been added to your exe.dev account. Run
ssh exe.dev ssh-key listto check. - The token has expired (
expis in the past). - Whitespace or newlines in the permissions JSON. The payload must be byte-for-byte identical to what was signed. Pipe through
jq -cto compact, and avoid editors that add trailing newlines. - Using
ssh-agentinstead of a key file.ssh-keygen -Y signrequires-f path/to/key. If your key is only in the agent, export it first:ssh-add -L | grep "your-key-comment" > /tmp/key.pub, then use the private key file directly.
Bad request (400)
The request body is empty, missing, or has invalid command syntax (e.g., unbalanced quotes).
Command not allowed by token permissions (403)
The token's cmds list doesn't include the command you're trying to run. The token payload is base64url-encoded and can be decoded to inspect its contents.
Subcommands must be listed explicitly. Including "ssh-key" does not grant access to "ssh-key list".
Unknown command (404)
The command doesn't exist. Check ssh exe.dev help all for the full list of available commands.
Method not allowed (405)
Only POST is accepted. You sent a GET, PUT, or other HTTP method.
Request too large (413)
The request body exceeds the 64KB limit.
Command failed (422)
The command ran but returned a non-zero exit code (e.g., missing arguments, invalid input). The body contains the error message.
Timeout (504)
The command took longer than 30 seconds to execute.
Rate limited (429)
Too many requests from this SSH key. The limit is per-key: use separate SSH keys for independent workloads.
Internal error (500)
Something unexpected went wrong server-side. If this persists, contact support@exe.dev.
FAQ
Is there replay protection? There is no built-in nonce or jti mechanism. Use short-lived tokens (small exp) to limit the replay window. Use separate ssh keys for sets of API keys for revocability.
Can I introspect a command without side effects? Yes. Pass --help to any command (e.g., new --help) to get its flags and examples as JSON.
What are the /exec limitations? The API has no stdin, no pty, and a 30-second timeout (HTTP 504 on timeout). Commands that require interactive input won't work. If it hurts, don't do it. The request body limit is 64KB.
HTTPS API Local Key Creation
This page describes how to create HTTPS API tokens locally by signing them with your SSH private key. This can be done entirely offline and programmatically.
Alternatively, use ssh-key generate-api-key to have the server generate a token for you.
Quick start
Add a new SSH key to your exe.dev account
You don't have to do this, but it's a good idea: you can revoke this API key by removing this ssh key from exe.dev, without disrupting your regular ssh access. The -C flag sets a name for this ssh key; feel free to change it.
ssh-keygen -t ed25519 -C api -f ~/.ssh/exe_dev_api
cat ~/.ssh/exe_dev_api.pub | ssh exe.dev ssh-key add
If you want finer-grained revocability of API keys, add more ssh keys.
Generate a token using this ssh key
Permissions are specified as JSON. Each field overrides a default; see Granular permissions for all available fields. We'll use {} for now; this creates a token that never expires.
Define a helper to convert base64 to base64url (RFC 4648).
b64url() { tr -d '\n=' | tr '+/' '-_'; }
Set the permissions and base64url-encode them.
export PERMISSIONS='{}'
export PAYLOAD=$(printf '%s' "$PERMISSIONS" | base64 | b64url)
Sign the permissions with your SSH key.
export SIG=$(printf '%s' "$PERMISSIONS" | ssh-keygen -Y sign -f ~/.ssh/exe_dev_api -n v0@exe.dev)
Strip the PEM armor and convert to base64url.
export SIGBLOB=$(echo "$SIG" | sed '1d;$d' | b64url)
Assemble the token.
export TOKEN="exe0.$PAYLOAD.$SIGBLOB"
Test
Test the token by running a simple command.
curl -X POST https://exe.dev/exec -H "Authorization: Bearer $TOKEN" -d 'whoami'
Shorter tokens
exe0 tokens are long and contain some information in plaintext.
If you want a short, opaque token, you may ask exe.dev to provide an exe1 token, which is nothing more than a handle for an exe0 token.
ssh exe.dev exe0-to-exe1 "$TOKEN"
This returns an exe1 token. The server validates the exe0 token before issuing an exe1 token. If the exe0 token is for a particular VM, you must specify that for the validation to succeed.
ssh exe.dev exe0-to-exe1 --vm=vm-name "$TOKEN"
exe1 tokens work everywhere exe0 tokens work, in exactly the same way.
An exe1 token is validated through its underlying exe0 token on every use. To revoke an exe1 token, revoke the underlying exe0 token.
VM tokens via local signing
You can also create VM-scoped tokens locally. The process is identical except the signing namespace changes from v0@exe.dev to v0@VMNAME.exe.xyz:
export SIG=$(printf '%s' "$PERMISSIONS" | ssh-keygen -Y sign -f ~/.ssh/exe_dev_api -n v0@myvm.exe.xyz)
HTTPS API: Run commands on VM
You can execute commands on your VMs over the HTTPS API, using the same /exec endpoint with the same ssh command you would type into the REPL.
Quick start
Generate a token that is allowed to use ssh:
ssh exe.dev ssh-key generate-api-key --label=deploy --cmds=ssh --exp=30d
# Restricts to one VM
ssh exe.dev ssh-key generate-api-key --label=deploy --cmds="'ssh my-vm'" --exp=30d
Then run:
curl -X POST https://exe.dev/exec \
     -H "Authorization: Bearer exe1.AAA" \
     -d 'ssh my-vm whoami'
Output and exit codes
The response body is output of your command combined, so you can redirect the curl output as you need to. Be aware that stderr is mixed in there (unlike a typical shell redirect).
curl -X POST https://exe.dev/exec \
     -H "Authorization: Bearer exe1.AAA" \
     -d 'ssh my-vm cat build/app.tar.gz' > app.tar.gz
The exit code is in the X-Exe-Exit trailer; use -D for curl to show it:
$ curl -sD - -X POST https://exe.dev/exec \
     -H "Authorization: Bearer exe1.AAA" \
     --data-raw 'ssh my-vm false'
X-Exe-Exit: 1
Quoting and all that
Your command passes through two parsers, and each one eats a layer of quoting:
- The lobby parses the request body with a shell lexer.
- The VM parses whatever the lobby handed it, much like sshd
So a pipeline, a redirect, or a quoted argument has to survive being quoted twice. Type a command below to see both layers:
If you want to return JSON, run a complicated bash pipeline, or start a process and return immediately, whip up the appropriate one-liner for that. The world is your oyster.
Returning immediately
To detach your command from the initiating HTTPS request, detaching it with setsid nohup and shell redirection.
curl -X POST https://exe.dev/exec \
     -H "Authorization: Bearer $TOKEN" \
     -d 'ssh my-vm "setsid nohup ./build.sh > /tmp/build.log 2>&1 & echo started"'
HTTPS Tokens for VMs
The HTTPS API page shows how to authenticate to the exe.dev API. For programmatic access to VMs, we support something very similar.
Our HTTPS auth proxy gates access to websites on your VMs, but it assumes a browser and cookies. For API servers or git push over HTTPS, you can generate bearer tokens that the proxy will respect.
Using ssh-key generate-api-key --vm:
ssh exe.dev ssh-key generate-api-key --vm=my-vm --label=deploy
You can also create VM tokens locally by signing with a different namespace.
How it works
VM tokens work just like API tokens, with two differences:
-
Namespace: The signing namespace is
v0@VMNAME.exe.xyz(instead ofv0@exe.dev), scoping the token to a specific VM. When usingssh-key generate-api-key --vm, this is handled for you. -
Ctx header: When a request is authenticated via token, the
ctxfield from the payload is passed verbatim to your VM's HTTP server in theX-ExeDev-Token-Ctxheader. The contents are signed, so your server can use them for its own authorization rules.
Authentication methods
Tokens can be provided in three ways:
- Bearer token in
X-Exedev-Authorization(preferred): Add anX-Exedev-Authorization: Bearer <token>HTTP header. The proxy consumes and strips this header before forwarding to your VM. - Bearer token in
Authorization(deprecated): Add anAuthorization: Bearer <token>HTTP header. PreferX-Exedev-Authorizationfor new integrations. - Basic auth: Username is ignored; password is the token. This works with tools like
gitthat use basic auth for HTTPS. (VM proxy only, not/exec.)
What your server receives
When a request is authenticated via token, your server receives these headers:
X-ExeDev-UserID: Your exe.dev user IDX-ExeDev-Email: Your email addressX-ExeDev-Token-Ctx: Thectxfield from the token, passed verbatim (if present)
Using with git
For git HTTPS access, save the token to a file and configure git to supply it as the password via basic auth.
echo "$TOKEN" > ~/.ssh/exe_dev_token
git config credential.helper '!f() { echo "password=$(cat ~/.ssh/exe_dev_token)"; }; f'
git clone https://myvm.exe.xyz/repo.git
Receive email
Your VM can receive emails at *@vmname.exe.xyz.
Enable
ssh exe.dev share receive-email vmname on
Once enabled, any email sent to any.name.here@vmname.exe.xyz will be delivered to ~/Maildir/new/ on your VM.
Enabling inbound email also lets your VM reply to the people who email it,
scoped to their threads by default; see
replying to correspondents,
including the --reply-policy flag to restrict or disable this.
Disable
ssh exe.dev share receive-email vmname off
Disabling does not delete existing emails. It does clear the VM's permission to reply to people who have emailed it — except that anyone who unsubscribed stays unsubscribed.
Email format
Emails are delivered in Maildir format.
Email include an injected Delivered-To: header as the first line, containing the envelope recipient address. Use this header (not To: or CC:) to determine what address the email was sent to.
DKIM-Signature: headers are removed before delivery. exe.dev checks them on the message as it arrived, and what it concludes is what decides who your VM may reply to. A signature is a reusable credential — anyone holding a signed message can present it again — so your VM gets the mail without it, and cannot re-present someone else's mail as permission. Other authentication headers, such as Authentication-Results:, are passed through untouched; they are the upstream relay's claims, and exe.dev does not trust them either.
To watch for new mail, poll or use inotify. For example:
inotifywait -m ~/Maildir/new -e create -e moved_to |
  while read dir action file; do
    FILE="$dir/$file"
    # process email in $FILE
    mv "$FILE" ~/Maildir/cur/
  done
You are responsible for promptly moving emails out of ~/Maildir/new/. If there are more than 1000 files in that directory, we will automatically disable email receiving. If this happens, you may clear the backlog and re-enable it, as above.
Limitations
- No spam, virus, phishing, or safety checks, we only deliver the bits
- No custom domains yet, only
*.exe.xyz - Strict receiving rules; mail that fails authentication may be rejected
- 1MB maximum message size
- Delivered emails must be processed promptly
Send email
Your VM can send plain-text emails.
Request
curl -X POST http://169.254.169.254/gateway/email/send \
  -H "Content-Type: application/json" \
  -d '{
    "to": "odysseus@example.com",
    "subject": "Build Complete",
    "body": "Your build finished successfully!"
  }'
Required fields: to, subject, body
Optional fields: reply_to, in_reply_to, references, attachments
Sending is rate-limited.
Attachments
Pass an attachments array. Each entry needs a filename and
base64-encoded content; content_type is optional.
curl -X POST http://169.254.169.254/gateway/email/send \
  -H "Content-Type: application/json" \
  -d '{
    "to": "odysseus@example.com",
    "subject": "Report",
    "body": "Latest numbers attached.",
    "attachments": [
      {
        "filename": "report.csv",
        "content": "'"$(base64 -w0 report.csv)"'"
      }
    ]
  }'
Attachment count and size are limited.
Allowed recipients
To prevent spam, to must be one of:
- you
- a member of your exe.dev team
- someone that has logged into your private-but-shared VM using exe.dev auth
- someone who has emailed your VM (see below)
Replying to people who email your VM
If your VM receives email, it may reply to people who
email it. By default the permission is scoped to the thread: set in_reply_to
(or references) to the Message-ID of a message the sender sent your VM
within the last 30 days. Replies sent this way carry a short footer telling
the recipient how to widen or revoke the permission (every message your VM
sends a correspondent carries at least the unsubscribe instruction):
- they can email your VM with subject
subscribe, after which your VM may email them directly (noin_reply_toneeded) - they can email your VM with subject
unsubscribe, after which your VM cannot email them at all — this outranks every other permission, including your own and your team's, and only anothersubscribefrom that same address lifts it
The subject must be exactly the command word; Re: subscribe does not count,
so that hitting Reply can never subscribe someone by accident.
To prevent spoofed or replayed mail from opening this door, the inbound email
must carry a valid DKIM signature that is aligned with its From domain and
covers a To/Cc header naming your VM (nearly all real mail providers do
this). The subject and Message-ID must be signed too, or they are ignored.
Mail that can't be verified is still delivered to your VM, but does not make
its sender replyable; the send endpoint's error message says why a given
address isn't sendable.
Reply permissions are cleared when you run share receive-email <vm> off,
when the VM is deleted, and when it changes owner. An unsubscribe outlives
the off/on cycle and a change of owner: neither lets your VM mail someone who
asked it to stop. Whether your VM may email someone is that person's call, so
they are also the only one who can reverse it.
While inbound email is off, your VM cannot email correspondents at all —
their unsubscribe reply would have nowhere to land.
You can also restrict who your VM may email at all:
ssh exe.dev share receive-email <vm> --reply-policy=<policy>
where <policy> is all (default: owner, team, share recipients, and
correspondents), known (no correspondents), owner, or none.
Response
{"success": true}
or
{"error": "error message"}
Integrations
What are Integrations?
Integrations connect your exe.dev VM to other services securely and flexibly.
They allow you to "inject secrets" on the network, so that those secrets cannot
be extracted from the VM itself. Integrations are created with the integrations add
command and attached to VMs with the integrations attach command.
You can manage integrations from the Integrations page in the web UI or via SSH.
The common public integration types are:
- HTTP Proxy Integration — inject headers into HTTP requests
- VM-to-VM Integration — let one VM call another over HTTPS, generated key injected at the edge
- GitHub Integration — work with private repos without managing tokens
- LLM Integration — expose managed, API-key, ChatGPT-backed, or custom HTTPS LLM providers to VMs
- Object Storage (S3) Integration — sign requests to S3-compatible storage without putting credentials on the VM
- Reflection Integration — expose VM metadata such as email, tags, comments, and attached integrations
- Slack Integration — send messages from a VM to a Slack channel
- Slack Bot Integration — run a two-way Slack bot from a VM, tokens held off-VM
- Discord Integration — send messages from a VM to a Discord channel
- Discord Bot Integration — drive your own Discord bot from a VM, token held off-VM
Beyond these built-in types, the catalog covers well over a hundred services; see the Integration catalog for the full list of handles and connect links.
Identity Federation guides:
- AWS Workload Identity Federation — let VMs assume AWS IAM roles with short-lived OIDC tokens
- GCP Workload Identity Federation — let VMs impersonate Google Cloud service accounts with short-lived OIDC tokens
Object storage (S3)
Object storage integrations support Amazon S3, Tigris, Cloudflare R2, and custom S3-compatible HTTPS endpoints. exe.dev stores the access key and secret outside the VM and signs each request with AWS Signature Version 4.
Create one from the Object storage tile on the Integrations page, or over
SSH. Set --region to the AWS region for Amazon S3; auto works for providers
such as Tigris and R2.
$ printf '%s\n%s\n' "$S3_ACCESS_KEY_ID" "$S3_SECRET_ACCESS_KEY" | \
    ssh exe.dev integrations add s3 --name objects \
      --endpoint=https://t3.storage.dev --region=auto --bucket=my-bucket \
      --access-key-id=- --secret-access-key=- --attach auto:all
Attached VMs access the bucket through
https://objects.int.exe.xyz/<object-key> without receiving the stored
credentials.
Default integrations
New accounts get these default integrations:
reflection: exposes all reflection fields and is attached withauto:all, so every VM can read its metadata fromreflection.int.exe.xyz.llm: exposes the managed LLM model list athttps://llm.int.exe.xyz/v1/modelsand is attached withauto:all, so every VM can use the managed Anthropic, OpenAI, and Fireworks providers.
Reinstall Reflection from the Reflection tile on the Integrations page or with:
exe.dev ▶ integrations add reflection --name reflection --fields all --attach auto:all
Reinstall the default LLM integration from the LLM tile on the Integrations page or with:
exe.dev ▶ integrations add llm --name llm --attach auto:all
Providing secrets to integrations commands
Several integration types take a secret at creation time: an API key
(--openai-key), a bot token (--bot-token, --app-token), a webhook URL
(--webhook-url), or a bearer token (--bearer). Set any credential value
flag to - to read its value from stdin:
$ printf '%s' "$OPENAI_API_KEY" | ssh exe.dev integrations add llm --name openai-key --openai=byok --openai-key=-
This works with password managers:
$ op read "op://vault/slack-bot/token" | ssh exe.dev integrations add slack --name mybot --bot-token=-
With one credential flag set to -, the flag receives the complete stdin
value, including internal newlines such as those in a PEM private key. With
multiple - flags, provide one non-empty value per line in the exact order
the flags appear on the command line. The first line belongs to the first
- flag, the second line to the second - flag, and so on. A multiline
credential must be supplied by itself. In the interactive shell, credentials
are prompted for in the same flag order.
Where secrets live
Whatever the type, the secret is stored server-side and injected at the
network edge when your VM calls the integration hostname. The VM — and any
agent running on it — can use the integration but can never read the
secret. integrations list --json shows stored secrets as ***.
See also: Attaching Integrations for how to connect integrations to your VMs using direct attachment, tags, or auto-attach.
HTTP Proxy Integration
The HTTP Proxy integration serves as an HTTP(S) proxy that injects a header into your request. This can be useful to interact with an API that requires a bearer token.
For example, the following snippet creates, attaches, and uses the http proxy integration to inject a header into a request.
exe.dev ▶ integrations add http-proxy --name mirror --target https://httpbin.org/ --header prettiest-of-them-all:me --attach vm:my-vm-name
Added integration mirror

Usage from a VM:
  ssh my-vm-name.exe.xyz curl http://mirror.int.exe.xyz/

exe.dev ▶ ssh my-vm-name.exe.xyz curl -s http://mirror.int.exe.xyz/anything -Hfoo:bar
{
  "args": {},
  "data": "",
  "files": {},
  "form": {},
  "headers": {
    "Accept": "*/*",
    "Accept-Encoding": "gzip",
    "Foo": "bar",
    "Host": "httpbin.org",
    "Prettiest-Of-Them-All": "me",
    "User-Agent": "curl/8.5.0",
    "X-Amzn-Trace-Id": "Root=1-69b339a2-0032d20f5263c6dc17235289"
  },
  "json": null,
  "method": "GET",
  "origin": "64.34.88.25",
  "url": "https://httpbin.org/anything"
}
The HTTP Proxy integration supports HTTP basic auth as well. When the
injected header carries a real credential (e.g. --bearer), remember it is
stored server-side and never visible from the VM — see
Where secrets live.
Path rewriting with --strip-prefix
Some APIs mount every endpoint under a version prefix (say /api/v3) that
you want to drop when proxying: requests to the integration should reach the
target with the prefix removed. --strip-prefix does exactly that — a
static path prefix stripped from the front of each matching request before
forwarding:
exe.dev ▶ integrations add http-proxy --name myapi --target https://api.example.com --bearer sk-... --strip-prefix /api/v3
With that configuration, from an attached VM:
http://myapi.int.exe.xyz/api/v3/users→https://api.example.com/usershttp://myapi.int.exe.xyz/api/v3→https://api.example.com/http://myapi.int.exe.xyz/healthz→https://api.example.com/healthz(a path outside the prefix passes through unchanged)
Matching is segment-aligned: /api/v3x/other does not match /api/v3
and is forwarded verbatim. The prefix must start with /, contains no
regex — only letters, digits, and - _ . ~ in path segments — and composes
with --header/--bearer/basic-auth injection unchanged. Use
integrations edit <name> --strip-prefix <new> to change it, or
--strip-prefix="" to remove it. (The target URL itself still must not
carry a path; --strip-prefix is the sanctioned way to express a path
rewrite, in the request direction only.)
Peer Integrations (VM-to-VM)
The --peer flag turns an HTTP proxy integration into a VM-to-VM proxy: the
--target is another VM you own, and exe.dev injects a generated API key so
the source VM can reach the target without managing tokens itself. Requests
arrive at the target with an X-Exedev-Source-Vm header naming the caller.
The platform signs an attestation alongside it and delivers the header only
when that attestation verifies, so it cannot be forged.
exe.dev ▶ integrations add http-proxy --name talk-to-bob --target https://bob.<your-domain>/ --peer --attach vm:alice
From alice, requests to http://talk-to-bob.int.exe.xyz/ arrive at bob
with X-Exedev-Source-Vm: alice.
See the VM-to-VM Integration page for the full story: the auth model, using the source-VM header safely, UI setup, and a two-agent example.
Integration catalog
This page lists the public catalog services that can be added to exe.dev. It is generated from the same descriptors and visibility rules used by the catalog browse and add flows, so staged previews and names owned by built-in integration types are omitted.
Use the handle exactly as the service query parameter in a connect link:
https://exe.dev/integrations/add?service=<handle>&attach=vm:<vm>&for=<duration>&source=shelley
The link only pre-fills the add dialog. The user reviews it and supplies or authorizes credentials on exe.dev; credentials never belong in the URL.
| Service | Handle | Connection | Description |
|---|---|---|---|
| Airtable | airtable |
API credential | Spreadsheet-database for structured records, bases, and views. |
| Algolia | algolia |
API credential | Hosted search-as-a-service with instant, typo-tolerant queries. |
| Alpha Vantage (market data) | alphavantage |
API credential | Stock, forex, and crypto market data API. |
| Amplitude | amplitude |
API credential | Product analytics for user behavior and funnels. |
| Anthropic | anthropic |
API credential | Claude large language models (chat, tools, vision). |
| Argo CD | argocd |
API credential | GitOps continuous delivery for Kubernetes. |
| Asana | asana |
API credential | Work and project management for teams. |
| AssemblyAI | assemblyai |
API credential | Speech-to-text transcription and audio intelligence. |
| atcr.io (AT Protocol container registry) | atcr |
API credential | AT Protocol container registry: mint short-lived scoped pull tokens (Tangled/Knot). |
| Attio | attio |
API credential | Modern, data-driven CRM. |
| Axiom | axiom |
API credential | Log management and event analytics at scale. |
| 511 SF Bay (transit & traffic) | bay511 |
API credential | San Francisco Bay Area transit and traffic open data. |
| Better Stack | betterstack |
API credential | Uptime monitoring, incident management, and logs. |
| Bitbucket Cloud | bitbucket |
API credential | Git repository hosting: repos, pull requests, and pipelines. |
| Brave Search API | brave |
API credential | Independent web search API with its own index. |
| Buildkite | buildkite |
API credential | CI/CD pipelines that run on your own infrastructure. |
| Cal.com | calcom |
API credential | Open-source scheduling and booking (Calendly alternative). |
| Calendly | calendly |
API credential | Automated meeting scheduling and booking links. |
| Cerebras | cerebras |
API credential | Ultra-fast LLM inference on wafer-scale hardware. |
| CircleCI | circleci |
API credential | Continuous integration and delivery pipelines. |
| Clerk | clerk |
API credential | Drop-in user authentication and management. |
| ClickHouse Cloud | clickhouse |
API credential | Columnar SQL database for real-time analytics. |
| ClickUp | clickup |
API credential | All-in-one project management and docs. |
| Cloudflare | cloudflare |
API credential | CDN, DNS, and edge network management. |
| CockroachDB Cloud | cockroachdb |
API credential | Manage CockroachDB Cloud clusters via the Cloud API. |
| Cohere | cohere |
API credential | Enterprise LLMs for chat, embeddings, and rerank. |
| CoinGecko | coingecko |
API credential | Cryptocurrency prices and market data. |
| Confluence Cloud | confluence |
API credential | Team wiki and documentation (Atlassian). |
| Convex | convex |
API credential | Reactive backend-as-a-service: database, functions, and scheduling. |
| crates.io | cratesio |
API credential | The Rust package registry. |
| Datadog | datadog |
API credential | Infrastructure and application monitoring. |
| Deepgram | deepgram |
API credential | Real-time and batch speech-to-text. |
| DeepSeek | deepseek |
API credential | Open-weight LLMs (chat and reasoning), OpenAI-compatible. |
| DigitalOcean | digitalocean |
API credential | Cloud VMs, databases, and managed infrastructure. |
| Docker Hub | dockerhub |
API credential | Container image registry and repository management. |
| Doppler | doppler |
API credential | Secrets management and environment configuration. |
| Dynatrace | dynatrace |
API credential | Full-stack observability and APM. |
| EasyPost | easypost |
API credential | Multi-carrier shipping, tracking, and labels. |
| ElevenLabs | elevenlabs |
API credential | AI text-to-speech and voice generation. |
| Etherscan | etherscan |
API credential | Ethereum blockchain explorer and on-chain data. |
| Exa | exa |
API credential | Neural web search built for AI agents. |
| Fastly | fastly |
API credential | Edge CDN and real-time content delivery. |
| Fastmail | fastmail |
API credential | Full email, contacts, and calendar access over JMAP. |
| Figma | figma |
API credential | Collaborative interface design: files, comments, components, and dev resources. |
| Finnhub | finnhub |
API credential | Real-time stock, forex, and financial data. |
| Firecrawl | firecrawl |
API credential | Turn websites into clean, LLM-ready markdown. |
| Fireworks AI | fireworks |
API credential | Fast hosted inference for open LLMs, OpenAI-compatible. |
| Fly.io | flyio |
API credential | Deploy app containers close to users, globally. |
| Forgejo | forgejo |
API credential | Self-hostable Git forge (Gitea fork); Codeberg.org is the flagship public instance. |
| Freshdesk | freshdesk |
API credential | Customer support ticketing and helpdesk. |
| Front | front |
API credential | Shared inbox and customer communication hub. |
| Google Artifact Registry | gar |
API credential | Google Artifact Registry: docker push/pull through the integration, no SA key on the VM. |
| Google Gemini | gemini |
API credential | Google's Gemini multimodal large language models. |
| GitHub Container Registry (ghcr.io) | ghcr |
API credential | GitHub Container Registry: mint registry tokens at ghcr.io's OCI token realm. |
| Ghost (Content API) | ghost |
API credential | Publishing platform and newsletter CMS. |
| GitGuardian | gitguardian |
API credential | Secrets detection and code security scanning. |
| GitLab | gitlab |
API credential | Git hosting, CI/CD, and DevOps platform. |
| Google Maps Platform | googlemaps |
API credential | Geocoding, directions, places, and maps data. |
| Google Service Account (JWT-bearer token mint) | googlesa |
API credential | Mint Google API access tokens from a service-account key (Sheets, Drive, GCS, ...). |
| Google Sheets (read) | googlesheets |
API credential | Read link-shared Google Sheets data. |
| Grafana | grafana |
API credential | Dashboards and visualization for metrics and logs. |
| Groq | groq |
API credential | Very-low-latency LLM inference, OpenAI-compatible. |
| HashiCorp Vault | hashicorpvault |
API credential | Secrets management and encryption as a service. |
| Have I Been Pwned | haveibeenpwned |
API credential | Check emails and passwords against known breaches. |
| Heroku | heroku |
API credential | Managed platform-as-a-service app hosting. |
| Hetzner Cloud | hetzner |
API credential | Budget cloud servers and infrastructure. |
| Home Assistant | homeassistant |
API credential | Control and observe a Home Assistant instance: states, services, automations. |
| Honeycomb | honeycomb |
API credential | Observability for distributed systems and tracing. |
| HubSpot | hubspot |
API credential | CRM, marketing, and sales platform. |
| HubSpot | hubspotapi |
API credential | HubSpot CRM objects, contacts, and deals API. |
| Hugging Face | huggingface |
API credential | Model, dataset, and inference hub for ML. |
| Infisical | infisical |
API credential | Open-source secrets management. |
| InfluxDB Cloud | influxdb |
API credential | Time-series database for metrics and events. |
| Intercom | intercom |
API credential | Customer messaging and support platform. |
| Jenkins | jenkins |
API credential | Self-hosted automation and CI server. |
| Jina AI | jina |
API credential | Embeddings, rerank, and a web reader for AI. |
| Jira Cloud | jira |
API credential | Issue tracking and agile project management (Atlassian). |
| Keycloak (OAuth2 token mint) | keycloak |
API credential | Open-source identity and OAuth2/OIDC provider. |
| Last.fm | lastfm |
API credential | Music scrobbling, listening history, and metadata. |
| LaunchDarkly | launchdarkly |
API credential | Feature flags and progressive delivery. |
| Lemon Squeezy | lemonsqueezy |
API credential | Payments and subscriptions for digital products. |
| Linear | linear |
API credential | Issue tracking and planning for software teams. |
| Linode (Akamai) | linode |
API credential | Akamai's cloud compute and hosting. |
| Grafana Loki | loki |
API credential | Grafana's log aggregation system. |
| Mailgun | mailgun |
API credential | Transactional and bulk email delivery. |
| Mattermost | mattermost |
API credential | Self-hosted team chat and collaboration. |
| Meilisearch | meilisearch |
API credential | Fast, typo-tolerant open-source search engine. |
| Mistral | mistral |
API credential | Open-weight and frontier LLMs, OpenAI-compatible. |
| Mixpanel | mixpanel |
API credential | Product analytics and user event tracking. |
| monday.com | monday |
API credential | Work OS: boards, items, and workflows via a GraphQL API. |
| Neon | neon |
API credential | Serverless PostgreSQL with branching. |
| Netlify | netlify |
API credential | Deploy and host web front-ends and functions. |
| Netlify | netlifyapi |
API credential | Netlify site, deploy, and DNS management API. |
| New Relic | newrelic |
API credential | Application performance monitoring and observability. |
| NewsAPI.org | newsapi |
API credential | Headlines and articles from news sources worldwide. |
| Notion | notion |
API credential | Connected workspace for notes, docs, and databases. |
| npm registry | npm |
API credential | The JavaScript/Node package registry. |
| Okta | okta |
API credential | Enterprise identity and single sign-on. |
| OMDb (movie database) | omdb |
API credential | Movie and TV metadata from IMDb. |
| 1Password Connect (self-hosted) | onepassword |
API credential | Secrets vault via a self-hosted 1Password Connect server. |
| OneSignal | onesignal |
API credential | Push notifications and customer messaging. |
| OpenAI | openai |
API credential | GPT models, embeddings, images, and audio. |
| OpenAI Ads (ChatGPT) | openai-ads |
API credential | Create and manage ChatGPT ad campaigns and pull performance insights. |
| OpenRouter | openrouter |
API credential | One API gateway to many LLM providers. |
| OpenWeather | openweather |
API credential | Current weather and forecasts worldwide. |
| Opsgenie | opsgenie |
API credential | On-call scheduling and alert routing (Atlassian). |
| Paddle | paddle |
API credential | Merchant-of-record billing for software. |
| PagerDuty | pagerduty |
API credential | Incident response and on-call management. |
| Perplexity | perplexity |
API credential | Answer engine with live web search (Sonar models). |
| Pinecone | pinecone |
API credential | Managed vector database for semantic search. |
| Pipedrive | pipedrive |
API credential | Sales-focused CRM and pipeline management. |
| PlanetScale | planetscale |
API credential | Serverless MySQL platform built on Vitess. |
| Polygon.io | polygon |
API credential | Real-time and historical stock and crypto data. |
| PostHog | posthog |
API credential | Open-source product analytics and session replay. |
| PostHog (query API) | posthogapi |
API credential | PostHog query and events API (HogQL). |
| Postmark | postmark |
API credential | Fast, reliable transactional email. |
| Pushover | pushover |
API credential | Simple push notifications to your devices. |
| PyPI (upload) | pypi |
API credential | The Python package index (uploads). |
| Qdrant Cloud | qdrant |
API credential | Vector database for similarity search. |
| Red Hat Quay (quay.io) | quay |
API credential | Red Hat Quay container registry: mint short-lived scoped registry JWTs. |
| Railway | railway |
API credential | Deploy apps and databases with minimal config. |
| Reddit Ads | reddit-ads |
Credential mint | Reddit Ads API: manage and report on Reddit advertising campaigns. |
| Render | render |
API credential | Managed cloud hosting for apps and databases. |
| Replicate | replicate |
API credential | Run and host open ML models via API. |
| Resend | resend |
API credential | Developer-first transactional email. |
| Scaleway | scaleway |
API credential | European cloud compute and storage. |
| SendGrid | sendgrid |
API credential | Transactional and marketing email (Twilio). |
| Sentry | sentry |
API credential | Error tracking and performance monitoring. |
| SerpApi (Google search results) | serpapi |
API credential | Scrape Google and other search-engine results. |
| Shippo | shippo |
API credential | Multi-carrier shipping labels and tracking. |
| Shodan | shodan |
API credential | Search engine for internet-connected devices. |
| Shopify (Admin API) | shopify |
API credential | E-commerce store and order management. |
| Shortcut | shortcut |
API credential | Issue tracking and project planning for dev teams. |
| Snowflake | snowflake |
API credential | Run SQL against your Snowflake warehouse over the SQL REST API. |
| Snyk | snyk |
API credential | Developer security scanning for code and deps. |
| Square | square |
API credential | Payments, point-of-sale, and commerce. |
| Statsig | statsig |
API credential | Feature flags and experimentation. |
| Stripe | stripe |
API credential | Online payments and billing. |
| Supabase | supabase |
API credential | Postgres backend with auth, storage, and APIs. |
| Tailscale | tailscale |
API credential | Manage a tailnet: devices, keys, DNS, and ACLs via the Tailscale API. |
| Tavily | tavily |
API credential | Web search API built for LLMs and agents. |
| Telegram Bot API | telegram |
API credential | Send messages and read updates as a Telegram bot. |
| Telnyx | telnyx |
API credential | Programmable voice, SMS, and connectivity. |
| TMDB (movies) | tmdb |
API credential | Movie and TV database (TMDB). |
| Todoist | todoist |
API credential | Task management and to-do lists. |
| Together AI | togetherai |
API credential | Open-source LLM inference, fine-tuning, and embeddings API. |
| Trello | trello |
API credential | Kanban boards, lists, and cards. |
| Turso | turso |
API credential | SQLite-compatible edge database platform (libSQL) — Platform API. |
| Twilio | twilio |
API credential | Programmable SMS, voice, and messaging. |
| Twitch | twitch |
Credential mint | Twitch Helix API: streams, channels, games, clips and EventSub subscriptions. |
| Typesense | typesense |
API credential | Open-source, typo-tolerant search engine. |
| Upstash Redis | upstash |
API credential | Serverless Redis and data over HTTP. |
| UptimeRobot | uptimerobot |
API credential | Website and endpoint uptime monitoring. |
| urlscan.io | urlscan |
API credential | Scan and analyse websites: submit URLs, search scans, fetch verdicts. |
| Vercel | vercel |
API credential | Deploy and host front-end apps and functions. |
| VirusTotal | virustotal |
API credential | File, URL, and domain threat analysis. |
| Voyage AI (embeddings) | voyage |
API credential | High-quality text embeddings and rerank. |
| Vultr | vultr |
API credential | Cloud compute, storage, and bare metal. |
| Weaviate Cloud | weaviate |
API credential | Open-source vector database. |
| Webflow | webflow |
API credential | Visual website builder and CMS. |
| Wolfram|Alpha | wolframalpha |
API credential | Computational knowledge and answers engine. |
| WordPress | wordpress |
API credential | Manage posts, pages, media, and users on a WordPress site via the REST API. |
| WorkOS | workos |
API credential | Enterprise SSO, SCIM, and directory sync. |
| xAI (Grok) | xai |
API credential | Grok large language models from xAI. |
| YouTube Data API (read) | youtube |
API credential | YouTube video, channel, and search data (read). |
| Zendesk | zendesk |
API credential | Customer support ticketing and helpdesk. |
| Zulip | zulip |
API credential | Threaded team chat (Zulip Cloud or self-hosted). |
Service notes
Operational caveats carried by the descriptors themselves (the same notes the catalog add flow surfaces), keyed by handle. Only services with notes appear.
algolia— Proxies the -dsn host only; SDK retry strategies that rotate to-1/-2/-3.algolianet.com hosts bypass the proxy — pin SDK hosts to the proxy URL. alphavantage— Free tier: 25 requests/day. Errors arrive as HTTP 200 with an error JSON body. CAVEAT: the API appears to serve data for ANY well-formed key, so verify only proves the key is not missing or throttled — it cannot distinguish a valid key from a wrong one.amplitude— Basic auth: API key + secret key.anthropic— Custom x-api-key header plus a fixed anthropic-version header. SSE streaming supported.argocd— Self-hosted: pass --base-url for your Argo CD server.assemblyai— Raw key in Authorization header (no scheme).atcr— Token mint: GET the realm with your chosen scope; the proxy injects your handle + app password and atcr's JWT comes back to you. The JWT lives ~45 SECONDS — use it as 'Authorization: Bearer' against https://atcr.io/v2/... immediately and re-mint on 401. The app password never touches the VM. Consume it with curl/skopeo/crane (docker's static 'registrytoken' config field works but a ~45s TTL makes it impractical). Full details: https://exe.dev/docs/integrations-oci-registries attio— Bearer key.axiom— Bearer API token.bay511— Rate limit: 60 requests/hour per token. format=json is injected (the API defaults to XML).betterstack— Bearer token (Uptime API).bitbucket— App passwords are GONE (removed 2026-07-28); the credential is an Atlassian API token, and the Basic username must be the ACCOUNT EMAIL — the old Bitbucket username 401s with a valid token on the REST API (git-over-HTTPS confusingly still wants the username, but that never rides this proxy). Tokens carry scopes chosen at creation; /2.0/user needs account:read.brave— Custom X-Subscription-Token header.calcom— API v2 (v1 decommissioned, HTTP 410). Bearer API key (cal_... / cal_live_...). Some v2 endpoints additionally require a cal-api-version header (e.g. bookings wants cal-api-version: 2024-08-13); /v2/me does not.calendly— Bearer PAT.cerebras— OpenAI-compatible, very fast inference.circleci— v2 API under /api/v2; some legacy step-output flows still need /api/v1.1 (same host, same token).clerk— Single global hostname, plain REST.clickhouse— Basic auth over the HTTP interface; pass --base-url for your host:port.cloudflare— Use scoped API tokens (per-zone, per-permission), not the legacy X-Auth-Key global key.cockroachdb— This is the CockroachDB Cloud MANAGEMENT API (cluster lifecycle: create/list/scale/delete clusters) — it does NOT run SQL. There is no public SQL-over-HTTP endpoint for Cloud; connect to the database itself over the Postgres wire protocol directly. The secret key belongs to a service account and inherits its role/permissions. Rate limited to 10 req/s.cohere— Bearer key; v2 chat API.coingecko— Custom x-cg-demo-api-key header (Pro uses x-cg-pro-api-key + api.coingecko.com/api/v3/pro). Verify uses /ping, which DOES authenticate (401 on a bad key); most data endpoints like /simple/price serve anonymously and would return 200 for any garbage key.confluence— The same site/email/token also works for the jira service.convex— Deployment-scoped: proxies https://.convex.cloud; the deploy key grants admin on this ONE deployment (Convex auth scheme, not Bearer). Do not use POST /api/query as a health check — it 200s unauthenticated requests with an in-body error. HTTP actions are served from .convex.site (not proxied here). Streaming export/import endpoints 403 (StreamingExportNotEnabled) without a paid Convex plan even with a valid key. The npx convex CLI also talks to the convex.dev control plane, so CLI deploys aren't covered — use the HTTP API. cratesio— Raw token in Authorization header (no scheme). crates.io's API data-access policy (https://crates.io/data-access) rejects generic user agents with HTTP 403 regardless of the credential, so the descriptor sends an identifying User-Agent. CAVEAT: crates.io cannot be made to authenticate the verify probe. Every authenticated GET either requires a cookie session (AuthCheck::only_cookie — /api/v1/me answers 403 'this action can only be performed on the crates.io website' to ALL tokens) or enforces token endpoint-scopes, so no single GET accepts every valid token; verify is a liveness probe only and cannot distinguish a valid token from a wrong one. Revisit if crates.io ever adds a token-introspection GET.datadog— Defaults to the US1 site; EU and other regional accounts must set --base-url (e.g. https://api.datadoghq.eu).deepgram— Custom 'Token' Authorization scheme. deepseek— OpenAI-compatible; /v1 alias also works.digitalocean— Spaces (S3-compatible) uses separate keys and SigV4 hosts; this covers the REST API only.dockerhub— Hub management API. PAT directly as Bearer (no login dance).doppler— Read-only per-config scoping available on service tokens. The verify path needs a real project+config: a service token is scoped to one config, and personal tokens must name one. project/config are declared non-secret fields so RenderVerify templates them in (the old descriptor hardcoded YOUR_PROJECT and could never verify).dynatrace— Custom 'Api-Token' scheme. Templated env host; or --base-url for Managed. easypost— Basic auth: API key as username, empty password.elevenlabs— Billing is character-based; TTS responses are audio bytes — save to a file.etherscan— V2 API is multi-chain via chainid parameter. Errors arrive as HTTP 200 with status=0 in the body.exa— The /contents endpoint doubles as a scraper; pass livecrawl for freshness.fastly— Custom Fastly-Key header.fastmail— JMAP, not REST: everything after the session is POST /jmap/api/ with batched methodCalls, and every call needs the accountId from GET /jmap/session (under primaryAccounts). Token scopes are chosen at creation (read-only vs read-write); a read-only token still passes verify. New tokens are shown once, prefixed fmu1-.figma— PATs are scoped at creation and a missing scope 403s with 'Invalid scope(s)' naming the scope required — fix the token's scopes, not the token. Tokens expire (90-day default in the UI); invalid or expired tokens get 403, not 401. Rate limits are per seat/plan/endpoint tier and harsh on free Starter files (file content can be as low as 6 req/month); 429 carries Retry-After.finnhub— API token as query param.firecrawl— Scrape is synchronous; crawl is submit-then-poll. Credits are billed per page.fireworks— OpenAI-compatible under /inference/v1.flyio— Machines API only; org/certs/IP management lives on the legacy GraphQL API at api.fly.io (same token, not proxied here).forgejo— Defaults to Codeberg.org; self-hosted: pass --base-url https://git.mycorp.example. API is Gitea-compatible under /api/v1, and Gitea instances accept the same shape. Tokens are scoped — verify needs read:user, and a valid token without it gets 403 (fix the scope, not the token).freshdesk— Basic auth: API key as username, any password. Templated per-account host.front— Bearer token.gar— Full-surface registry proxy: use the integration hostname AS the registry (docker pull/push/PROJECT/REPO/IMAGE — no docker login; push needs roles/artifactregistry.writer on the SA). The proxy injects _json_key + your SA key only at the token realm (/v2/token) and rewrites the auth challenge so stock docker/podman/skopeo/crane mint through the integration automatically. Regions: the default target is us-docker.pkg.dev; for other regions pass --base-url (europe-docker.pkg.dev, asia-docker.pkg.dev, or a regional host like us-central1-docker.pkg.dev / europe-west1-docker.pkg.dev). GAR also accepts oauth2accesstoken: at the realm; this integration uses the durable _json_key form so it never expires server-side. Blob downloads redirect to a pre-signed /artifacts-downloads/ URL (self-authorizing, no credential needed) which the gate admits alongside /v2/. Full details: https://exe.dev/docs/integrations-oci-registries gemini— Google is migrating Gemini API keys: new AI Studio keys are auth keys (AQ....), and standard keys (AIza...) are being phased out during 2026. Both forms work here; credentials are injected as a request header server-side.ghcr— Full-surface registry proxy: use the integration hostname AS the registry (docker pull/owner/image — no docker login). The proxy injects your PAT only at the token realm (/token) and rewrites the auth challenge so stock docker/podman/skopeo/crane mint through the integration automatically. CAUTION: ghcr's minted token is your PAT base64-encoded, NOT a short-lived JWT — it passes through to the client, so scope the PAT tightly (read:packages only, expiring). Full details: https://exe.dev/docs/integrations-oci-registries ghost— Content API key as query param; pass --base-url for your blog. (Admin API is JWT — separate.)gitguardian— Custom 'Token' scheme. gitlab— Self-hosted: pass --base-url https://gitlab.mycorp.example. Prefer project/group access tokens for scoping.googlemaps— Billing account required on the Google Cloud project (generous free monthly credit). Restrict the key server-side.googlesa— Token mint: POST /token with an EMPTY body; the proxy signs the JWT assertion server-side and returns a ~1h access token. Use it directly against the Google API (those calls do NOT ride this integration) and re-mint on 401 — the private key never touches the VM. Share the target resource with the client_email; --subject enables domain-wide delegation. Full details: https://exe.dev/docs/integrations-token-mintgooglesheets— API-key query param; reads link-shared sheets only (no OAuth).grafana— Stack Grafana API only; Grafana Cloud metrics/logs ingest uses separate per-signal hosts with basic auth.groq— OpenAI-compatible API under /openai/v1; also serves fast Whisper transcription at /openai/v1/audio/transcriptions.hashicorpvault— Self-hosted: pass --base-url for your Vault address. X-Vault-Token custom header.haveibeenpwned— Custom hibp-api-key header.heroku— Bearer token + fixed Accept version header.hetzner— Cloud API only; Hetzner DNS and Robot (dedicated) use different hosts and auth. Tokens are per-project, read-only or read-write.homeassistant— Self-hosted: pass --base-url for your instance (often http://:8123; HTTPS only if you've set it up). Long-lived tokens last 10 years but die if the creating user is deleted. /api/ requires auth and 401s wrong tokens, so verify genuinely authenticates. If HA sits behind its own reverse proxy, trusted_proxies must include the caller or HA 400s valid requests. honeycomb— Targets the US instance (EU teams use api.eu1.honeycomb.io); Query Data API is plan-gated.hubspotapi— Private app token as Bearer.huggingface— Large file downloads via //resolve/... also work through the proxy. infisical— Bearer token; --base-url for self-hosted. Verify uses GET /api/v1/workspace: it authenticates the token (403 on a bad token, 200 on a good one) WITHOUT requiring a workspaceId/environment. The old verify hit /api/v3/secrets/raw, which 400s ('You must provide projectSlug or workspaceId') for every caller — it was untestable.influxdb— Custom 'Token' scheme; pass --base-url for your region host. intercom— Requires an explicitAccept: application/json; without it Intercom answers 406 media_type_not_acceptable (curl hides this by defaulting to /, Go's client sends no Accept at all).jenkins— Self-hosted: pass --base-url. Basic auth = username + API token.jina— Bearer key; embeddings, rerank, reader. Verify posts a 1-token embeddings call (Jina has no GET liveness endpoint): a bad key 401s, a good key 200s.jira— Jira Server/Data Center uses different auth (PATs with Bearer); this descriptor targets Jira Cloud. The same site/email/token also works for the confluence service.keycloak— Token mint: POST the realm's token endpoint (path-gated to /realms/); a short-lived bearer token comes back. Use it directly against your API and re-mint on 401 — the client secret never touches the VM. Point --base-url at your Keycloak install. Full details: https://exe.dev/docs/integrations-token-mintlastfm— Read-only methods only: write/scrobble methods need OAuth-style session signing, not supported here.launchdarkly— Raw token in Authorization header (no scheme).lemonsqueezy— Bearer key + JSON:API Accept header.linear— GraphQL API: access scoping is delegated to the token's permissionslinode— Bearer PAT.loki— Self-hosted: pass --base-url. Basic auth. CAVEAT: upstream Loki ships no auth layer (it expects an authenticating proxy in front), so whether this credential authenticates is a property of YOUR deployment, not of Loki — verify only proves the endpoint answered, and a multi-tenant Loki wants X-Scope-OrgID and can 401 even a valid Basic credential.mailgun— Basic auth: username 'api', password = key. EU: --base-url https://api.eu.mailgun.net.mattermost— Self-hosted: pass --base-url. Bearer PAT.meilisearch— Bearer key; pass --base-url for your instance.mistral— OpenAI-ish shape.mixpanel— Basic auth with a service account.monday— GraphQL-only API (POST /v2); the token goes bare in the Authorization header (linear-style, no Bearer). Complexity budget: each account gets a per-minute complexity allowance and heavy queries return a COMPLEXITY_BUDGET_EXHAUSTED error with a retry_in_seconds hint — page with limit/page rather than fetching whole boards.neon— Management API (Bearer). SQL-over-HTTP is a separate per-endpoint host.netlifyapi— Bearer PAT.newrelic— Api-Key custom header (User key).newsapi— Custom X-Api-Key header.notion— Pages must be explicitly shared with the integration in Notion before the API can see them.npm— Bearer token as used by .npmrc _authToken. Plain REST, no token dance.okta— Custom 'SSWS' scheme. Templated org host; or --base-url for custom domains. omdb— Errors arrive as HTTP 200 with Response:"False" in the body.onepassword— Self-hosted Connect server ONLY: pass --base-url for your deployment. 1password.com accounts and service-account tokens (ops_...) do not work here — the hosted product has no Connect REST API.onesignal— Custom 'Key' Authorization scheme. openai— The OpenAI-compatible shape is the industry lingua franca; many providers below mirror it.openai-ads— Advertiser API (beta): key comes from the OpenAI Ads Manager Settings tab, NOT platform.openai.com. Each key is scoped to a single ad account; the account must pass OpenAI's advertiser verification before campaigns deliver. Docs have Markdown twins: append .md to any page URL, index at developers.openai.com/ads/llms.txt.openrouter— OpenAI-compatible API under /api/v1; point OpenAI SDKs at the proxy host with /api/v1 as the base path.openweather— New keys can take ~10 minutes to activate. Free tier: 60 calls/minute.opsgenie— Custom 'GenieKey' Authorization scheme. paddle— Bearer key. Sandbox: --base-url https://sandbox-api.paddle.com.perplexity— OpenAI-ish chat/completions with sonar models.pinecone— Control plane only: per-index data-plane hosts (from /indexes) are NOT proxied; upsert/query traffic cannot go through this integration.pipedrive— API token as query param; templated per-company host.planetscale— Authorization header is 'token_id:token' (no scheme).polygon— Bearer key (also accepts ?apiKey=).posthog— Defaults to US Cloud; EU Cloud or self-hosted instances must set --base-url (e.g. https://eu.posthog.com).posthogapi— Personal API key Bearer. Use --base-url for EU (eu.posthog.com) or self-hosted.postmark— Custom X-Postmark-Server-Token header.pushover— App token as param; message also needs a user key.pypi— Basic auth with the literal username 'token' and the API token as password.qdrant— Custom api-key header. Templated per-cluster host; or --base-url.quay— Full-surface registry proxy: use the integration hostname AS the registry (docker pull/org/repo — no docker login). The proxy injects your robot credentials only at the token realm (/v2/auth) and rewrites the auth challenge so stock docker/podman/skopeo/crane mint through the integration automatically; your image traffic and minted tokens pass through untouched (blobs come from quay's CDN directly). Self-hosted Quay: pass --base-url. Full details: https://exe.dev/docs/integrations-oci-registries railway— Bearer token; GraphQL API. Verification works with both account and workspace tokens (the { projects } query answers for either). Project tokens still cannot verify — they authenticate via the Project-Access-Token header (not Authorization: Bearer), so they will always be rejected.reddit-ads— Token mint: POST /api/v1/access_token (any body is ignored); the proxy runs the refresh-token grant server-side and a ~1h access_token comes back. Use it as 'Authorization: Bearer' on /api/v3/... and re-mint on 401 — the refresh token and client secret never reach the VM. Scopes: adsread (reporting/reads), adsedit (campaign writes), adsconversions (conversion uploads). Getting the refresh token + full details: https://exe.dev/docs/integrations-token-mint render— Bearer key.replicate— Poll predictions instead of webhooks; output URLs (replicate.delivery) are presigned and expire — download promptly.resend— Bearer key. Resend mints two key classes: full_access and sending_access (send-only, optionally domain-restricted). Verification calls GET /domains, which only a full-access key can answer — a valid sending-access key gets 401 restricted_api_key there, so add it with --skip-verify; it still sends fine (POST /emails). Every management endpoint 401s for sending keys, so no side-effect-free verify path exists for them today.scaleway— Custom X-Auth-Token header.sendgrid— Bearer key.sentry— EU-region orgs use https://de.sentry.io and self-hosted installs their own host: pass --base-urlshippo— Custom 'ShippoToken' scheme. shopify— Custom app token self-minted per store. Templated per-store hostname.snowflake— The PROGRAMMATIC_ACCESS_TOKEN token-type header is mandatory (this descriptor injects it); without it Snowflake assumes the bearer is an OAuth token and rejects PATs confusingly. A 401 on a fresh token usually means the user needs a network policy, not that the token is bad. Most statements need a warehouse (in the body or as user default); SELECT 1 runs warehouse-less.snyk— Custom 'token' scheme. square— Bearer token + fixed Square-Version header. Sandbox: --base-url https://connect.squareupsandbox.com.statsig— Custom STATSIG-API-KEY header.stripe— Use restricted keys (rk_) to scope access. Event-driven flows: poll /v1/events instead of webhooks.supabase— The key rides both the apikey header and Bearer. service_role/secret keys bypass RLS — prefer anon/publishable unless you need that. Per-project host (your project ref is the X in X.supabase.co). Verify uses GET /auth/v1/health, which the project's API gateway key-auths for every key role.tailscale— The '-' tailnet path segment means "the token's own tailnet", so no tailnet name field is needed. API access tokens (tskey-api-...) expire at most 90 days after creation — a verify that starts failing on a previously-good credential usually means the token aged out, not that access was revoked. Auth keys (tskey-auth-...) enroll devices and will NOT work here.tavily— Results are pre-chunked for RAG; free monthly credit tier.telegram— The bot token is a path segment: exe.dev injects it server-side, so write paths WITHOUT the token. Method calls use /bot/ — write /getMe, /sendMessage, etc. File downloads use /file/bot /<FILE_PATH> — keep the /file/ prefix and write the file_path exactly as getFile returned it (e.g. /file/photos/file_1.jpg). Add the bot to a chat and use getUpdates to discover chat_id. telnyx— Bearer key.tmdb— v4 read access token as Bearer.todoist— Unified API v1 (Sync v9 and REST v2 decommissioned, HTTP 410). List endpoints are paginated: {"results": [...], "next_cursor": ...}.togetherai— OpenAI-compatible API surface (/v1/chat/completions, /v1/embeddings), so OpenAI SDKs work by pointing base_url at the integration hostname. Model names are namespaced (org/model); list /v1/models for current serverless availability.trello— Auth rides in query parameters (key= and token=), injected by the proxy — write paths WITHOUT them. Both halves are needed: the API key identifies the Power-Up, the token grants a user's access to it. POST endpoints take arguments as query params too, not JSON bodies.turso— Control plane only — DB queries go to https://- .turso.io with a separate DB token; mint a short-lived one via this API (see usage) so the durable platform token never leaves the proxy. libsql:// URLs use WebSocket; prefer the https:// URL form for Hrana-over-HTTP. twilio— Basic auth: Account SID as username, Auth Token as password.twitch— Token mint: POST /oauth2/token (any body is ignored); the proxy runs the client-credentials grant server-side and an app access token comes back. Use it as 'Authorization: Bearer' on /helix/... through this integration (the proxy adds the required Client-Id header) and re-mint on 401. App tokens carry no user scopes — user-context endpoints need a user token this shape does not mint. Full details: https://exe.dev/docs/integrations-token-mint typesense— Custom X-TYPESENSE-API-KEY header; pass --base-url for your node.upstash— Any Redis command as path segments. Templated per-db hostname.uptimerobot— API key as POST/query param; format=json injected. POST-only API; the key rides the query params, so the verify body only forces a POST. UptimeRobot answers HTTP 200 even for a bad key ({"stat":"fail"}), hence the body assertion — and it ECHOES the submitted api_key in that envelope, so the response body must never be logged or quoted.urlscan— Scan submissions default to PUBLIC visibility — set visibility (unlisted/private) explicitly to avoid publishing the URLs you scan. Result fetch is asynchronous: poll /api/v1/result/{uuid}/ until it stops 404ing. Search serves unauthenticated traffic at a lower rate limit, so a passing search proves nothing about the key; verify uses /user/quotas/, which rejects wrong keys.vercel— Team resources need ?teamId=... on each request; endpoints are versioned per-path (v6/v9/v13).virustotal— Custom x-apikey header.voyage— Bearer key; embeddings + rerank.vultr— Bearer API key.weaviate— Bearer key; pass --base-url for your cluster endpoint.webflow— Bearer token.wolframalpha— AppID as query param.wordpress— Self-hosted: pass --base-url for your site. The credential is an APPLICATION password (Users > Profile > Application Passwords), not the login password; WordPress displays it with spaces — pasting either form works. A 404 on EVERY /wp-json path usually means plain permalinks: set a permalink structure or use ?rest_route=/wp/v2/... A 403 with rest_disabled/rest_login_required means a security plugin, not a bad credential.workos— Bearer key.xai— Both OpenAI- and Anthropic-compatible endpoint shapes.youtube— API-key auth is read-only; uploads/comments need OAuth (not supported here). Default quota 10k units/day; a search costs 100 units.zulip— Zulip Cloud or self-hosted: pass --base-url with your realm (https://.zulipchat.com). Basic auth = bot-email + API key from the bot's settings.
Databases
Database (wire-protocol) integrations hold the endpoint and credentials
server-side and broker a TLS connection, so the password never lands on the
VM. Their handles carry the db: prefix — that is the only form
the add flow accepts — and the same connect-link shape applies
(service=db:neon). Database integrations are still rolling out; if
the Databases section is missing from your account's catalog page, they are
not enabled for you yet.
| Service | Handle | Protocol | Description |
|---|---|---|---|
| CockroachDB Cloud (SQL access) | db:cockroachdb-sql |
postgres | Run SQL against a CockroachDB Cloud cluster over Postgres-wire. |
| Neon (Serverless Postgres) | db:neon |
postgres | Serverless Postgres with branching. Broker holds the role password. |
| PostgreSQL (generic) | db:postgres |
postgres | Any PostgreSQL endpoint — RDS, Aurora, Timescale, or self-hosted. |
| Supabase (Postgres) | db:supabase |
postgres | The Postgres database behind a Supabase project, direct or pooled. |
Database notes
db:cockroachdb-sql— SQL query access (the other half of the cockroachdb management integration). Most clusters need NO routing id: modern dedicated hosts route by hostname, so leave 'cluster' empty. Only the shared free-tier hosts require it. TLS is pinned to verify-full and validates against public roots (CockroachDB Cloud uses Let's Encrypt), so no root.crt download is needed despite what older docs say.db:neon— Neon requires TLS; sslmode is pinned to verify-full on the backend leg. Use a role scoped to what the agent needs.db:postgres— Generic Postgres-wire endpoint. The broker holds the credentials; VMs connect over TLS with no password. Prefer a least-privilege database user.db:supabase— Database is fixed to 'postgres'. Use the session pooler (port 5432) or transaction pooler (port 6543) host with user postgres.; the direct db..supabase.co host is IPv6-only. sslmode pinned verify-full. The vendor CA (Supabase Root 2021 CA) is pinned in the descriptor: Supabase signs server certs with its own CA, so verify-full needs it and system roots never suffice.
GitHub Integration
Instead of setting up a GitHub personal access token, the GitHub integration connects your GitHub account to exe.dev so that you can work on private repos without managing tokens, and without having tokens on the VM itself.
Linking your GitHub account
Link your GitHub account from the Integrations page.
The exe.dev GitHub App will need to be installed into your account or into your organization. If someone else has already installed it, you may need to sign into your account instead of clicking the install button.
Creating repo integrations
Once connected, create per-repo integrations:
exe.dev ▶ integrations add github --name blog --repository ghuser/blog --attach vm:my-vm
Added integration blog

Usage from a VM:
  ssh my-vm.exe.xyz 'cd $(mktemp -d) && git clone https://github.int.exe.xyz/ghuser/blog.git'
Then, from inside the VM:
git clone https://github.int.exe.xyz/ghuser/blog.git
Acting as your user (--act-as-user)
By default the integration acts as the exe.dev GitHub App, so pushes
show up as exe-dev-github-integration[bot]. Pass --act-as-user on
integrations add github or integrations edit (or use the toggle in
the web UI) to authenticate as your GitHub user instead, attributing
activity to your account. Not available on team integrations.
Read-only integrations (--readonly)
Pass --readonly on integrations add github or integrations edit
(or check "Read-only" in the web UI) to allow reads but not writes, for
both the API and git.
Using the gh CLI
The integration also supports the GitHub CLI (gh). Set GH_HOST to the
aggregate integration hostname:
export GH_HOST=github.int.exe.xyz
gh repo view ghuser/blog
gh issue list -R ghuser/blog
gh pr list -R ghuser/blog
LLM Integration
The LLM integration exposes built-in and custom HTTPS model providers to
attached VMs through an exe.dev integration hostname. New accounts get a
default llm integration attached to auto:all, so VMs can call
https://llm.int.exe.xyz/v1/models without storing provider API keys on the
VM.
Choose one source for each provider:
exe.dev LLM gateway: use exe.dev managed credentials and your exe.dev LLM allocation.API Key: store your provider API key in the integration. The VM can call the integration hostname, but cannot read the key.ChatGPT subscription: connect a ChatGPT account and use it as the OpenAI source for a personal LLM integration. This is not an OpenAI Platform API key.Custom HTTPS endpoint: route supported LLM APIs to another HTTPS provider, with optional bearer-token or custom-header authentication.Disabled: hide that provider from the integration.
ChatGPT subscriptions are only available for the OpenAI provider, and only on personal LLM integrations. Team LLM integrations can use the exe.dev gateway or provider API keys.
Configure in the browser
Open the Integrations page and click LLM.
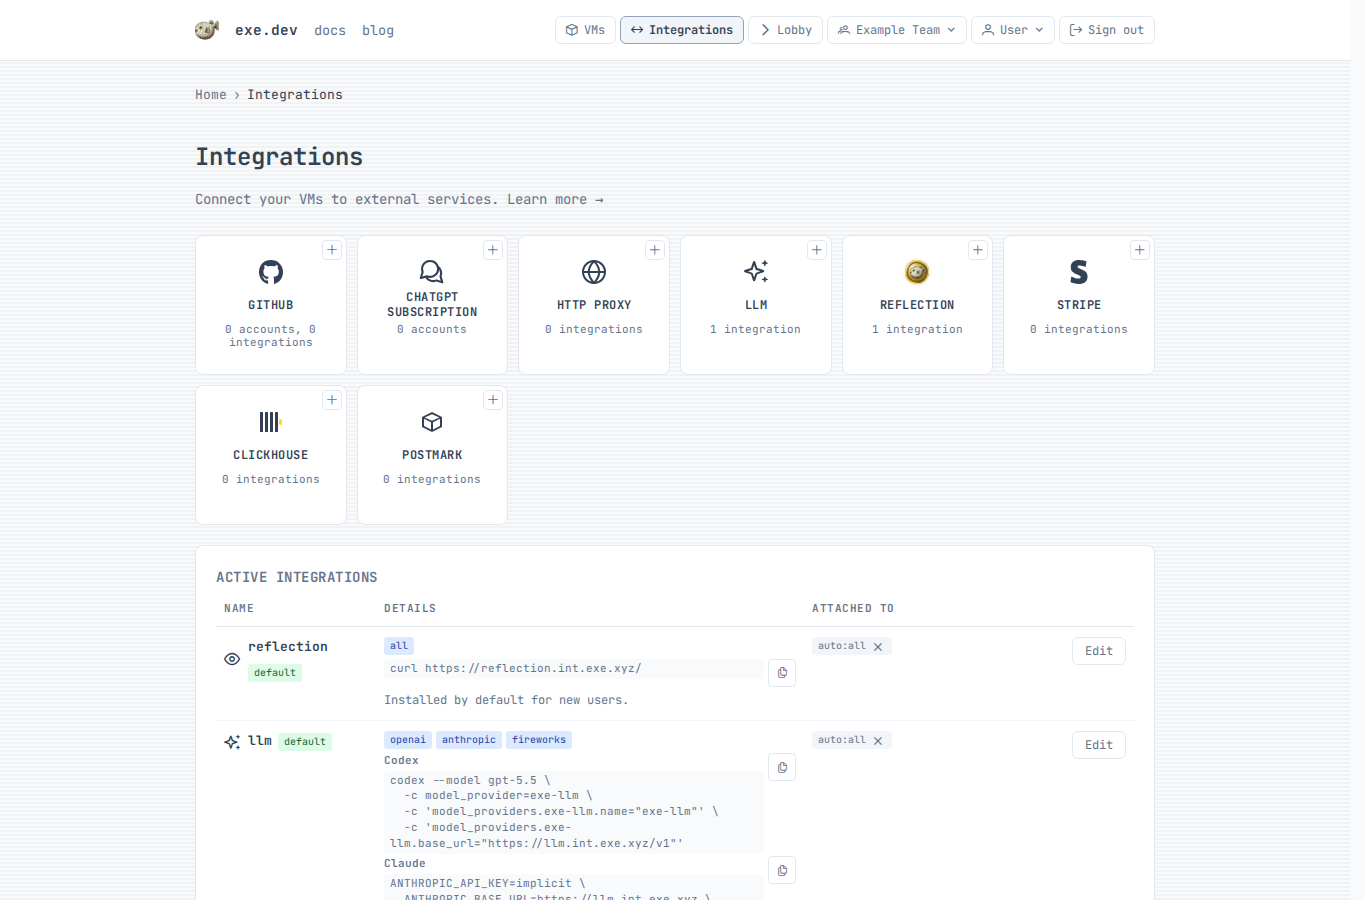
Add an LLM integration
- Choose an integration name. The default name
llmgives attached VMs the hostnamellm.int.exe.xyz. - For each provider, choose
exe.dev LLM gateway,API Key,ChatGPT subscription, orDisabled. - If you choose
ChatGPT subscriptionfor OpenAI, connect a ChatGPT account first, then select the connected account by name. - If you choose
API Key, paste the provider key and optionally clickTest. - To add a custom provider, choose
Add provider→Custom HTTPS endpoint, then enter a unique provider ID, HTTPS base URL, supported APIs, and authentication. Model discovery filters are optional. - Choose where to apply the integration: a VM, a tag, or
auto:all. - Click
Add integration.
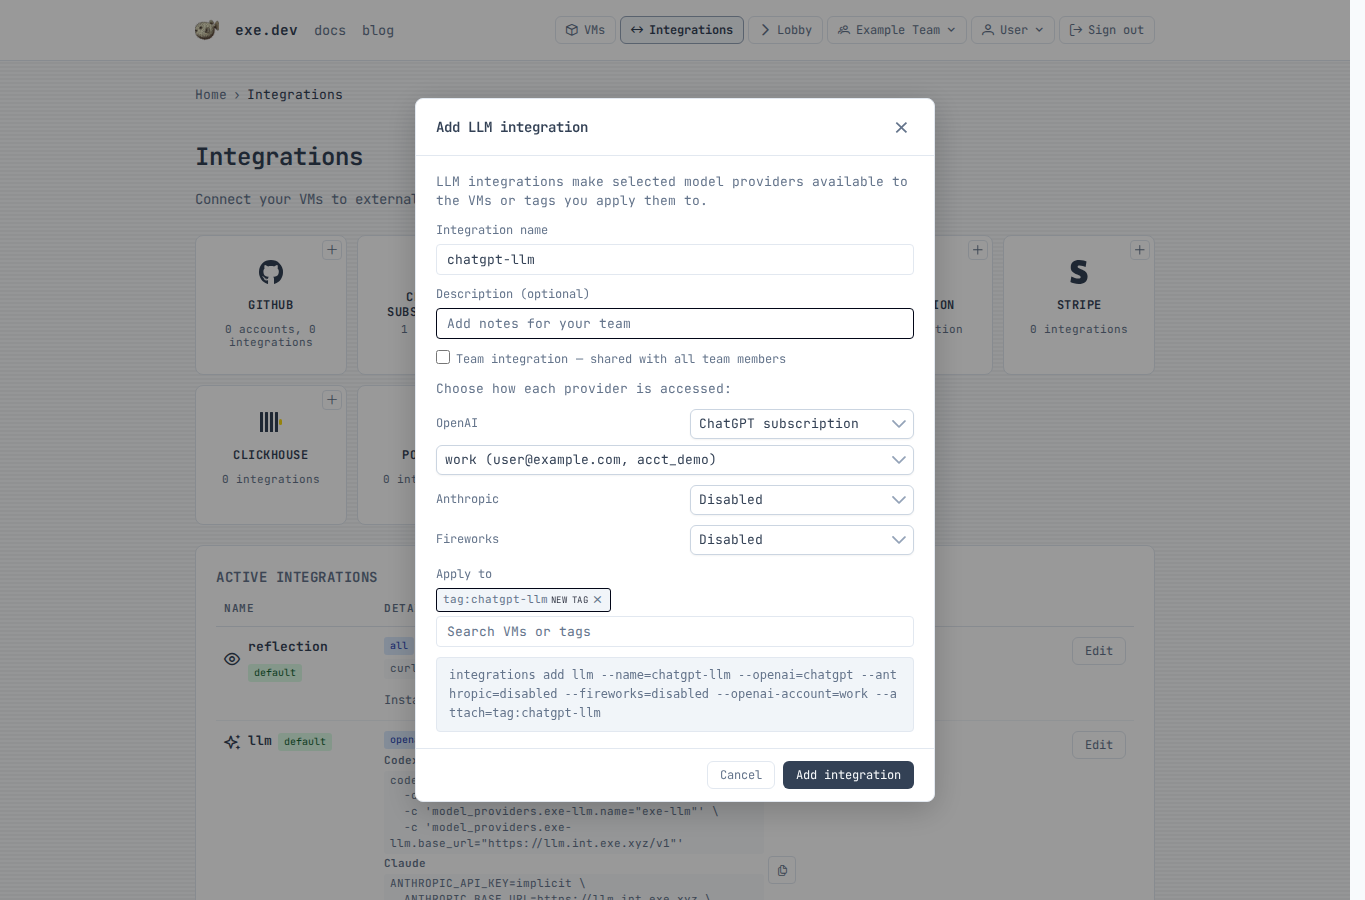
The integration hostname is available from any attached VM after the integration is saved.
Connect a ChatGPT account
Connect a ChatGPT account only if you want the OpenAI provider to use a ChatGPT subscription instead of the exe.dev LLM gateway or an OpenAI API key.
Enable device code login in ChatGPT
ChatGPT subscription integrations use ChatGPT's device-code authorization flow. Before connecting an account in exe.dev, make sure device code login is enabled on the ChatGPT side.
Enable device code login in your ChatGPT security settings (personal account) or ChatGPT workspace permissions (workspace admin).
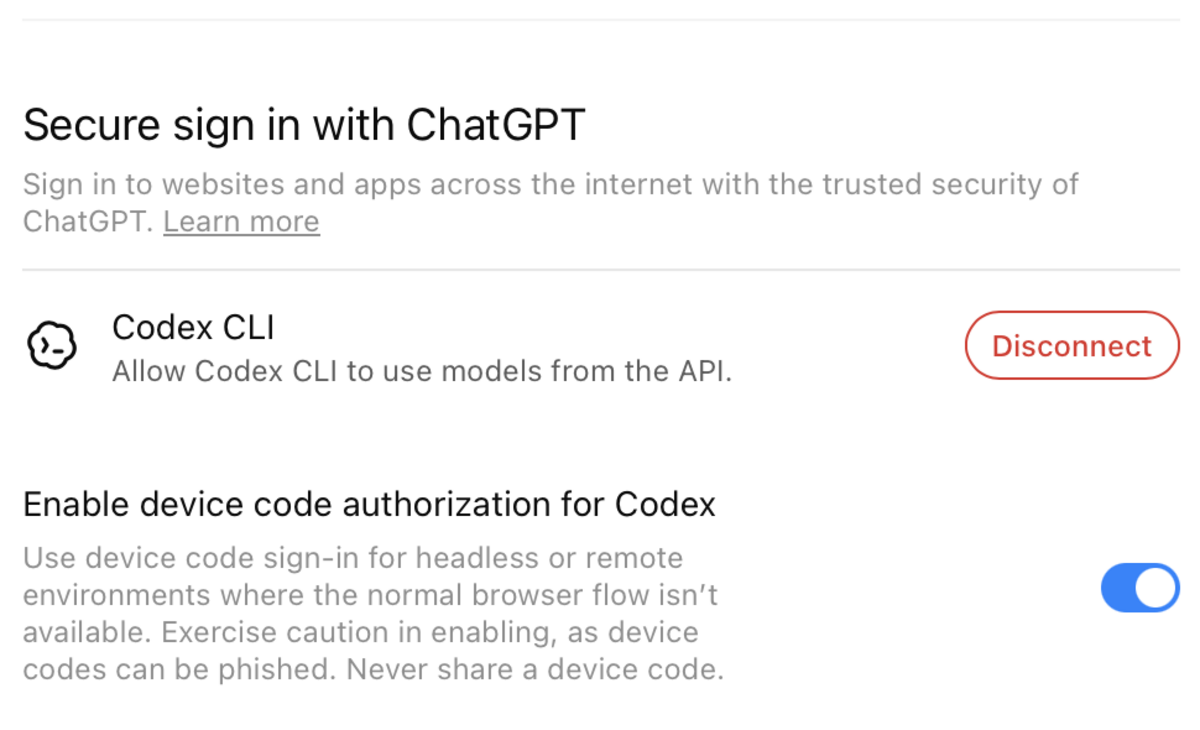
If this setting is disabled, exe.dev can still show a one-time code, but ChatGPT may reject the authorization before the account is connected.
- Confirm device code login is enabled in ChatGPT.
- Click
ChatGPT subscription. - Enter a short local account name, such as
work. - Click
Connect account. - Click
Open ChatGPT, sign in, and enter the one-time code. - Return to exe.dev and click
Done signing in.
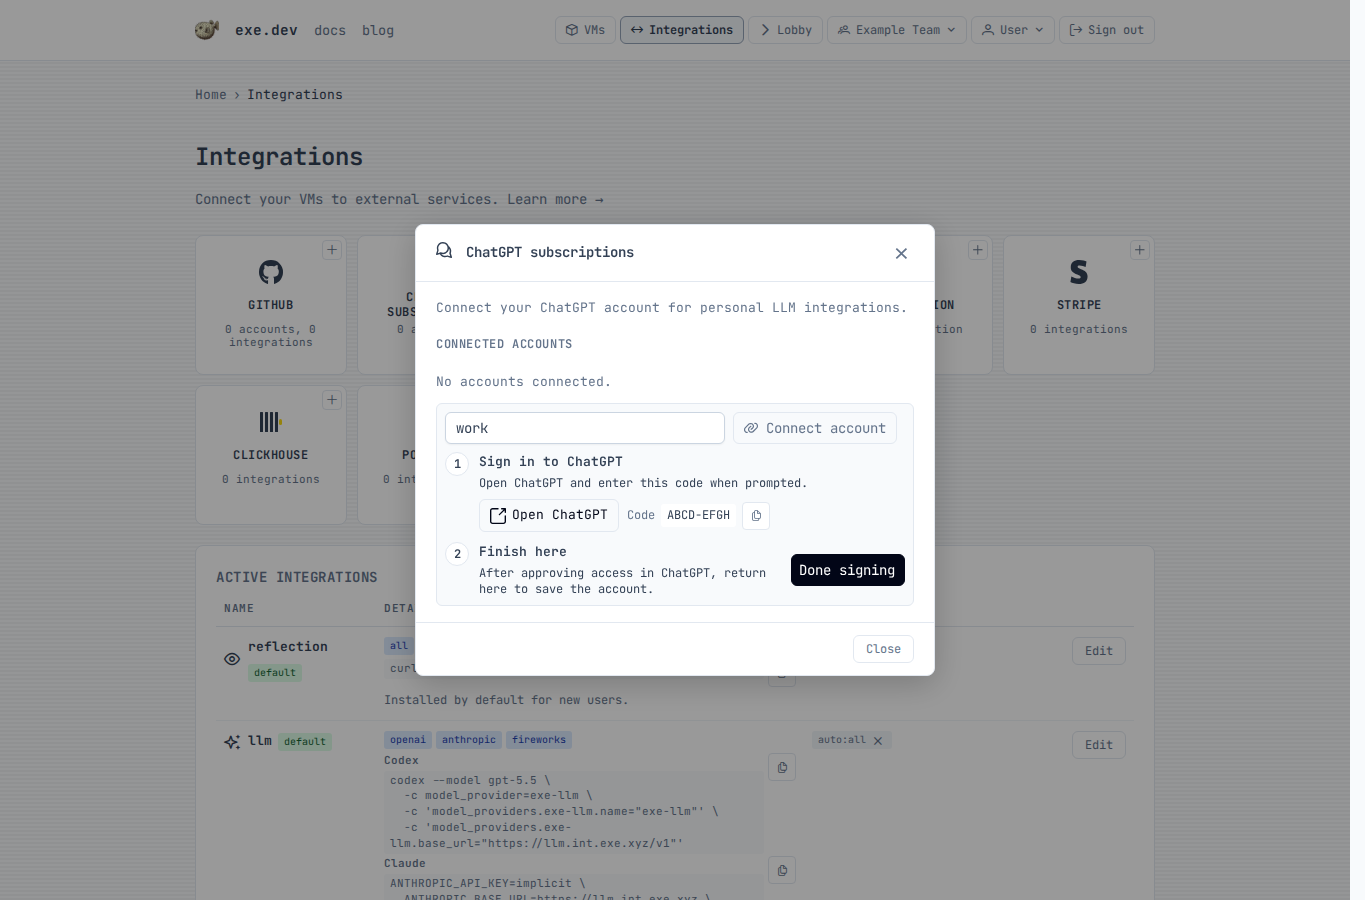
The saved account can now be selected by LLM integrations. You can connect more than one ChatGPT account and choose the account by name.
Configure over SSH
Reinstall the default managed LLM integration:
exe.dev ▶ integrations add llm --name llm --attach auto:all
Create a bring-your-own-key integration. From your local shell, use - to
read provider keys from stdin
(see Providing secrets):
$ printf '%s' "$OPENAI_API_KEY" | ssh exe.dev integrations add llm --name openai-key --openai=byok --openai-key=- --anthropic=disabled --fireworks=disabled --attach tag:llm
Multiple keys can be supplied together, one per line in the same order as the corresponding flags:
$ printf '%s\n%s\n' "$OPENAI_API_KEY" "$ANTHROPIC_API_KEY" | \
    ssh exe.dev integrations add llm --name team-keys --openai=byok --openai-key=- --anthropic=byok --anthropic-key=-
Add a custom HTTPS provider. --custom-provider-api can be repeated; omit it
to enable all supported APIs. Use --header instead of --bearer when the
provider needs custom authentication headers.
$ printf '%s' "$CUSTOM_LLM_TOKEN" | \
    ssh exe.dev integrations add llm --name custom-llm \
      --custom-provider=acme=https://api.acme.example/v1 \
      --custom-provider-api=openai_responses --bearer=- --attach tag:llm
Edit an existing integration:
$ printf '%s' "$ANTHROPIC_API_KEY" | ssh exe.dev integrations edit llm --anthropic=byok --anthropic-key=-
exe.dev ▶ integrations edit llm --openai=disabled
To use a ChatGPT subscription for OpenAI, connect a ChatGPT account with the device-code flow. Device code login must already be enabled in ChatGPT before this flow can complete. Enable device code login in your ChatGPT security settings (personal account) or ChatGPT workspace permissions (workspace admin).
exe.dev ▶ integrations setup chatgpt --name work
Open this URL to authorize ChatGPT:
  https://chatgpt.com/...

Enter this code:
  ABCD-EFGH

Waiting for authorization...
After the account is connected, create a personal LLM integration that uses it for OpenAI:
exe.dev ▶ integrations add llm --name chatgpt-llm --openai=chatgpt --openai-account=work --anthropic=disabled --fireworks=disabled --attach auto:all
List, verify, or disconnect ChatGPT accounts:
exe.dev ▶ integrations setup chatgpt --list
exe.dev ▶ integrations setup chatgpt --verify
exe.dev ▶ integrations setup chatgpt --name work --delete
Use from a VM
Attached personal integrations are available at
https://<integration-name>.int.exe.xyz. Team integrations use
https://<integration-name>.team.exe.xyz.
List available models:
$ curl https://llm.int.exe.xyz/v1/models
Call the OpenAI Responses API:
$ curl https://llm.int.exe.xyz/v1/responses \
    -H "content-type: application/json" \
    -d '{
      "model": "gpt-5.5",
      "input": "Say hello from exe.dev."
    }'
Call the Anthropic Messages API:
$ curl https://llm.int.exe.xyz/v1/messages \
    -H "content-type: application/json" \
    -H "anthropic-version: 2023-06-01" \
    -d '{
      "model": "claude-sonnet-4-6",
      "max_tokens": 256,
      "messages": [{"role": "user", "content": "Hello!"}]
    }'
Transcribe an audio file (up to 25 MB; billed per minute of audio):
$ curl https://llm.int.exe.xyz/v1/audio/transcriptions \
    -F model=gpt-transcribe \
    -F file=@recording.m4a
For Whisper word-level timestamps, request its verbose JSON format:
$ curl https://llm.int.exe.xyz/v1/audio/transcriptions \
    -F model=whisper-1 \
    -F response_format=verbose_json \
    -F 'timestamp_granularities[]=word' \
    -F file=@recording.m4a
Use timestamp_granularities[]=segment for segment timestamps, or repeat the
field with both values to receive both. Managed Whisper requests require
response_format=verbose_json; its plain JSON response does not include the
usage data the gateway needs for billing. Other transcription models use
response_format=json. Bare text, srt, and vtt responses and
stream=true are rejected for managed requests. Transcription requires
managed OpenAI or BYOK; a ChatGPT subscription does not provide it. To keep
ChatGPT for chat, attach a separate LLM integration with managed OpenAI or BYOK
and send transcription requests to that integration's hostname.
The generic /v1 endpoints route by model ID. To force a provider, prefix the
path with /openai, /anthropic, or /fireworks/inference; for example:
https://llm.int.exe.xyz/openai/v1/models.
Deepgram transcription
Enable Deepgram in the integration's provider settings, or use
integrations edit llm --deepgram=managed over SSH. For your own API key, use
integrations edit llm --deepgram=byok --deepgram-key=- and enter the key when prompted.
curl --fail-with-body 'https://llm.int.exe.xyz/deepgram/v1/listen?model=nova-3&smart_format=true' \
  -H 'Content-Type: application/octet-stream' \
  --data-binary @recording.m4a
The transcript is at results.channels[0].alternatives[0].transcript.
Uploads are limited to 26 MiB; split larger recordings or submit
{"url":"https://example.com/recording.m4a"} with Content-Type: application/json.
As of Sep 2026, Nova-3 recorded audio costs $0.0043/minute per transcribed channel,
or $0.0052 with language=multi.
Duration includes fractional seconds.
See Deepgram pricing for the latest.
Managed requests use your exe.dev credits; BYOK requests are billed by Deepgram.
Both modes set mip_opt_out=true.
Managed options: model, language, smart_format, punctuate,
paragraphs, utterances, utt_split, diarize, multichannel, numerals,
profanity_filter, filler_words, encoding, sample_rate, and channels.
Managed requests require a known language code or language=multi and reject
automatic language detection and paid add-ons. BYOK supports discovered
recorded-audio models and their native options. Both modes reject callbacks,
live transcription, text-to-speech, and other Deepgram endpoints.
Use with Shelley
Shelley automatically discovers attached LLM integrations through the
reflection integration. On new accounts, the default reflection
integration is attached to auto:all, so Shelley can see the default llm
integration and show its models in the Model: picker without custom model
setup or API keys in the VM.
If the model list changes while Shelley is open, choose Add / Remove Models... from the Model: picker and click Refresh. Use Add Model only
for separate custom model providers.
If Shelley does not show the integration models, reinstall Reflection with the attached integrations field exposed:
exe.dev ▶ integrations add reflection --name reflection --fields all --attach auto:all
If you use a different LLM integration name, attach that integration to the VM,
a tag, or auto:all. Shelley discovers every attached integration of type
llm.
Use with Codex
When the OpenAI provider is enabled, run Codex inside an attached VM with the integration as its model provider:
$ codex --model gpt-5.5 \
    -c model_provider=exe-llm \
    -c 'model_providers.exe-llm.name="exe-llm"' \
    -c 'model_providers.exe-llm.base_url="https://llm.int.exe.xyz/v1"'
Or add a provider to ~/.codex/config.toml:
model_provider = "exe-llm"

[model_providers.exe-llm]
name = "exe-llm"
base_url = "https://llm.int.exe.xyz/v1"
requires_openai_auth = false
If your LLM integration uses --openai=chatgpt, the ChatGPT account is
connected to exe.dev, not to the VM. Codex still talks to the integration
hostname without an OpenAI API key in the VM.
Use with Claude Code
When the Anthropic provider is enabled, Claude Code expects an API key value, so provide a harmless placeholder and point it at the integration hostname:
$ ANTHROPIC_API_KEY=implicit \
    ANTHROPIC_BASE_URL=https://llm.int.exe.xyz \
    claude --model opus
Or add the configuration to ~/.claude/settings.json:
{
  "apiKeyHelper": "printf exe-gateway",
  "env": {
    "ANTHROPIC_BASE_URL": "https://llm.int.exe.xyz"
  }
}
If you use a different integration name, replace llm in the hostname with
that name.
Attachments
The default llm integration is attached to auto:all. If you create a
separate integration, attach it to a VM, a tag, or all VMs:
exe.dev ▶ integrations attach chatgpt-llm vm:devbox
exe.dev ▶ integrations attach chatgpt-llm tag:llm
exe.dev ▶ integrations attach chatgpt-llm auto:all
See Attaching Integrations for more attachment examples.
AWS Workload Identity Federation
Identity Federation lets an attached VM mint short-lived exe.dev OIDC tokens.
AWS trusts those tokens through an IAM OIDC provider, then exchanges them for
temporary role credentials with AssumeRoleWithWebIdentity. Use this instead
of storing AWS access keys on the VM.
Create the exe.dev integration in the web UI. Run the AWS commands from a machine with the AWS CLI.
Setup
Set values
One-time AWS account setup values. Choose these once for the AWS account:
export AWS_ACCOUNT_ID=123456789012

export AWS_AUDIENCE=sts.amazonaws.com
Per-role and per-exe.dev-integration values. Choose these for each workload:
export INTEGRATION_NAME=awswif
export ROLE_NAME=exe-dev-demo

export AWS_ROLE_ARN="arn:aws:iam::${AWS_ACCOUNT_ID}:role/${ROLE_NAME}"
export AWS_TRUST_POLICY_FILE="/tmp/exe-${ROLE_NAME}-trust-policy.json"
Add the exe.dev integration
Open the Integrations page, choose Identity Federation, and
select AWS.
Name:awswifAWS role ARN: theAWS_ROLE_ARNvalue from aboveAttach to: the VM or tag that should use this role
Copy the generated Issuer and Subject, then click Run. The AWS provider
and role trust policy below must use those exact values.
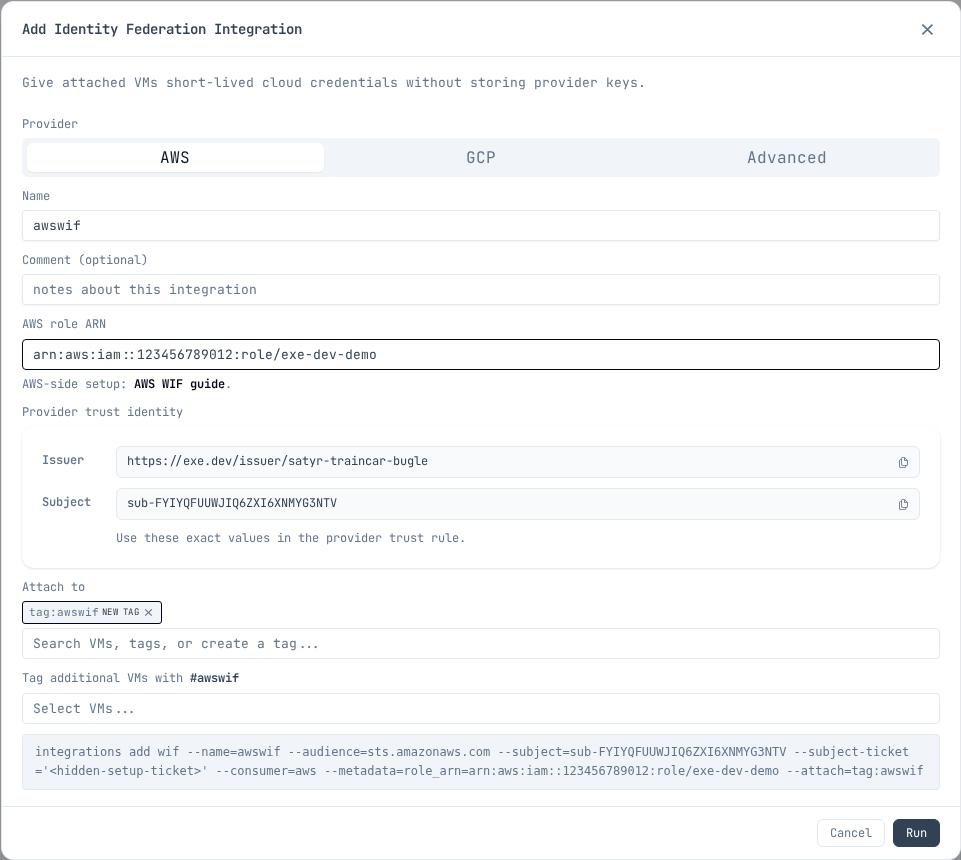
Set the copied values in your shell before running the AWS commands. Replace
these example values with the exact Issuer and Subject from the integration:
export EXE_WIF_ISSUER=https://exe.dev/issuer/example-team-workload
export EXE_WIF_SUBJECT=sub-ABCDEFGHIJKLMNOPQRSTUVWXYZ

export AWS_OIDC_CONDITION_PREFIX="${EXE_WIF_ISSUER#https://}"
export AWS_OIDC_PROVIDER_ARN="arn:aws:iam::${AWS_ACCOUNT_ID}:oidc-provider/${AWS_OIDC_CONDITION_PREFIX}"
The condition prefix and provider ARN use the issuer host and path, without
the https:// scheme.
Configure AWS
Create the IAM OIDC provider once per exe.dev user or team in the AWS account:
aws iam create-open-id-connect-provider \
  --url "$EXE_WIF_ISSUER" \
  --client-id-list "$AWS_AUDIENCE"
Create the role trust policy:
cat > "$AWS_TRUST_POLICY_FILE" <<EOF
{
  "Version": "2012-10-17",
  "Statement": [
    {
      "Effect": "Allow",
      "Principal": {
        "Federated": "${AWS_OIDC_PROVIDER_ARN}"
      },
      "Action": "sts:AssumeRoleWithWebIdentity",
      "Condition": {
        "StringEquals": {
          "${AWS_OIDC_CONDITION_PREFIX}:aud": "${AWS_AUDIENCE}",
          "${AWS_OIDC_CONDITION_PREFIX}:sub": "${EXE_WIF_SUBJECT}"
        }
      }
    }
  ]
}
EOF

aws iam create-role \
  --role-name "$ROLE_NAME" \
  --assume-role-policy-document "file://${AWS_TRUST_POLICY_FILE}"
Grant the role only the permissions your workload needs. For example:
export BUCKET_NAME=my-app-bucket
export AWS_PERMISSIONS_POLICY_FILE="/tmp/exe-${ROLE_NAME}-s3-read-policy.json"

cat > "$AWS_PERMISSIONS_POLICY_FILE" <<EOF
{
  "Version": "2012-10-17",
  "Statement": [
    {
      "Effect": "Allow",
      "Action": "s3:ListBucket",
      "Resource": "arn:aws:s3:::${BUCKET_NAME}"
    },
    {
      "Effect": "Allow",
      "Action": "s3:GetObject",
      "Resource": "arn:aws:s3:::${BUCKET_NAME}/*"
    }
  ]
}
EOF

aws iam put-role-policy \
  --role-name "$ROLE_NAME" \
  --policy-name exe-dev-demo-s3-read \
  --policy-document "file://${AWS_PERMISSIONS_POLICY_FILE}"
You do not need to attach a policy just to run
aws sts get-caller-identity as a smoke test after assumption.
Use it from the VM
From a VM that has the integration attached, use /metadata to read the AWS
role ARN you entered in the integration:
export INTEGRATION_NAME=awswif

export EXE_WIF_URL="https://${INTEGRATION_NAME}.int.exe.xyz"
export EXE_WIF_METADATA_FILE="/tmp/exe-${INTEGRATION_NAME}-aws-wif-metadata.json"
export AWS_WEB_IDENTITY_TOKEN_FILE="/tmp/exe-${INTEGRATION_NAME}-aws-web-identity-token"
export AWS_ROLE_SESSION_NAME="exe-${INTEGRATION_NAME}"

curl -fsS "$EXE_WIF_URL/metadata" > "$EXE_WIF_METADATA_FILE"
curl -fsS "$EXE_WIF_URL/token" | jq -r .token > "$AWS_WEB_IDENTITY_TOKEN_FILE"
For a team integration, use https://${INTEGRATION_NAME}.team.exe.xyz for
EXE_WIF_URL instead.
export AWS_ROLE_ARN="$(jq -r .role_arn "$EXE_WIF_METADATA_FILE")"

aws sts get-caller-identity
The AWS CLI and AWS SDKs read AWS_ROLE_ARN and
AWS_WEB_IDENTITY_TOKEN_FILE, then call AWS STS with the token file. exe.dev
does not put AWS access keys on the VM. For long-running processes, refresh
AWS_WEB_IDENTITY_TOKEN_FILE before the SDK needs to call STS again.
Use cases
Common things to do from a VM with an assumed role. Each assumes
AWS_ROLE_ARN and AWS_WEB_IDENTITY_TOKEN_FILE are exported as shown
above.
S3: artifacts and data
Sync build outputs, datasets, or static sites to a bucket:
aws s3 sync ./dist "s3://${BUCKET_NAME}/"
The permissions example in Configure AWS grants scoped S3
read access; add s3:PutObject on the bucket for writes.
ECR: push and pull container images
Build images on the VM and push them to a private registry:
export ECR_REGISTRY="${AWS_ACCOUNT_ID}.dkr.ecr.${AWS_REGION}.amazonaws.com"

aws ecr get-login-password | docker login --username AWS --password-stdin "$ECR_REGISTRY"
docker push "${ECR_REGISTRY}/${REPO_NAME}:${TAG}"
Grant AmazonEC2ContainerRegistryPowerUser or a policy scoped to the
repository ARN.
CodeArtifact: private package registries
Install from and publish to private npm, PyPI, or Maven repositories with a temporary token:
aws codeartifact login --tool npm \
  --domain "$CA_DOMAIN" --repository "$CA_REPO"

npm install
npm publish
Use --tool pip or --tool twine for Python. Grant
codeartifact:GetAuthorizationToken, sts:GetServiceBearerToken, and the
read or publish actions the workload needs.
Bedrock: model inference
Call Claude and other models with temporary credentials:
aws bedrock-runtime converse \
  --model-id "$MODEL_ID" \
  --messages '[{"role":"user","content":[{"text":"Hello"}]}]'
AWS SDKs pick up the web identity env vars automatically, so application code
needs no extra configuration. Grant bedrock:InvokeModel scoped to the model
ARNs you use.
Terraform / IaC: state and deploys
Run terraform plan and terraform apply with an S3 state backend and
DynamoDB (or S3 native) locking:
terraform init
terraform plan
terraform apply
Terraform's AWS provider reads the same AWS_ROLE_ARN and
AWS_WEB_IDENTITY_TOKEN_FILE env vars. Grant access to the state bucket and
lock table, plus whatever the configuration manages.
Keep it narrow
- Use one exe.dev WIF integration per AWS role or workload.
- Attach the integration only to the VM or tag that needs it.
- Bind
sts:AssumeRoleWithWebIdentityto the exact exe.dev audience and subject. - Give the AWS role only the permissions the workload needs.
- Do not create or store AWS access keys as a fallback.
Additional integrations owned by the same exe.dev user or team reuse its IAM OIDC provider. A different exe.dev user or team has a different issuer and needs its own provider. AWS accounts have a default quota of 100 IAM OIDC providers.
AWS references:
- Create an IAM OIDC provider
- Create a role for an OIDC identity provider
- IAM object quotas
- AssumeRoleWithWebIdentity
- AWS SDK web identity token credentials
GCP Workload Identity Federation
Identity Federation lets an attached VM mint short-lived exe.dev OIDC tokens. A Google Cloud Workload Identity Pool is a container for identities from external systems. An OIDC provider inside the pool tells Google Cloud which issuer's tokens to trust. For exe.dev, configure the provider to trust the exact generated user/team-scoped issuer. Google Cloud then exchanges accepted tokens for access to a service account. Use this instead of storing Google Cloud service account keys on the VM.
Create the exe.dev integration from the exe.dev CLI or the web UI. Run the
Google Cloud commands from any machine with gcloud.
Setup
Set values
Choose a Google Cloud project and pool ID once. The pool contains the OIDC providers that trust user/team-scoped exe.dev issuers:
export PROJECT_ID=example-gcp-project
export POOL_ID=exe-dev-pool

export PROJECT_NUMBER="$(gcloud projects describe "$PROJECT_ID" --format='value(projectNumber)')"
export GCP_POOL_RESOURCE="projects/${PROJECT_NUMBER}/locations/global/workloadIdentityPools/${POOL_ID}"
Choose a provider ID for this user/team-scoped issuer. Provider IDs must be unique within the pool. The provider resource identifies the provider inside the pool, and the provider audience is the Google IAM URL for that resource:
export PROVIDER_ID=exe-dev-example-team

export GCP_PROVIDER_RESOURCE="${GCP_POOL_RESOURCE}/providers/${PROVIDER_ID}"
export GCP_PROVIDER_AUDIENCE="https://iam.googleapis.com/${GCP_PROVIDER_RESOURCE}"
Per-service-account and per-exe.dev-integration values. Choose these for each workload:
export INTEGRATION_NAME=gcpwif
export SERVICE_ACCOUNT_NAME=exe-dev-demo

export SERVICE_ACCOUNT_EMAIL="${SERVICE_ACCOUNT_NAME}@${PROJECT_ID}.iam.gserviceaccount.com"
Nothing above depends on Google Cloud or exe.dev state yet. GCP_PROVIDER_AUDIENCE
is derived entirely from values you just picked, which is what lets you create
the exe.dev integration first and the Google Cloud provider second.
Add the exe.dev integration
One command creates the integration and attaches it. The five --metadata
values are the Google Cloud identifiers the VM reads back from /metadata
later.
Run it from the same shell that holds the values from above, so they expand
before reaching exe.dev — the lobby is a command interface, not a shell, and
passes ${...} through untouched:
ssh exe.dev "integrations add wif --name=${INTEGRATION_NAME} \
  --audience=${GCP_PROVIDER_AUDIENCE} \
  --consumer=gcp \
  --metadata=project_id=${PROJECT_ID} \
  --metadata=project_number=${PROJECT_NUMBER} \
  --metadata=pool_id=${POOL_ID} \
  --metadata=provider_id=${PROVIDER_ID} \
  --metadata=service_account=${SERVICE_ACCOUNT_EMAIL} \
  --attach=vm:example-vm"
Use --attach=tag:<tag-name> to cover every VM with a tag, and add --team for
a team integration. The subject is generated for you.
It echoes back what it created:
Added integration gcpwif

Give these to your cloud provider:
  Issuer:   https://exe.dev/issuer/example-team-workload
  Subject:  sub-ABCDEFGHIJKLMNOPQRSTUVWXYZ
  Audience: https://iam.googleapis.com/projects/123456789012/locations/global/workloadIdentityPools/exe-dev-pool/providers/exe-dev-example-team
Read those two values back into the shell you will run the Google Cloud commands from. This works at any time, not just right after the add:
INTEGRATION_JSON="$(ssh exe.dev 'integrations list --json')"

export EXE_WIF_ISSUER="$(printf '%s' "$INTEGRATION_JSON" |
  jq -r --arg n "$INTEGRATION_NAME" '.[] | select(.name==$n) | "https://exe.dev/issuer/\(.config.issuer_id)"')"
export EXE_WIF_SUBJECT="$(printf '%s' "$INTEGRATION_JSON" |
  jq -r --arg n "$INTEGRATION_NAME" '.[] | select(.name==$n) | .config.subject')"

echo "$EXE_WIF_ISSUER"
echo "$EXE_WIF_SUBJECT"
Open the Integrations page, choose Identity Federation, and
select GCP.
Name: theINTEGRATION_NAMEvalue from aboveProject ID: thePROJECT_IDvalue from aboveProject number: thePROJECT_NUMBERvalue from abovePool ID: thePOOL_IDvalue from aboveProvider ID: thePROVIDER_IDvalue from aboveService account: theSERVICE_ACCOUNT_EMAILvalue from aboveAttach to: the VM or tag that should use this service account
Copy the generated user/team-scoped Issuer URL and Subject, then click
Run. The Google Cloud provider and IAM binding below must use those exact
values.
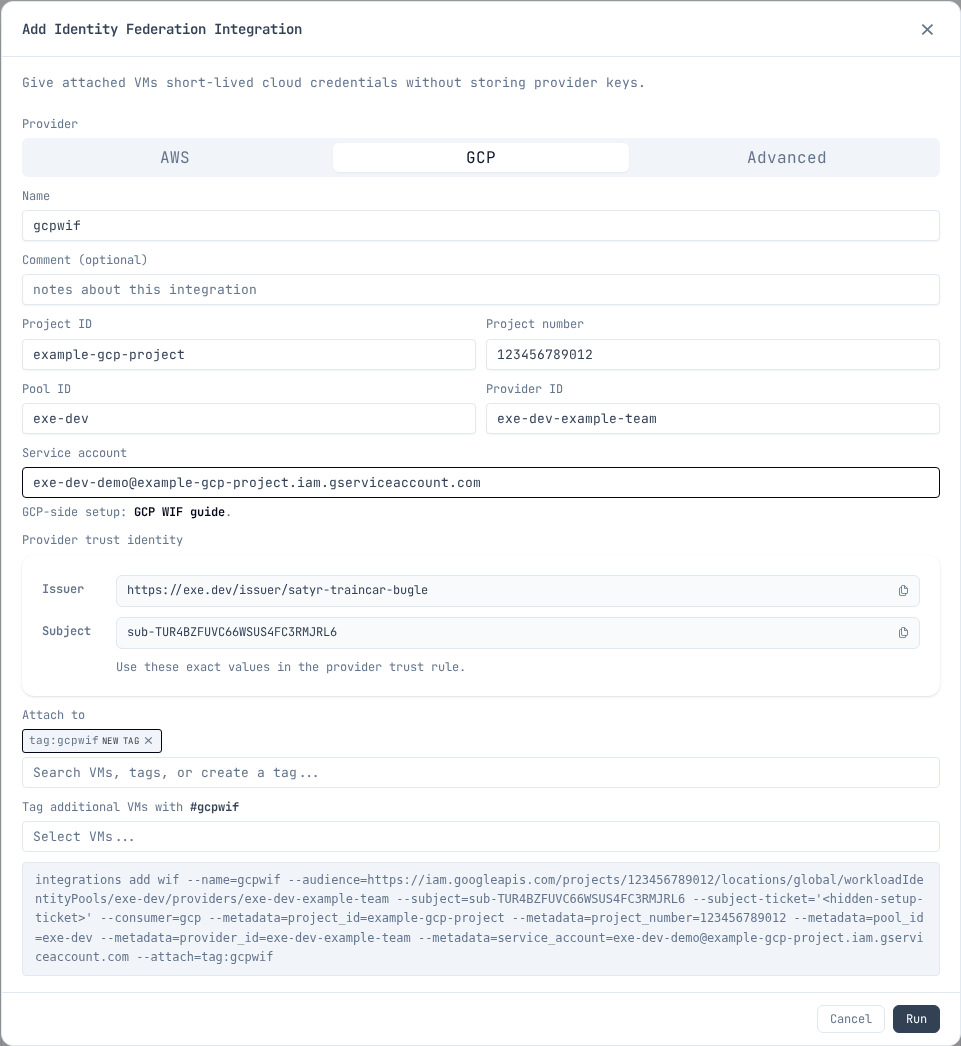
Set the copied values in your shell before running the Google Cloud commands. Copy the issuer URL exactly; do not derive it from the Google Cloud pool or provider IDs. Replace these examples with the generated user/team-scoped issuer URL and subject from the integration:
export EXE_WIF_ISSUER=https://exe.dev/issuer/example-team-workload
export EXE_WIF_SUBJECT=sub-ABCDEFGHIJKLMNOPQRSTUVWXYZ
Configure Google Cloud
gcloud services enable \
  iam.googleapis.com \
  sts.googleapis.com \
  iamcredentials.googleapis.com \
  cloudresourcemanager.googleapis.com \
  --project "$PROJECT_ID"

gcloud iam workload-identity-pools create "$POOL_ID" \
  --project "$PROJECT_ID" \
  --location global \
  --display-name "exe.dev"

gcloud iam workload-identity-pools providers create-oidc "$PROVIDER_ID" \
  --project "$PROJECT_ID" \
  --location global \
  --workload-identity-pool "$POOL_ID" \
  --display-name "exe.dev" \
  --issuer-uri "$EXE_WIF_ISSUER" \
  --allowed-audiences "$GCP_PROVIDER_AUDIENCE" \
  --attribute-mapping "google.subject=assertion.sub"

gcloud iam service-accounts create "$SERVICE_ACCOUNT_NAME" \
  --project "$PROJECT_ID" \
  --display-name "exe.dev demo workload"

gcloud iam service-accounts add-iam-policy-binding "$SERVICE_ACCOUNT_EMAIL" \
  --project "$PROJECT_ID" \
  --role "roles/iam.workloadIdentityUser" \
  --member "principal://iam.googleapis.com/${GCP_POOL_RESOURCE}/subject/${EXE_WIF_SUBJECT}"
These four APIs cover federation itself. Each use case below also needs its own API enabled and its own role granted — see Use cases.
Use it from the VM
Install gcloud on the VM
exeuntu ships Docker but not the Google Cloud CLI. Install it once per VM; the
package also provides docker-credential-gcloud, which is what makes
gcloud auth configure-docker work.
curl -fsSL https://packages.cloud.google.com/apt/doc/apt-key.gpg |
  sudo gpg --dearmor -o /usr/share/keyrings/cloud.google.gpg
echo "deb [signed-by=/usr/share/keyrings/cloud.google.gpg] https://packages.cloud.google.com/apt cloud-sdk main" |
  sudo tee /etc/apt/sources.list.d/google-cloud-sdk.list
sudo apt-get update
sudo DEBIAN_FRONTEND=noninteractive apt-get install -y google-cloud-cli
Create the credential config
Run this on the VM the integration is attached to.
The integration answers on its own hostname, <name>.int.exe.xyz, reachable
only from the VMs it is attached to. GET /metadata there returns the Google
Cloud values you gave when you created the integration — project, project
number, pool, provider, and service account. Read them from there instead of
retyping them, so the VM cannot drift out of sync with the integration.
export INTEGRATION_NAME=gcpwif

export EXE_WIF_URL="https://${INTEGRATION_NAME}.int.exe.xyz"
export EXE_WIF_METADATA_FILE="/tmp/exe-${INTEGRATION_NAME}-gcp-wif-metadata.json"
export GOOGLE_APPLICATION_CREDENTIALS="$HOME/.config/gcloud/exe-${INTEGRATION_NAME}-gcp-wif.json"

mkdir -p "$(dirname "$GOOGLE_APPLICATION_CREDENTIALS")"
curl -fsS "$EXE_WIF_URL/metadata" > "$EXE_WIF_METADATA_FILE"
For a team integration, use https://${INTEGRATION_NAME}.team.exe.xyz for
EXE_WIF_URL instead.
export PROJECT_NUMBER="$(jq -r .project_number "$EXE_WIF_METADATA_FILE")"
export POOL_ID="$(jq -r .pool_id "$EXE_WIF_METADATA_FILE")"
export PROVIDER_ID="$(jq -r .provider_id "$EXE_WIF_METADATA_FILE")"
export SERVICE_ACCOUNT_EMAIL="$(jq -r .service_account "$EXE_WIF_METADATA_FILE")"
export GCP_PROVIDER_RESOURCE="projects/${PROJECT_NUMBER}/locations/global/workloadIdentityPools/${POOL_ID}/providers/${PROVIDER_ID}"

gcloud iam workload-identity-pools create-cred-config "$GCP_PROVIDER_RESOURCE" \
  --service-account "$SERVICE_ACCOUNT_EMAIL" \
  --credential-source-url "$EXE_WIF_URL/token" \
  --credential-source-type json \
  --credential-source-field-name token \
  --output-file "$GOOGLE_APPLICATION_CREDENTIALS"

gcloud auth login --cred-file="$GOOGLE_APPLICATION_CREDENTIALS"
Smoke-test:
gcloud auth print-access-token >/dev/null &&
  echo "GCP Workload Identity Federation is working"
For client libraries, keep GOOGLE_APPLICATION_CREDENTIALS in the workload
environment. The credential config tells Google auth libraries and gcloud to
fetch fresh exe.dev tokens from GET /token; no local service account key or
exe.dev token file is needed. gcloud itself does not need the variable after
gcloud auth login --cred-file, which stores the configuration.
Setting a default project is convenient but optional:
gcloud config set project "$PROJECT_ID"
If the service account has only resource-scoped roles it cannot read the project
resource, so this prints a does not have permission to access projects instance
warning. The property is still set and everything below still works. Granting a
project-level role purely to silence the warning is the wrong trade.
Troubleshooting: isolate the exchange
If something fails, check the token exchange on its own before suspecting
gcloud, Docker, or a client library. Getting an access_token back proves the
pool, provider, issuer, audience, and subject mapping are all correct:
AUD="//iam.googleapis.com/projects/${PROJECT_NUMBER}/locations/global/workloadIdentityPools/${POOL_ID}/providers/${PROVIDER_ID}"
TOK="$(curl -fsS "$EXE_WIF_URL/token" | jq -r .token)"
curl -sS -X POST https://sts.googleapis.com/v1/token \
  -H "Content-Type: application/json" \
  -d "{\"audience\":\"$AUD\",
       \"grantType\":\"urn:ietf:params:oauth:grant-type:token-exchange\",
       \"requestedTokenType\":\"urn:ietf:params:oauth:token-type:access_token\",
       \"scope\":\"https://www.googleapis.com/auth/cloud-platform\",
       \"subjectTokenType\":\"urn:ietf:params:oauth:token-type:jwt\",
       \"subjectToken\":\"$TOK\"}"
Note that the STS audience uses the //iam.googleapis.com/... form with no
scheme, while the provider's --allowed-audiences uses https://.
A 403 from GET /token means the integration is not attached to this VM.
Use cases
Common things to run from the VM once the federated credentials are active. Each use case needs its own API enabled and its own role granted; the federation setup above does not imply either. Grant the service account only the roles that use case needs.
Run the gcloud services enable and add-iam-policy-binding commands as an
administrator, not from the VM.
Cloud Storage: artifacts and data
Sync build outputs, datasets, or static sites to a bucket:
gcloud storage rsync --recursive ./dist "gs://${BUCKET_NAME}/"
Enable and grant, scoped to the one bucket:
gcloud services enable storage.googleapis.com --project "$PROJECT_ID"

gcloud storage buckets add-iam-policy-binding "gs://${BUCKET_NAME}" \
  --member "serviceAccount:${SERVICE_ACCOUNT_EMAIL}" \
  --role "roles/storage.objectAdmin"
Use roles/storage.objectViewer for read-only workloads.
Artifact Registry: containers and packages
Push container images, or publish to private npm, pip, or Maven repositories in the same registry:
gcloud auth configure-docker "${REGION}-docker.pkg.dev"
docker push "${REGION}-docker.pkg.dev/${PROJECT_ID}/${REPO}/${IMAGE}:${TAG}"
Enable and grant, scoped to the one repository:
gcloud services enable artifactregistry.googleapis.com --project "$PROJECT_ID"

gcloud artifacts repositories add-iam-policy-binding "$REPO" \
  --project "$PROJECT_ID" \
  --location "$REGION" \
  --member "serviceAccount:${SERVICE_ACCOUNT_EMAIL}" \
  --role "roles/artifactregistry.writer"
roles/artifactregistry.writer covers both push and pull; there is no separate
reader grant to add. Use roles/artifactregistry.reader for a pull-only VM.
BigQuery: queries and data jobs
Run queries and load jobs, or run dbt: its BigQuery oauth method uses
application default credentials, which the WIF credential file provides.
bq query --use_legacy_sql=false "SELECT COUNT(*) FROM \`${PROJECT_ID}.${DATASET}.${TABLE}\`"
Running a job is a project-level permission; reading the data is not. Grant both:
gcloud services enable bigquery.googleapis.com --project "$PROJECT_ID"

gcloud projects add-iam-policy-binding "$PROJECT_ID" \
  --member "serviceAccount:${SERVICE_ACCOUNT_EMAIL}" \
  --role "roles/bigquery.jobUser"
Then grant data access on the one dataset by editing its access list. (Dataset
bindings are not available through gcloud, and bq add-iam-policy-binding -d
requires allowlisting.)
bq show --format=prettyjson "${PROJECT_ID}:${DATASET}" > /tmp/dataset.json
jq --arg sa "$SERVICE_ACCOUNT_EMAIL" \
  '.access += [{"role":"READER","userByEmail":$sa}]' \
  /tmp/dataset.json > /tmp/dataset-updated.json
bq update --source /tmp/dataset-updated.json "${PROJECT_ID}:${DATASET}"
Use "role":"WRITER" for a workload that loads data.
Cloud SQL: databases via the Auth Proxy
The Cloud SQL Auth Proxy connects over the instance's public IP with IAM authorization and TLS; no authorized networks or VPC needed. Connect to localhost with your normal client or migration tool:
cloud-sql-proxy "${PROJECT_ID}:${REGION}:${INSTANCE}" &
psql "host=127.0.0.1 dbname=${DB_NAME} user=${DB_USER}"
Enable and grant:
gcloud services enable sqladmin.googleapis.com --project "$PROJECT_ID"

gcloud projects add-iam-policy-binding "$PROJECT_ID" \
  --member "serviceAccount:${SERVICE_ACCOUNT_EMAIL}" \
  --role "roles/cloudsql.client"
Add roles/cloudsql.instanceUser as well if you authenticate to the database
with IAM database authentication rather than a password.
Vertex AI: model inference
Call Gemini and other models with the federated credentials. Client libraries
pick up GOOGLE_APPLICATION_CREDENTIALS automatically:
curl -fsS -X POST \
  -H "Authorization: Bearer $(gcloud auth print-access-token)" \
  -H "Content-Type: application/json" \
  -d '{"contents":[{"role":"user","parts":[{"text":"Hello"}]}]}' \
  "https://${REGION}-aiplatform.googleapis.com/v1/projects/${PROJECT_ID}/locations/${REGION}/publishers/google/models/${MODEL}:generateContent"
Enable and grant:
gcloud services enable aiplatform.googleapis.com --project "$PROJECT_ID"

gcloud projects add-iam-policy-binding "$PROJECT_ID" \
  --member "serviceAccount:${SERVICE_ACCOUNT_EMAIL}" \
  --role "roles/aiplatform.user"
Terraform / IaC: state and deploys
Run terraform plan and terraform apply with the GCS state backend; the
google provider reads the same credential file via application default
credentials:
terraform init -backend-config="bucket=${STATE_BUCKET}"
terraform apply
Grant the state bucket, then whatever the configuration manages:
gcloud services enable storage.googleapis.com --project "$PROJECT_ID"

gcloud storage buckets add-iam-policy-binding "gs://${STATE_BUCKET}" \
  --member "serviceAccount:${SERVICE_ACCOUNT_EMAIL}" \
  --role "roles/storage.objectAdmin"
A configuration that creates resources also needs the APIs for those resources
enabled and the matching admin roles granted. Prefer resource-scoped or
folder-scoped bindings over roles/editor on the project.
Keep it narrow
- Use one exe.dev WIF integration per service account or workload.
- Attach the integration only to the VM or tag that needs it.
- Bind
roles/iam.workloadIdentityUserto the exact exe.dev subject. - Give the Google Cloud service account only the roles the workload needs.
- Do not create or store Google Cloud service account keys as a fallback.
Additional integrations owned by the same exe.dev user or team use the same user/team-scoped issuer. They can reuse the same OIDC provider when they use the same provider audience. A different exe.dev user or team has a different user/team-scoped issuer and needs its own provider, which can live in the same pool.
Google references:
- Workload Identity Federation with other providers
- Create an OIDC workload identity pool provider
- Create credential configurations
Reflection Integration
The Reflection integration allows a VM (and, for example, agents running on that VM) to discover metadata about itself, including the owner email, tags, comments, the port configured to be shared on https://vm-name.exe.xyz/, and the list of attached integrations. The VM's own name and emoji are always published at the top level of the index response, regardless of which fields the integration opts into. Shelley and pi are both pre-configured to use this to discover LLM integrations and models. Shelley knows to look at integrations to access resources that the user is asking to access, like git repos or HTTPs proxies.
Reflection is a default integration: new accounts get it
attached with auto:all, so every VM can reach it out of the box. Edit the
attachment tags to change this behavior.
Examples
See what's available:
$ curl -s https://reflection.int.exe.xyz/
{
  "name": "my-vm",
  "emoji": "🚀",
  "paths": [
    { "description": "owner email address", "path": "/email" },
    { "description": "integrations available to this VM", "path": "/integrations" },
    { "description": "tags set on this VM", "path": "/tags" },
    { "description": "comment set on this VM", "path": "/comment" },
    { "description": "default proxy port for this VM", "path": "/default_port" }
  ]
}
Query attached integrations:
$ curl -s https://reflection.int.exe.xyz/integrations
{
  "integrations": [
    {
      "comment": "",
      "help": "curl https://reflection.int.exe.xyz/",
      "name": "reflection",
      "type": "reflection"
    },
    {
      "comment": "",
      "help": "curl https://llm.int.exe.xyz/v1/models",
      "name": "llm",
      "type": "llm"
    },
    {
      "comment": "Use this for the backend repo; the app repo is at github-app.",
      "help": "git clone https://github.int.exe.xyz/your-org/your-repo.git",
      "name": "github-example",
      "type": "github"
    }
  ]
}
Attaching Integrations
Integrations can be attached to specific VMs, to all VMs, or to tags.
Attach to a specific VM
exe.dev ▶ integrations attach blog vm:my-vm
Attach to all VMs
exe.dev ▶ integrations attach blog auto:all
Attach to a tag
exe.dev ▶ integrations attach blog tag:prod
Any VM with the prod tag will have the blog integration available.
You can tag VMs with:
exe.dev ▶ tag my-vm prod
Attach at creation time
You can attach integrations when creating them with --attach:
exe.dev ▶ integrations add github --name blog --repository ghuser/blog --attach auto:all
exe.dev ▶ integrations add http-proxy --name myapi --target https://api.example.com --bearer sk-... --attach tag:prod
You can also attach integrations when creating a new VM with --integration:
exe.dev ▶ new --name my-vm --integration blog --integration myapi
Detach
exe.dev ▶ integrations detach blog vm:my-vm
Slack Integration
The Slack integration lets your VM post messages to a Slack channel with a plain HTTP request — no Slack tokens on the VM, no Slack SDK required. It's handy for build notifications, long-running job completions, or anything an agent wants to tell you about.
If you want a bot that can respond to Slack — read messages, react to mentions, call the full Slack Web API — see the Slack Bot Integration instead.
Setup
Click the Slack tile on the Integrations page, or run:
exe.dev ▶ integrations setup slack
Either way, you'll be sent to Slack to authorize the exe.dev app. Slack shows a channel picker: choose the workspace and channel the integration should post to, then click Allow. That's the whole dance — exe.dev stores the resulting webhook server-side, and the integration is created for you.
Each integration posts to exactly one channel. To post to a second channel, run setup again and pick a different channel.
Sending messages
Attach the integration to a VM, then POST JSON to the integration hostname:
exe.dev ▶ integrations attach slack-hook vm:my-vm
Attached slack-hook to vm:my-vm

exe.dev ▶ ssh my-vm curl --json '{"text":"build finished ✅"}' https://slack-hook.int.exe.xyz/
ok
The request body is Slack's incoming webhook payload, so anything Slack supports there works — including Block Kit:
curl --json '{"blocks":[{"type":"section","text":{"type":"mrkdwn","text":"*deploy done* :rocket:"}}]}' \
  https://slack-hook.int.exe.xyz/
Notes
- The webhook URL is a secret, and it never touches your VM. exe.dev holds it server-side and injects it when proxying your request.
- Messages are rate limited to 5 per minute per user.
- If the webhook is revoked on the Slack side (app removed from the
workspace), requests return 404 — re-run
integrations setup slack. - If a workspace requires admin approval for apps, clicking Allow files an approval request; the integration is created once an admin approves.
Manual webhook
Already have a Slack incoming webhook URL from your own app? Skip OAuth and add it directly:
exe.dev ▶ integrations add slack --name my-slack --webhook-url https://hooks.slack.com/services/T000/B000/XXXX
Slack Bot Integration
The Slack Bot integration lets a VM drive a real Slack bot: post as the bot, read history, react, and respond live to mentions and DMs — while the bot's tokens stay off the VM entirely. You bring your own Slack app; exe.dev holds its tokens server-side and injects them on the way to Slack.
This is the two-way sibling of the send-only Slack Integration. Use that one if all you need is "post a message to a channel."
How it works
Your VM talks to the integration hostname exactly as it would talk to
slack.com:
curl -X POST https://mybot.int.exe.xyz/api/chat.postMessage --json '{"channel":"C0123","text":"hi"}'
exe.dev forwards /api/<method> calls to the Slack Web API with your bot
token attached. Any Web API method works; what the bot may actually do is
bounded by the scopes you granted your own app.
For receiving events (mentions, DMs), the integration supports Slack's
Socket Mode: the VM calls one
special method, apps.connections.open, and gets back a single-use ticketed
wss:// URL. The VM connects to that URL directly — an outbound WebSocket,
no inbound ports, no tokens — and events stream in over it.
Step 1: create your Slack app
Go to api.slack.com/apps → Create New App → From an app manifest, pick your workspace, and paste:
{
  "display_information": { "name": "my-exe-bot" },
  "features": {
    "bot_user": { "display_name": "my-exe-bot", "always_online": true }
  },
  "oauth_config": {
    "scopes": {
      "bot": ["chat:write", "app_mentions:read", "im:history"]
    }
  },
  "settings": {
    "event_subscriptions": {
      "bot_events": ["app_mention", "message.im"]
    },
    "socket_mode_enabled": true
  }
}
This is the minimal talk-to-able bot: it can post, and it hears mentions and
DMs. Add scopes as your bot needs them (channels:history to read channels,
reactions:write to react, files:read to download private files,
files:write to upload, ...). Each event subscription needs its matching read
scope or Slack won't deliver it.
Then collect two tokens:
- Bot token (
xoxb-…): Install App to your workspace, then copy the Bot User OAuth Token from OAuth & Permissions. - App-level token (
xapp-…), only needed for receiving events: Basic Information → App-Level Tokens → Generate, with theconnections:writescope.
Finally, invite the bot to a channel: /invite @my-exe-bot.
Step 2: create the integration
On the Integrations page, click the Slack Bot tile and
paste the tokens — the Test button verifies them against Slack and fills in
the bot's name. Or via SSH, pass - to read each token from stdin. At the
interactive prompt, each - asks for its token with hidden input:
exe.dev ▶ integrations add slack --name mybot --bot-token=- --app-token=-
Bot token (xoxb-...):
App-level token (xapp-...):
exe.dev ▶ integrations attach mybot vm:my-vm
Scripted (ssh exe.dev integrations add ...), stdin carries one token per
line in the same order as the corresponding flags:
$ printf '%s\n%s\n' "$SLACK_BOT_TOKEN" "$SLACK_APP_TOKEN" | \
    ssh exe.dev integrations add slack --name mybot --bot-token=- --app-token=-
The --app-token is optional; without it the bot can call the Web API but
not receive events.
Step 3: use it from the VM
The examples below use the integration hostname
mybot.int.exe.xyz — substitute the exact URL printed when you created the
integration (it varies by integration name and environment).
Post as the bot:
curl -X POST https://mybot.int.exe.xyz/api/chat.postMessage \
  --json '{"channel":"C0123456789","text":"hello from my VM"}'
Sanity-check the token routing:
curl -X POST https://mybot.int.exe.xyz/api/auth.test
Receive events over Socket Mode. Standard Slack SDKs work once pointed at the
integration host; here is the bare-bones version with just websockets:
import asyncio, json, urllib.request, websockets

GW = "https://mybot.int.exe.xyz/api/"  # your integration URL (as printed on creation) + /api/

def gw_post(method, payload=None):
    data = json.dumps(payload).encode() if payload is not None else b""
    req = urllib.request.Request(GW + method, data=data,
        headers={"Content-Type": "application/json"}, method="POST")
    with urllib.request.urlopen(req) as resp:
        return json.load(resp)

async def main():
    url = gw_post("apps.connections.open")["url"]   # ticketed wss URL
    async with websockets.connect(url) as ws:
        async for raw in ws:
            msg = json.loads(raw)
            if "envelope_id" in msg:                 # ack everything
                await ws.send(json.dumps({"envelope_id": msg["envelope_id"]}))
            ev = msg.get("payload", {}).get("event", {})
            if ev.get("type") == "app_mention":
                gw_post("chat.postMessage",
                        {"channel": ev["channel"], "text": "you rang?"})

asyncio.run(main())
Mention the bot in Slack and it answers — and at no point did an xoxb- or
xapp- token exist on the VM. The only credential the VM ever holds is the
single-use WebSocket ticket.
Download private files
With the files:read bot scope, Slack file objects contain url_private and
url_private_download. For a documented /files-pri/... URL, replace only the
URL's hostname with your integration hostname and reuse its path and query. Do
not add an Authorization header: exe.dev supplies the bot token only to Slack's
pinned file origin. Query bytes are preserved exactly; the path is
safety-validated and encoded once by the gateway.
For example, if Slack returns:
https://files.slack.com/files-pri/T0123-F0456/report.txt
fetch the same path through the integration:
curl https://mybot.int.exe.xyz/files-pri/T0123-F0456/report.txt \
  -o report.txt
GET, HEAD, byte ranges, and standard file validators are supported for
/files-pri/... and thumbnail /files-tmb/... paths. If Slack answers with a
redirect to its signed CDN URL, the gateway returns that redirect to the VM
(status and Location) instead of following it server-side, so use a client
that follows redirects (curl -L). The VM follows the short-lived signed URL
with the URL's own token; the durable bot token is never sent on that second
hop. Redirects are only passed through after validation (HTTPS, an approved
Slack CDN host, no userinfo, default port); anything failing validation fails
closed. The signed Location is never written to exe.dev logs.
curl -L https://mybot.int.exe.xyz/files-pri/T0123-F0456/report.txt \
  -o report.txt
If you add files:read or files:write after installing the app, reinstall it
to the workspace and recheck the existing stored credential first. If Slack
rotated the token, update the integration through the secure credential intake;
never transfer a replacement token onto the VM or through chat.
Notes
- Slack rate-limits the Web API per method. When Slack says slow down,
exe.dev honors the
Retry-Afterand rejects further calls to that method locally until the window passes; other methods are unaffected. apps.connections.openwithout a stored app token returns 409 with the fix (integrations edit mybot --app-token=-).- Slack asks Socket Mode clients to reconnect periodically; SDKs handle this automatically. If you hand-roll, just re-open a fresh ticket when the socket closes.
- Slack allows at most 10 concurrent Socket Mode connections per app.
- Rotating tokens (e.g. after adding scopes, which requires reinstalling the
app):
integrations edit mybot --bot-token=- --app-token=-.
Discord Integration
The Discord integration lets your VM post messages to a Discord channel with a plain HTTP request — no webhook URL on the VM, no Discord library required. It's handy for build notifications, long-running job completions, or anything an agent wants to tell you about.
If you want a bot that can act on Discord — read message history, react, manage roles, call the full Discord Bot API — see the Discord Bot Integration instead.
Setup
Click the Discord tile on the Integrations page, or run:
exe.dev ▶ integrations setup discord
Either way, you'll be sent to Discord to authorize the exe.dev app. Discord shows a server and channel picker: choose where the integration should post, then click Authorize. That's the whole dance — Discord hands exe.dev an incoming webhook for that channel, exe.dev stores it server-side, and the integration is created for you.
Each integration posts to exactly one channel. To post to a second channel, run setup again and pick a different channel.
Sending messages
Attach the integration to a VM, then POST JSON to the integration hostname:
exe.dev ▶ integrations attach discord-hook vm:my-vm
Attached discord-hook to vm:my-vm

exe.dev ▶ ssh my-vm curl --json '{"content":"build finished ✅"}' https://discord-hook.int.exe.xyz/
The request body is Discord's webhook execute
payload,
so content, embeds, components, and friends all work:
curl --json '{"embeds":[{"title":"deploy done","description":"v42 is live 🚀","color":5763719}]}' \
  https://discord-hook.int.exe.xyz/
Two query parameters pass through: wait=true to get the created message
back in the response, and thread_id=<id> to post into a thread.
Notes
- The webhook URL is a secret, and it never touches your VM. exe.dev holds it server-side and injects it when proxying your request.
- Messages are rate limited to 5 per minute per user, and exe.dev also
honors Discord's own per-webhook rate limit headers proactively — when a
limit is hit you get a 429 with a
Retry-Afterheader. - The payload must be JSON (
Content-Type: application/json), at most 256 KiB. File uploads (multipart) are not supported. - The
usernameandavatar_urloverride fields are rejected, and mass mentions (@everyone, role and user pings) are neutralized — a VM can't impersonate someone else or ping your whole server. - If the webhook is deleted on the Discord side (Server Settings →
Integrations → Webhooks), requests return 404 — re-run
integrations setup discord.
Manual webhook
Already have a Discord webhook URL? Create one in Discord under Server Settings → Integrations → Webhooks → New Webhook, pick the channel, Copy Webhook URL, then skip OAuth and add it directly:
exe.dev ▶ integrations add discord --name my-discord --webhook-url https://discord.com/api/webhooks/1234567890/XXXX
Discord Bot Integration
The Discord Bot integration lets a VM act as a real Discord bot: post messages, read channel history, react, manage roles — anything in the Discord Bot REST API — while the bot's token stays off the VM entirely. You bring your own Discord application; exe.dev holds its bot token server-side and injects it on the way to Discord.
This is the do-everything sibling of the send-only Discord Integration. Use that one if all you need is "post a message to a channel."
How it works
Your VM talks to the integration hostname exactly as it would talk to
discord.com, version prefix and all:
curl -X POST https://mybot.int.exe.xyz/api/v10/channels/1234567890/messages --json '{"content":"hi"}'
exe.dev forwards the request to the Discord Bot API with your bot token
attached as Authorization: Bot …. The path is forwarded verbatim —
including the /api/v10 prefix, so you choose the API version — and GET,
POST, PUT, PATCH, and DELETE all work. There is no endpoint
allowlist: what the bot may actually do is bounded by your own bot's
permissions in the servers you invited it to.
Step 1: create your Discord bot
Go to the Discord Developer Portal → New Application, name it, then:
- Get the bot token. Open the Bot tab and click Reset Token; copy the token it reveals. This is the credential the integration needs — not the Client Secret on the OAuth2 tab, which is a different string that won't work here.
- (Optional) enable intents. Still on the Bot tab: if your bot will read other users' message content via the API, switch on the Message Content Intent under Privileged Gateway Intents.
- Invite the bot to your server. Under OAuth2 → URL Generator,
check the
botscope, pick the permissions your bot needs (e.g. Send Messages, Read Message History, Add Reactions), open the generated URL in your browser, and choose your server.
Step 2: create the integration
On the Integrations page, click the Discord Bot tile
and paste the token — the Test button verifies it against Discord and fills
in the bot's username. Or via SSH, pass - to read the token from stdin:
exe.dev ▶ integrations add discord --name mybot --bot-token=-
Bot token:
exe.dev ▶ integrations attach mybot vm:my-vm
Scripted (ssh exe.dev integrations add ...), stdin carries the token:
$ printf '%s\n' "$DISCORD_BOT_TOKEN" | \
    ssh exe.dev integrations add discord --name mybot --bot-token=-
Step 3: use it from the VM
The examples below use the integration hostname mybot.int.exe.xyz —
substitute the exact URL printed when you created the integration (it varies
by integration name and environment).
Sanity-check the token routing (returns your bot's user object):
curl https://mybot.int.exe.xyz/api/v10/users/@me
Post as the bot:
curl -X POST https://mybot.int.exe.xyz/api/v10/channels/1234567890/messages \
  --json '{"content":"hello from my VM"}'
Read recent channel history:
curl 'https://mybot.int.exe.xyz/api/v10/channels/1234567890/messages?limit=10'
React to a message:
curl -X PUT 'https://mybot.int.exe.xyz/api/v10/channels/1234567890/messages/9876543210/reactions/%F0%9F%91%8D/@me'
At no point did the bot token exist on the VM — the VM only ever holds the integration hostname.
Receiving events
Unlike the Slack Bot Integration, the Discord Bot integration cannot receive events (new messages, mentions) as a push. Discord has no analogue of Slack's Socket Mode: its Gateway WebSocket requires the bot token inside the connection handshake itself, which would put the token on your VM — exactly what this integration exists to prevent.
What works instead is REST polling: fetch
/api/v10/channels/<id>/messages on a timer and act on what's new. For many
agent workloads (watch a support channel, respond to commands) a poll every
few seconds through the integration is entirely sufficient.
Notes
- Discord rate-limits the Bot API per route. exe.dev tracks Discord's
X-RateLimit-*response headers and, once a route's budget is exhausted, rejects further calls to that route locally (429 +Retry-After) until the window resets; other routes are unaffected. A global back-off from Discord pauses all forwarding until it passes. - On top of Discord's limits, exe.dev applies its own per-user limit (sustained 10 requests/second, bursting to 20).
- Request bodies are capped at 256 KiB, so large file uploads won't fit; responses (message history, member lists) stream through without a size cap.
- exe.dev sets the
User-AgentDiscord requires on Bot API calls, so plaincurlworks without extra headers. - Discord SDKs like
discord.pyanddiscord.jshardcodediscord.comand open Gateway WebSockets, so they can't be pointed at the integration hostname — use plain HTTP against the REST API instead. - Rotating the token (after a Reset Token in the Developer Portal):
integrations edit mybot --bot-token=-.
VM-to-VM Integration
The VM-to-VM integration (also called a peer integration) lets one of your VMs make HTTPS requests to another — an agent calling an API served by a second VM, a staging box hitting a shared service, two agents talking to each other — without either VM ever holding a credential.
Under the hood it's an HTTP Proxy integration
whose target is another VM you own, created with the --peer flag. Two
things make it more than a plain proxy:
- Generated key, never on the VM. exe.dev generates an API key scoped to the target VM, stores it server-side, and injects it at the network edge on every request. The source VM can use the integration but can never read the key — see Where secrets live. The target VM's auth proxy consumes the key; your server never sees it either.
- Caller identity on delivery. Requests arrive at the target with an
X-Exedev-Source-Vmheader naming the calling VM. The platform sets (never appends) this header after stripping anything the source VM sent, so the caller cannot forge it. Use it to audit or route by caller.
Setup from the UI
On the Integrations page, use the HTTPS to another VM tile. Pick the target VM from the dropdown, optionally a port (the default web port 8000 needs none), and attach it to the VMs that should be able to call the target.
You can also type the target VM's name (or "vm-to-vm" or "peer") into the integration catalog search — matching one of your own VMs offers this setup flow with that VM pre-selected as the target.
Setup from the CLI
exe.dev ▶ integrations add http-proxy --name talk-to-bob --target https://bob.exe.xyz/ --peer --attach vm:alice
Added integration talk-to-bob (peer auth → bob)
The --target must be a VM you own (or have access to) on your exe.dev
domain. To reach a port other than 8000, put it in the target URL:
https://bob.exe.xyz:3000/.
The generated key shows up in ssh-key list with the label
peer-<integration name>; deleting the integration removes it.
Example: two agents on two VMs
Say bob runs a small internal API on port 8000, and an agent on alice
needs to call it. Create the peer integration as above, then from alice:
exe.dev ▶ ssh alice curl -s http://talk-to-bob.int.exe.xyz/status
{"ok": true}
The request leaves alice with no credentials, picks up the generated key at
the edge, passes bob's auth proxy, and arrives at bob's server on port 8000
looking like a normal request — plus the caller's name:
X-Exedev-Source-Vm: alice
Bob's server can use that header to decide what alice is allowed to do, tag
log lines by caller, or fan out behavior per peer. If several VMs attach the
same integration, they all reach bob through the same hostname and each is
identified by its own X-Exedev-Source-Vm value.
Notes
- Auth composes. You can add
--headeror--bearerflags alongside--peer; those headers are forwarded to the target VM in addition to the automatic peer key (which travels in a reserved internal header the target never sees).--no-authconflicts with--peer— peer auth is always injected. - Trust scope of
X-Exedev-Source-Vm. A value that reaches your app was vouched for by the platform: the peer integration carries a short-lived signed attestation bound to the target VM, and the header is stripped on every other path, including a human setting it on a direct request. Note it names the source VM, not a user: anyone who can run code on the source VM can call the target as that VM. - Ownership. The target must be a VM you can access; the generated key is
scoped to exactly that VM (namespace
v0@<vm>.exe.xyz) and is useless anywhere else. - Same mechanics as HTTP Proxy. Attachment,
int.exe.xyzhostnames, editing, and teams all work exactly as described in the HTTP Proxy integration docs.
Token-Mint Integrations
Some vendors don't take an API key on every request — they want an OAuth-style token dance: present a durable credential at a token endpoint, get back a short-lived access token, use that. The token-mint integrations run that dance for you: exe.dev vaults the durable credential (a client secret, a service account key, a refresh token) and your VM exchanges it for the short-lived token without ever seeing it.
The catalog services with this shape today: googlesa, keycloak, twitch,
and reddit-ads. (Container registries use a GET-based cousin of this flow —
see Container Registry Integrations.)
How it works
-
POSTto the vendor's documented token path on the integration hostname. Any body you send is ignored — the proxy discards it and synthesizes the real token request from the vaulted credential:curl -X POST http://<name>.int.exe.xyz/oauth2/token -
The vendor's response comes back to you verbatim: a short-lived
access_token(typically ~1 hour) withexpires_in. -
Use it as
Authorization: Bearer <token>— depending on the service, either through the integration or directly against the vendor (see each section below). -
When the token expires (the vendor answers 401), mint a fresh one. React to the 401 rather than tracking TTLs.
The durable credential never reaches the VM; only the scoped, expiring token does. If a vendor echoes a durable secret back in the token response (Reddit does), the proxy strips that field.
Google service account (googlesa)
- Credential: a service-account JSON key (create one).
- Mint:
POST /tokenwith an empty body. The proxy signs the JWT assertion with the private key server-side and exchanges it at Google's token endpoint. - Use the ~1h access token directly against the Google API (e.g.
Authorization: Bearer <token>tosheets.googleapis.com) — those calls do not go through the integration. - Consumer-style use: share the target resource (e.g. a Sheet) with the
service account's
client_email. - Domain-wide delegation: pass
--subjectwith the user to impersonate.
Keycloak (keycloak)
- Credential: a confidential client's id + secret.
- Self-hosted: point
--base-urlat your Keycloak install. - Mint:
POST /realms/<realm>/protocol/openid-connect/token— the client-credentials grant. The integration is path-gated to/realms/, so the secret can only ever be presented to a token endpoint. - Use the bearer token directly against your own API.
- Verify runs a client-credentials mint against
--realm(defaultmaster); the id/secret ride HTTP Basic, so the body carries onlygrant_type.
Twitch (twitch)
- Credential: an application's client_id + client_secret (register an app, then "New Secret" on its Manage page).
- Mint:
POST /oauth2/token— Twitch's client-credentials grant. Twitch only accepts the credentials as form-body fields (HTTP Basic is rejected withmissing client id), which is exactly why the body is synthesized server-side. - Use the app access token on
/helix/...requests through the integration — the proxy adds the requiredClient-Idheader for you. - App access tokens are server-to-server and carry no scopes. Endpoints that need a user context (e.g. a user's email) require a user access token, which this integration does not mint.
Reddit Ads (reddit-ads)
- Credential: your app's client credentials plus a refresh token.
- Getting the refresh token: authorize your app once at
https://www.reddit.com/api/v1/authorize?client_id=...&response_type=code&state=...&redirect_uri=...&duration=permanent&scope=adsread(addadsedit/adsconversionsas needed), then exchange the code at Reddit's token endpoint; the response'srefresh_tokenis what you paste into the integration. - Scopes:
adsreadcovers reporting and read endpoints; campaign writes needadsedit; conversion uploads needadsconversions. - Mint:
POST /api/v1/access_token(any body ignored). The proxy performs the refresh-token grant server-side and returns the ~1haccess_token. Reddit echoes the permanent refresh token back in refresh responses — the proxy strips that field. - Use the token on
/api/v3/...requests, through the integration or directly againstads-api.reddit.com. - Reddit requires a descriptive User-Agent; the proxy sets one on proxied requests.
Container Registry Integrations
The container registry integrations (quay, ghcr, atcr, gar) are
session-mint integrations: exe.dev holds a durable registry credential —
a robot account, a personal access token, an app password, or a service
account key — and your VM exchanges it for a short-lived registry token
without ever seeing it.
They all front the same thing: the standard OCI distribution token
flow, the
same dance docker login performs. The only exe.dev-specific part is the
hostname; scope grammar, response shape, and error codes are the vendor's.
How it works
-
GETthe registry's token realm through the integration hostname, choosing your own scope:curl "http://<name>.int.exe.xyz/v2/auth?service=quay.io&scope=repository:<org>/<repo>:pull" -
The proxy injects your stored credential as HTTP Basic. The realm path is the only path the integration proxies (path-gated), so the credential can only ever be presented to the registry's own token endpoint.
-
The vendor's response comes back to you verbatim. The
tokenfield is a short-lived registry token. -
Use it directly against the registry — those requests do not go through the integration:
curl -H "Authorization: Bearer $TOKEN" https://quay.io/v2/<org>/<repo>/manifests/latest -
When the token expires (the registry answers 401), mint a fresh one. React to the 401 rather than tracking TTLs.
The token realms are GET-only (POST returns 405) — this is the OCI
registry token endpoint, not an RFC 6749 OAuth token endpoint.
Clients
The minted token is a standard OCI registry bearer token; what varies is how each client accepts it:
-
curlwithAuthorization: Bearer $TOKEN(as above), -
skopeowith--registry-token $TOKEN(or--src-registry-token/--dest-registry-tokenforskopeo copy), -
crane/oras/ anything built on go-containerregistry or containerd resolvers: put it in a Docker config file asregistrytoken(below), -
dockeritself, via the little-knownregistrytokenfield — unlikeauths.auth(Basic) oridentitytoken, this field is sent asAuthorization: Bearerand skips the token dance entirely:{ "auths": { "quay.io": { "registrytoken": "<minted JWT>" } } }Point
DOCKER_CONFIGat a directory holding thatconfig.json(or merge into~/.docker/config.json) anddocker pull quay.io/<org>/<repo>works with nodocker login.
Two caveats with registrytoken: it is static — docker will NOT re-mint
when the token expires or when it needs a scope the token lacks, you get a
plain 401 and must refresh the file yourself (mint with every scope you
need: the scope parameter repeats). And credential helpers cannot supply
it — it lives only in the config file.
Alternatively, outside the integration entirely: docker login <registry>
with your own credentials on the VM. That places the durable credential on
the VM — exactly what the integration exists to avoid — but restores
docker's automatic re-mint behavior.
quay.io (quay)
- Credential: a robot account (
myorg+ci/ token), created under Organization or User Settings → Robot Accounts. Your own quay.io username and password also work. - Token realm:
/v2/auth. The minted token is an RS256 JWT, observed TTL 3600s, response fieldtoken. - Bad credentials are rejected 401
Invalid Username or Password. - Path-gate caveat: the
/v2/authprefix also matches data-plane paths of repositories whose namespace starts withauth(e.g./v2/authzed/...). Such requests carry the credential to quay.io itself — never to a third party — so this is a scope wrinkle, not an exposure. - Self-hosted Red Hat Quay / Project Quay: pass
--base-url. The realm path can differ per install; check theWWW-Authenticateheader returned byGET /v2/on your registry.
GitHub Container Registry (ghcr)
- Credential: a GitHub personal access token. Classic PAT with
read:packages(pluswrite:packagesto push) for private packages; a fine-grained PAT authenticates at the realm and can pull public packages. The realm authenticates by the PAT alone — any non-empty username passes (an empty one is rejected), thoughdocker loginwants your real one. - Token realm:
/token. - Important deviation: for PAT-authenticated mints, ghcr's
tokenis your PAT base64-encoded, not a short-lived scoped JWT. Treat every minted token as equivalent to the PAT itself and scope the PAT accordingly:read:packagesonly, noreposcope, with an expiry. (Anonymous scoped mints for public images do return opaque short-lived pull tokens.) - Bad credentials are rejected 403 (not 401).
atcr.io (atcr)
- Credential: your ATProto handle + a dedicated app password (create one in your PDS/Bluesky settings; never your account password).
- Token realm:
/auth/token. The response carries bothtokenandaccess_token(identical values) plusexpires_in/issued_at. - The JWT lives about 45 seconds — use it immediately and expect to re-mint often.
- The realm does not accept a minted JWT as the Basic password (401); only the app password authenticates.
Google Artifact Registry (gar)
-
Credential: a service account JSON key. The username is always the literal
_json_key(the integration hardcodes it — you supply only the key). Grant the SAroles/artifactregistry.readerto pull,roles/artifactregistry.writerto push. -
Paste the key as a single line: the downloaded key file is multi-line JSON whose newlines are only formatting, so flatten it losslessly with
tr -d '\n' < key.json(or pass--key=-and pipe the file on stdin from the CLI). -
Token realm:
/v2/token. Minted tokens are opaque (base64 JSON, not a JWT), observed TTL 43200s (12h). -
Regions: the default target is
us-docker.pkg.dev. For any other region pass--base-url— the multi-regionseurope-docker.pkg.dev/asia-docker.pkg.dev, or a regional host such asus-central1-docker.pkg.dev/europe-west1-docker.pkg.dev. One integration per region host; the image path is alwaysPROJECT/REPOSITORY/IMAGE. -
Pull (stock docker, zero config, no login):
docker pull <name>.int.exe.xyz/PROJECT/REPOSITORY/IMAGE:TAG -
Push works the same way — tag with the integration hostname and push; docker re-runs the token dance with
push,pullscope automatically:docker tag myimage <name>.int.exe.xyz/PROJECT/REPOSITORY/IMAGE:TAG docker push <name>.int.exe.xyz/PROJECT/REPOSITORY/IMAGE:TAGBlob uploads ride through the integration (GAR answers upload legs with relative
Locationheaders, which the client resolves against the integration hostname). -
Anonymous-mint caveat: GAR's realm answers unauthenticated mints with HTTP 200 and a degraded token (usable only for public repos). A 200 from the realm therefore does not by itself prove the key worked — the integration's verify sends the key and relies on GAR rejecting bad keys (401 for malformed, 404
NAME_UNKNOWNfor well-formed-but-unknown), both non-2xx. -
The realm also accepts
oauth2accesstoken:<OAuth2 access token>as Basic — the integration does not use this form (access tokens expire hourly; the_json_keyform is the durable one).
Shelley
What is Shelley?
Shelley is a coding agent. It is web-based, works on mobile, and, when you
start an exe.dev VM with the default exeuntu image, it is running on port
9999, and you can access it securely at https://vmname.shelley.exe.xyz/.
You can ask Shelley to install software (e.g., run a Marimo notebook on port
8000), build a web site, browse the web, and anything in between. That said,
you don't have to use Shelley if you don't want to. Other coding agents run
just fine on exe.dev VMs and some are pre-installed on our default image.
If you want, disable it with sudo systemctl disable --now shelley.service.
By default, Shelley uses the LLM integration, backed by the LLM Gateway, so you don't need to configure any API keys. You can "bring your own key" to Shelley, and use it with your favorite provider.
Shelley's Name
Shelley is so named because the main tool it uses is the shell, and I like putting "-ey" at the end of words. It is also named after Percy Bysshe Shelley, with an appropriately ironic nod at "Ozymandias." Shelley is a computer program, and, it's an it.
Unique Features
If you're used to other coding agents, Shelley is pretty similar. Because Shelley runs on the web, it doesn't run in a specific directory, so you'll need to choose a starting directory for your agent. You can also have multiple conversations going on in parallel, either on one VM or on multiple.
Generations
A Shelley conversation is a log of messages, which are sent to the model at every step. When conversations get long, you can choose to "compact" them, and this creates a new "generation." Only the current generation is sent to the LLM, so you can restart with a smaller context window. Compaction compresses part of the context window and leaves recent messages alone.
Besides not working as well as contexts grow large, LLMs are quadratically expensive in the context length.
Browser Tools
Shelley's browser tool controls a Chromium and can navigate and take screenshots. It can also take profiles and do considerable debugging.
Bring Your Own Key
Shelley uses exe.dev's default LLM integration by default, but you can use your own API keys instead. When creating a new conversation, bring up the models menu by choosing "Add / Remove Models..." in the models drop-down.
The workflow for common providers like Anthropic, OpenAI, and Gemini is
straight-forward. If you have a z.ai coding subscription (as opposed to the
per-token endpoint), use the coding endpoint
https://api.z.ai/api/coding/paas/v4.
AGENTS.md
Shelley reads guidance files, specifically:
- personal
AGENTS.mdfile at~/.config/shelley/AGENTS.md - project
AGENTS.mdfiles in the git root or working directory
Shelley will also notice CLAUDE.md and DEAR_LLM.md files.
Upgrading Shelley
Since Shelley is running on your VM, you're running the version that existed when you created your VM. There are two ways to update:
- From the Shelley menu: Click the
⋮menu in the top-right corner of the Shelley UI and select Check for New Version. - From the exe.dev shell: Run
shelley install <vm>.
Teams
Teams
Teams let multiple people share a pool of VMs under one roof. Instead of everyone managing their own account and quota separately, a team pools resources and gives admins visibility into all team VMs.
With a team you get:
- Shared VM pool. All members' VMs count toward one shared quota instead of individual limits.
- Admin access. Team admins can SSH into, rename, delete, and copy any member's VM. Other team members can copy a member VM after its owner enables team shell access.
- Team sharing. Share a VM with the whole team in one command. New members automatically get access.
- SSO. Enforce Google OAuth or custom OIDC (Okta, Azure AD, etc.) for everyone on the team.
Roles
Teams have three roles:
| Role | Can do |
|---|---|
| billing_owner | Everything. Manages billing, can disband the team, configure SSO. |
| admin | Add/remove members, SSH into member VMs, transfer VMs. |
| user | Create and manage their own VMs, access team-shared VMs. |
A team always has exactly one billing owner. There can be multiple admins.
Getting started
- Create a team and manage members
- Understand how VMs work in a team
- Control who can share team VMs
- Learn how Shelley credits work for members
- Set up SSO (optional)
For the CLI command reference, see team.
Managing Members
Creating a team
Create a team through billing checkout. If you're on a trial, visit exe.dev/subscribe and choose the Team plan to create a team and subscribe automatically. You can also visit exe.dev/billing to enable a team and subscribe; if you already have an individual subscription, it will be cancelled.
From SSH, run billing manage to get a checkout link:
$ ssh user@exe.xyz
exe.dev ▶ billing manage
Whichever path you take, you become the team's billing owner, and your
existing VMs become part of the team's shared pool. The team command
(and its subcommands) becomes available once you're a team admin or
billing owner.
Inviting members
Admins and billing owners can invite people:
team add alice@example.com
This sends an invite email. How the invite works depends on whether the person already has an exe.dev account:
- Existing user: They'll see the invite on their
/user/teamspage and must explicitly accept it. When they join, their existing VMs become part of the team's shared pool and visible to team admins. If any of their VMs have IP shard collisions with existing team members, those shards get reassigned automatically. - New user: The email contains a signup link. When they create their account through that link, they're automatically added to the team.
Invites expire after 24 hours.
Listing members
View members and pending invites in the web roster at https://exe.dev/team/members.
team members
This shows all members and their roles. You can also use the alias team ls.
The team members command (like the rest of the team command) is
available to team admins and billing owners only.
Removing members
team remove alice@example.com
A member who still owns VMs cannot be removed outright: the VMs would be orphaned on a user who is no longer in the team. The command refuses and lists the VMs.
To offboard someone who has left, transfer their VMs to another current member in the same step:
team remove alice@example.com --transfer-vms-to bob@example.com
Every VM alice owns moves to bob, then alice is removed. No VM is ever deleted.
The target must be a current member of the same team, and cannot be alice
herself. The flag does not apply to a pending invite, which owns no VMs; remove
that with plain team remove to revoke it.
Transfers happen one VM at a time and each one commits on its own, so a failure part-way through leaves the earlier VMs already transferred. The command then keeps alice in the team and names the VM that failed. Re-run the same command after fixing the cause; VMs that already moved are skipped.
Transferring VMs
Admins can move a VM from one team member to another:
team transfer mybox alice@example.com
This changes ownership and clears all existing shares on the VM (both individual and team shares). The new owner can re-share as needed.
Viewing team info
Run team with no arguments to see a summary:
$ team
Team: Acme Corp
Your role: billing_owner
Members: 4
VMs: 12 / 100
Disbanding a team
The billing owner can disband the team with team disable, but only after
all other members have been removed. This is also interactive — you'll be
asked to confirm.
Disabling a team:
- removes all team shares
- cancels pending invites
- removes team auth and SSO configuration
- deletes the team
Your VMs stay on your personal account. You'll need to resubscribe to an individual plan yourself; exe.dev won't automatically reactivate your previous individual subscription.
Team VMs
Shared quota
When you're in a team, individual VM limits are replaced by team-wide limits.
All members' VMs count toward the same pool. Run team to see current usage:
VMs: 12 / 100
Creating VMs
Team members create VMs the same way as individual users. The VM is owned by whoever creates it and counts toward the team's shared quota.
Admin visibility
Team admins (and the billing owner) see all team members' VMs by running
team vm ls. These appear under a "Team VMs" section, separate from your
own. The listing can be grouped with --group=user or --group=access
(as well as tag and region). Admins can also visit
exe.dev/team/vms to see all VMs on their team.
Admin SSH access
Admins can SSH directly into any team member's VM, both by name and by IP shard routing. This works the same as SSHing into your own box:
ssh mybox@exe.dev
Admins can also delete, rename, and copy member VMs. Other team members can
copy after the VM owner grants the team Root access with share add mybox team --root. A web-only team share does not allow copying.
Sharing with the team
There are two kinds of team sharing.
Web access
Share a VM's private web proxy with the whole team:
share add mybox team
Team shares are dynamic — when a new member joins, they automatically get access to all team-shared VMs. Remove it with:
share remove mybox team
SSH, Shelley, and web access
Web sharing (share add mybox team) grants web-proxy access only. To let any
team member (not just admins) SSH into the VM, use the browser Terminal, or use
Shelley:
share add mybox team --root
Because Root access is strictly more powerful than Web access — a teammate with SSH can port-forward to any port anyway — it also grants access to the VM's private web routes. You don't need to run both commands.
Revoke whole-team Root access with:
share remove mybox team --root
You can also grant one existing account Root access without sharing with the whole team:
share add mybox teammate@example.com --root
Named Root shares persist independently of whole-team access. Grants to people outside the team are subject to the team's external-sharing policy.
See team sharing controls for more on how teams can share VMs, and the individual sharing docs for more on how sharing works.
Sharing controls
By default, any team member can share their VMs publicly or with people outside the team. Admins can lock this down so that only admins (and the billing owner) decide how broadly team VMs are exposed.
Viewing settings
Run team settings to see the current sharing mode:
team settings
Team settings:
  vm-sharing: all-members
Changing the sharing mode
Only team admins and the billing owner can change sharing settings:
team settings vm-sharing <admins-only|all-members>
There are two modes:
all-members(default). Any team member can make a VM public (share set-public) and grant Web or Root access to external accounts (share add <vm> <email> [--root]).admins-only. Regular members can no longer make VMs public or grant access to people outside the team. Only admins and the billing owner can.
Switching to admins-only:
team settings vm-sharing admins-only
Sharing a VM with the whole team (share add <vm> team) and granting the
whole team Root access (share add <vm> team --root) are unaffected by this
setting.
See the sharing docs for how the underlying share mechanisms work, and Team VMs for team-scoped sharing.
Shelley
Credits aren't shared between team members. Each member keeps their own Shelley usage pool, with their own balance, history, and monthly allowance.
What a team does change is how those credits get paid for. Team members can buy Shelley credits using the team's managed credit card instead of their own. The charge goes to the team's billing owner, but the credits land in the individual member's pool.
Buying credits on the team card
When you're in a team, the credit-purchase flow on your profile page lets you charge purchases to the team's payment method. The credits are added to your personal Shelley balance and only you can spend them. The team's billing owner sees the charge on the team invoice.
Admins and billing owners can review per-member Shelley spending in the team billing page.
Pooled usage
Pooled Shelley usage across a team isn't available today. We plan to offer it at a later date.
Can I turn off Shelley for my team?
At this time, Shelley is available for all team members. If you need to disable purchasing for certain users, reach out to support@exe.dev.
Team SSO
By default, team members log in with email and passkey. Team admins can enforce a different auth provider for the whole team.
Viewing the current provider
$ team auth
Auth provider: default
Google OAuth
To require all team members to sign in with Google:
team auth set google
That's it. Members will be redirected to Google's sign-in page.
OIDC (Okta, Azure AD, etc.)
For a custom identity provider, use the oidc option. You'll need your
provider's issuer URL, client ID, and client secret.
team auth set oidc \
  --issuer-url=https://your-org.okta.com \
  --client-id=0oa1234567890 \
  --client-secret=your-secret-here \
  --display-name="Acme SSO"
exe.dev will run OIDC discovery against your issuer URL to validate the configuration. On success, you'll see the callback URL:
Auth provider set to oidc
SSO issuer:    https://your-org.okta.com
Callback URL:  https://exe.dev/oauth/oidc/callback
Set your IdP's redirect URI to the callback URL above. This is the URL your identity provider needs to redirect users back to after authentication.
Updating OIDC settings
Run the same team auth set oidc command again with updated values. If you
want to keep the existing client secret, pass --client-secret=***.
The --display-name flag is optional and controls what's shown to users on
the login page.
Resetting to default
To clear SSO and go back to email/passkey:
team auth set default
This removes any configured SSO provider.
Invites
Invites
Invites are how you bring someone new into exe.dev. There are two related systems:
- Trial invites give someone a one-time signup path into a trial.
- Invite rewards use a reusable link that rewards both accounts after the invited person upgrades to a paid plan.
You can manage both from the Invites page in the web UI or with the
invite command.
Trial invites
Trial invites are single-use invite codes assigned to your account. Each unused invite can be shared as a web link or as an SSH command. When someone signs up with it, the code is marked used and no longer appears in your unused invite list.
Use:
exe.dev ▶ invite manage
to open the Invites page, or:
exe.dev ▶ invite request
to request more trial invites when your plan allows it.
Invite rewards
Invite rewards are separate from your pool of one-time trial invites. Instead of sharing a different code each time, you choose a reward and get one stable invite link. New signups through that link carry the reward you selected.
Anyone who signs up through your reward link starts on a 30-day trial, just like trial invites.
The reward is granted after the invited person upgrades to a paid plan. At that point, both accounts receive the selected reward. Reward types can include credits, extra memory, or extra disk, depending on the rewards currently offered.
To create or update your reward link:
exe.dev ▶ invite rewards
exe.dev ▶ invite set-reward <reward>
exe.dev ▶ invite show
Changing your selected reward keeps the same link, but future signups through that link use the new reward. People who already signed up keep the reward that was attached when they joined.
Activity and earned rewards
Use:
exe.dev ▶ invite activity
or the Invites page to see who signed up, which reward applies, and whether a reward invite is still waiting for an upgrade or has been rewarded.
After rewards are granted, credits appear with your account credits. Memory and disk rewards are added to your account limits and are also visible with:
exe.dev ▶ billing rewards
Billing
Overview
Exe.dev billing has two parts: a flat monthly subscription, plus extra charges if you go over bandwidth or disk usage. An active subscription is needed to create and manage VMs.
Each plan has different price points (known as tiers) that set one pool of vCPU and RAM shared by all of your VMs. It is not a per-VM size: one VM can use the whole pool, or many smaller VMs can split it. On a team, each user gets their own pool. We currently offer four tiers: small, medium, large and extra-large. As you scale your applications, you can upgrade or downgrade your tier based on your needs.
What each size includes
| Size | Shared capacity (total; per user on Team) | Individual | Team, per user |
|---|---|---|---|
| Small | 2 vCPU · 8 GB RAM | $20/mo | $25/mo |
| Medium | 4 vCPU · 16 GB RAM | $40/mo | $50/mo |
| Large | 8 vCPU · 32 GB RAM | $80/mo | $100/mo |
| XLarge | 16 vCPU · 64 GB RAM | $160/mo | $200/mo |
Every size above allows up to 50 VMs. That is a count limit inside the shared capacity, not 50 full-size VMs.
Every plan includes a $20/month Shelley credit. On team plans each user gets their own $20. The credit is the same on every size and refreshes at the start of each month (UTC).
All subscriptions are paid for in advance meaning you are paying for the month ahead. We bill for usage at the end of each cycle, charging you for what you actually used.
FAQ
Does "50 VMs" mean 50 full-size VMs?
No. 50 is the maximum number of VMs you can have. All of your VMs together share your plan's capacity. On extra-large that is 16 vCPU and 64 GB RAM in total: run one VM at the full 16 vCPU, or split the same capacity, for example 2×8 vCPU or 4×4 vCPU.
Can one VM use the whole pool?
Yes. A single VM can be resized up to your plan's full capacity. Adding more VMs does not add capacity; they draw from the same pool.
Does the Shelley credit grow with larger sizes?
No. The Shelley credit is $20/month on every size, for individual and team plans alike. On team plans it is per user. Buy more at exe.dev/user/shelley.
Subscriptions
Subscriptions come in two flavors: Individual and Team.
Individual subscriptions are owned and managed by a single user whereas team subscriptions are owned by the team. Both individual and team subscribers can change their tier and the changes will go into effect immediately. On a team, any billing owner can manage the team’s subscription.
Upgrades and Downgrades
Plan changes are prorated for the rest of the billing cycle. Since subscriptions are billed upfront, you’re charged the prorated difference immediately when you upgrade.
Example: Small to Medium
If you upgrade from Individual Small to Individual Medium partway through a billing cycle, we’ll credit the unused portion of your Small plan and charge you for the rest of the cycle at the Medium rate. Because Medium is more expensive, you’re charged the prorated difference immediately.
Example: Medium to Small
If you downgrade from Individual Medium to Individual Small partway through a billing cycle, we’ll credit the unused portion of your Medium plan and charge you for the rest of the cycle at the Small rate. Because Small is less expensive, you will receive a prorated credit to your account which will then be applied to future invoices.
Seats
Team subscriptions are billed per seat, with every member counting the same regardless of their role. Seat changes midcycle are prorated, just like plan changes. Adding seats means you’ll be charged the prorated amount immediately, while removing seats means you’ll get a credit for the difference.
We try our best not to inundate you with invoices. That said, adding or removing members in quick succession may result in lots of invoices being generated at once.
Switching Between Individual and Team Subscriptions
If you decide to switch to a team subscription, your individual subscription will not be converted. Instead, we’ll cancel your individual subscription, credit the unused portion to your personal account and set up a new subscription owned by the team. If you decide to switch back to an individual plan at any point, we’ll cancel the team subscription and set you up on your previous individual plan. Any credits on your personal account will be applied to your individual subscription.
Cancelling Your Subscription
If you cancel your subscription, it will remain active until the end of the billing cycle. You will have access to your current plan during that time. At the end of the billing cycle, you will be converted to a free plan that lets you connect to existing VMs.
Usage
Exe.dev grants all active subscriptions a set amount of vCPU, RAM, disk space and bandwidth. On an individual subscription, this allowance is shared across all your VMs. On a team subscription, each member gets their own allowance, shared across their VMs
vCPU and RAM are a total pool: your plan size is the capacity all of your VMs draw from together, not a size per VM. Adding VMs does not add vCPU or RAM. Adding VMs does not add disk or bandwidth allowance either, and going over those two is what generates the overage charges below.
As you use your VMs to run applications, they will start consuming the allocated disk space and bandwidth. Once you exceed those allocations, we will start charging you for overages.
When your subscription renews at the end of the billing cycle, we will also charge you for the previous period’s overage. These charges appear on the same invoice.
Disk
Extra storage is calculated in GiB-months. One GiB-month represents 1 GiB of extra storage used for one full monthly billing cycle.
Extra storage usage can fluctuate during a billing cycle, especially for short-lived VMs or workloads that create and delete large amounts of data. To account for this, exe.dev bills for average extra storage usage over time, not peak usage.
For example, if a VM was active for 10 days of a 30-day billing cycle and averaged 100 GiB of extra storage during that time, exe.dev would bill:
100 * 10 / 30 = 33.33 GiB-months
So the billable extra storage usage would be 33.33 GiB-months, not 100 GiB-months.
Bandwidth
Unlike disk usage, which fluctuates, bandwidth is a running total—outbound traffic across your VMs, accumulated over the billing cycle. Outbound bandwidth is any traffic that leaves exe.dev's infra. Inbound traffic is never billed.
At the end of the billing cycle, we look at how much outbound bandwidth was used relative to what's included in your plan. Extra bandwidth is measured in GiB (1 GiB = 1,073,741,824 bytes).
On a team subscription, each member gets their own bandwidth allowance, and overage is calculated per member.
Cloud Pool
If you find that our current subscriptions don’t fit your workflow or workloads, we recommend you reach to support@exe.dev out about our Cloud Pool plan. This plan is 100% usage based and we are happy to work with you based on your needs.
FAQ
What is the host key for exe.dev?
When you first ssh exe.dev you are looking for the fingerprint:
SHA256:JJOP/lwiBGOMilfONPWZCXUrfK154cnJFXcqlsi6lPo
Ensuring that fingerprint is displayed the first time means that
and all future connections from that device are going directly
to exe.dev.
How do I use a specific SSH key for exe.dev? How do I manage multiple exe.dev accounts?
If you want to specify which key to use, use ssh -i ~/.ssh/id_ed25519_exe exe.dev or add the following stanza to your ~/.ssh/config:
Host exe.dev *.exe.xyz
  IdentitiesOnly yes
  IdentityFile ~/.ssh/id_ed25519_exe
If you have multiple accounts, you will need different SSH keys per account.
You can create more keys with ssh-keygen -t ed25519 -f ~/.ssh/my-alt-account
or similar. If you work on multiple accounts frequently, use a script like
exe-ssh-config-generator
to configure your SSH configuration to use the appropriate key for the appropriate hostnames.
How do I connect VSCode to my VM?
On your dashboard, at https://exe.dev/, there are links to open in VSCode. This leverages VSCode's SSH remote features. The link is of the form:
vscode://vscode-remote/ssh-remote+<vmname>.exe.xyz/home/exedev?windowId=_blank
The /home/exedev in that URL is the path on the filesystem for VSCode to
consider as your workspace.
How do I copy files to/from my VM?
Use scp.
scp file.txt my-vm.exe.xyz:~/
scp my-vm.exe.xyz:~/file.txt .
scp -r dir my-vm.exe.xyz:~/
Piping through SSH
If scp isn't available, pipe through a plain SSH connection:
cat local-file | ssh my-vm.exe.xyz 'cat > ~/remote-file'
ssh my-vm.exe.xyz 'cat ~/remote-file' > local-file
tar cf - file dir | ssh my-vm.exe.xyz 'tar xf - -C ~/'
How do I write my VM's SSH destination?
Usually you ssh to your VM in the obvious way:
ssh my-vm.exe.xyz
Sometimes our shenanigans to make that work...don't.
When that happens, you can always specify the VM in the username instead:
ssh vm+my-vm@vm.exe.xyz
Both forms land you the same place. The first one is convenient; the second one always works.
Can I run docker images?
Sure, why not; it's just a VM. If you start with the exeuntu image,
you can run docker run --rm alpine:latest echo hello, and go from there!
How do you pronounce "exe"?
We pronounce it "EX-ee". But you don't have to.
How do I access GitHub? How do I set up a minimal GitHub token?
You can use the gh tool to login to GitHub on your VM, and it will
work fine.
If you want to give the VM only access to one repo, and perhaps make that access read-only, you can use create a fine-grained personal access token. Choose a single repository, and add the "Contents" permission. Choose read-only or read-write as your use case desires.
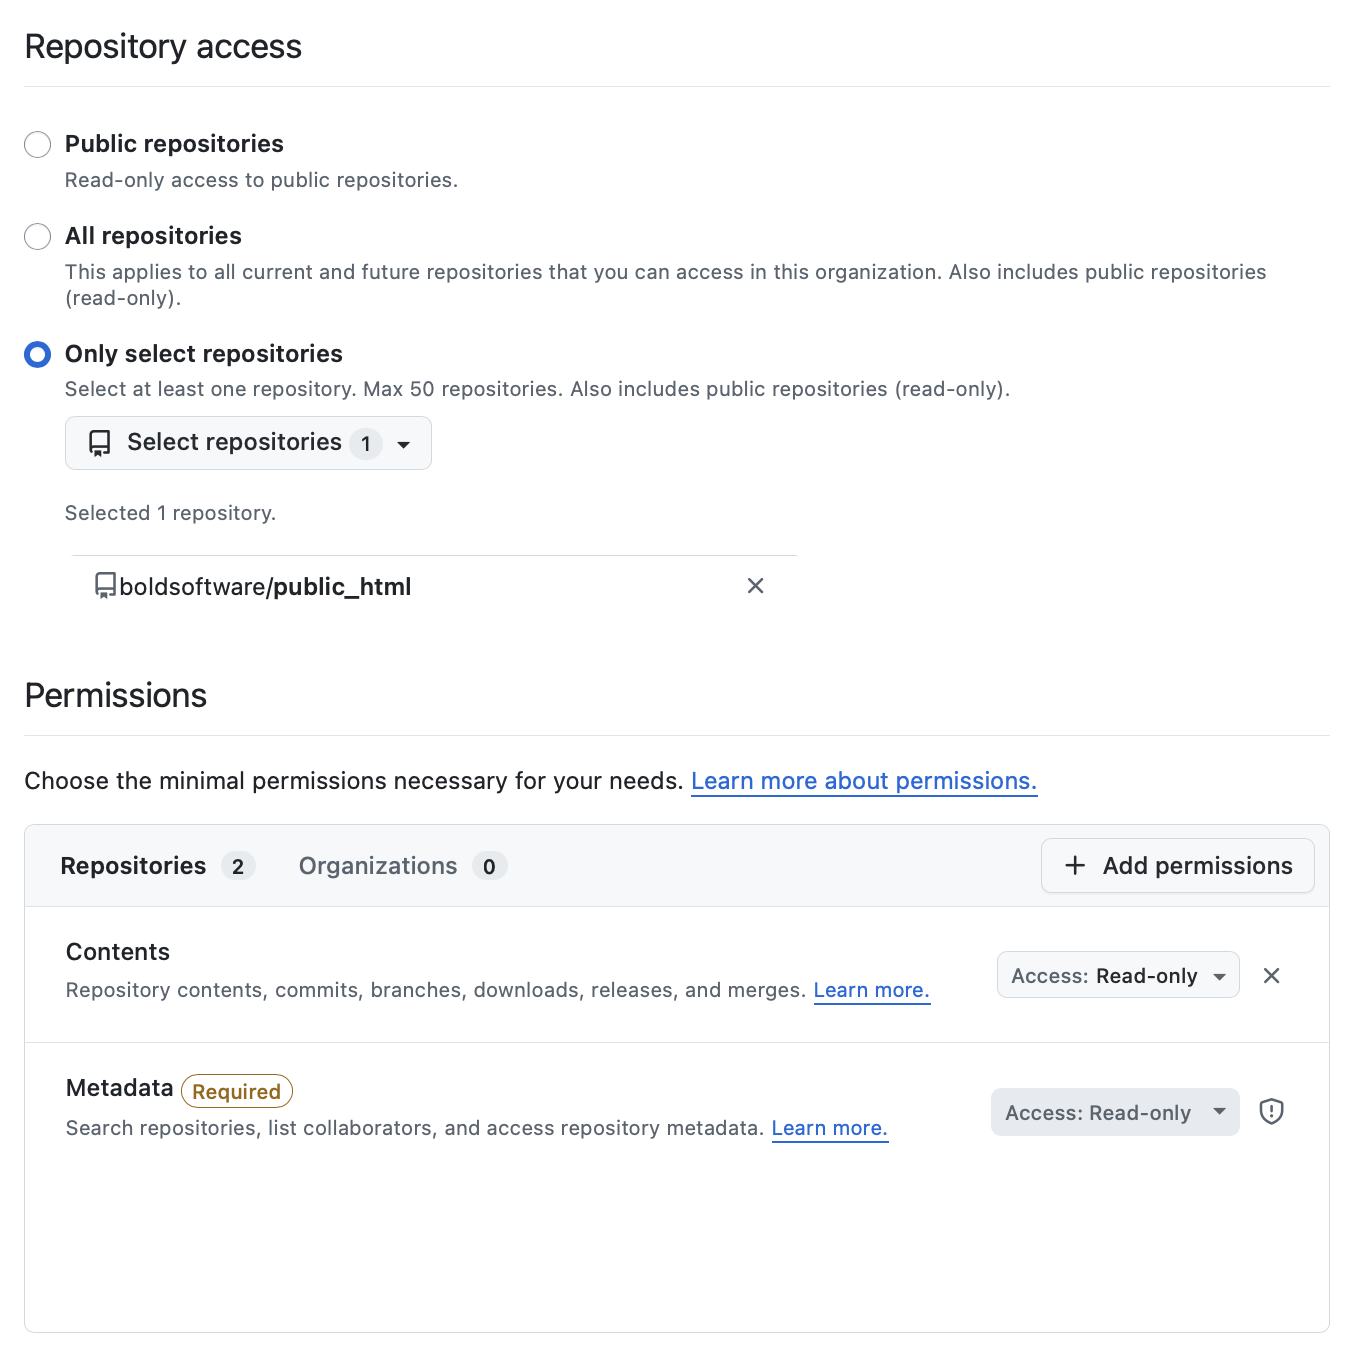
After doing so, use the token like so:
$ cat > token
(paste the token and hit ctrl-d)
$ gh auth login --with-token < token
$ gh auth setup-git
$ git clone https://github.com/USER/REPO
You must use HTTPS URLs (like https://github.com/USER/REPO) when cloning
repositories, not SSH URLs (like git@github.com:USER/REPO), when using
personal access tokens.
How do I connect from one VM to another?
VMs, even within one account, are isolated from each other. There is not a "private network" which connects them.
Some of our users use Tailscale to
create a virtual private network to connect their VMs. Tailscale
allows for exposing SSH (see the docs,
it requires tailscale set --ssh), which operates independently
of the SSH access provided by exe.dev.
You can also connect via SSH, either by forwarding your SSH agent connection or creating additional keys and registering them to your account.
How do I set up tab completion for VM names?
Two options
- dynamic completion that queries your VM list on each tab press
- static SSH config approach
Dynamic completion never goes out of date, but has a lag. Works best with zsh.
Static completion is more general purpose, but requires updating when your VM list changes.
Dynamic completion
The trick is to query ssh exe.dev ls --json on each tab press. Requires jq.
Zsh
Add to ~/.zshrc:
_exe_hosts() {
    reply=(${(f)"$(ssh exe.dev ls --json 2>/dev/null | jq -r '.vms[].ssh_dest')"})
}
zstyle -e ':completion:*:(ssh|scp|rsync):*' hosts '_exe_hosts'
The zstyle approach only overrides the hosts list. Flag and path completion still work normally.
Bash
See the caveat below before using!
Add to ~/.bashrc:
_exe_hosts() {
    local cur="${COMP_WORDS[COMP_CWORD]}"
    local hosts
    hosts=$(ssh exe.dev ls --json 2>/dev/null | jq -r '.vms[].ssh_dest')
    COMPREPLY=($(compgen -W "$hosts" -- "$cur"))
}
complete -F _exe_hosts -o default ssh scp rsync
Caveat: complete -F replaces the default completion function for these commands, so you lose flag completion (ssh -<TAB>). If that hurts, consider using the static SSH config approach instead.
Fish
Add to ~/.config/fish/config.fish:
complete -c ssh -fa '(ssh exe.dev ls --json 2>/dev/null | jq -r ".vms[].ssh_dest")'
complete -c scp -fa '(ssh exe.dev ls --json 2>/dev/null | jq -r ".vms[].ssh_dest")'
complete -c rsync -fa '(ssh exe.dev ls --json 2>/dev/null | jq -r ".vms[].ssh_dest")'
SSH config approach (any shell)
Add your VM names to ~/.ssh/config, so shells pick them up automatically.
One time, add to ~/.ssh/config:
Include ~/.ssh/exe-hosts
Every time you create, delete, or rename a VM, regenerate the config:
ssh exe.dev ls --json | jq -r '.vms[].ssh_dest' | sed 's/^/Host /' > ~/.ssh/exe-hosts
How does exe.dev work?
You're an engineer. We're engineers. Let's talk about what's going on under the hood.
An "exe.dev" VM runs on a bare metal machine that exe.dev rents. We happen to use Cloud Hypervisor, but that's a bit of an implementation detail (and may change!).
With most providers, your VM starts with a "base image" and is given a block device. Exe.dev instead starts with a container image (by default, "exeuntu"), and hooks it up with a block device with the image on it. This makes creating a new VM take about two seconds. In exchange, we lose some flexibility: you don't get to choose which kernel you're using.
On the networking side, we don't give your VM its own public IP.
Instead, we terminate HTTPS/TLS requests, and proxy them securely
to your VM's web servers. For SSH, we handle ssh vmname.exe.xyz.
ssh exe.dev sometimes asks me to register
When you ssh to a server, you authenticate using a public key. If you have multiple public keys, they are offered to the server one at a time. Out of privacy concerns, the server must accept or reject each key in turn; it cannot wait to see the full set.
When you ssh exe.dev, our server decides based on the first key it receives whether it knows who you are. If we don't recognize the key, we ask you to register.
This is a pretty fundamental limitation of ssh.
If this is happening to you, options include:
- specify a particular key to use with exe.dev
- add the other public keys to exe.dev using one of:
- run
ssh-key addin the repl (docs) - visit your security page
- "re-register" with the new keys using your same email address
- run
I found an undocumented command! Can I use it?
Congratulations. Empirically, you can use it. Should you use it? Only if you will enjoy us breaking it later. You know the drill.
How do I run Next.js, Vite, or other JS dev servers on my VM?
The exe.dev HTTPS proxy makes requests to https://my-vm.exe.xyz/ work
to talk to your VM. To allow Vite and Next.js to work, you need to add your
VM hostname to the framework's origin allow-list.
Next.js
Next.js ≥ 15.2 uses allowedDevOrigins:
// next.config.js
module.exports = {
  allowedDevOrigins: [
    'my-vm.exe.xyz',
    'my-vm.exe.xyz:8000', // and any other ports in 3000–9999 you use
  ],
};
npx next dev -H 0.0.0.0 -p 8000
See allowedDevOrigins.
Vite
Vite ≥ 5.0 uses server.allowedHosts:
// vite.config.js
import { defineConfig } from 'vite';

export default defineConfig({
  server: {
    host: '0.0.0.0',
    port: 5173,
    allowedHosts: ['my-vm.exe.xyz'],
  },
});
See server.allowedHosts.
How does exe.dev measure disk usage?
We look at the filesystem usage of your ext4 filesystem. If you have a VM with a disk of 25 GB, the most disk usage that this could use is 25 GB, but less is very likely.
exe.dev will occasionally run fstrim or equivalent to all our infrastructure
to reclaim your free space.
The default exeuntu is about
4 GB in size. We think a "batteries included" image is a great default,
but if you are optimizing for space, you can build your own smaller image with
the tools you require.
Teach your coding agent to exe.dev
A coding agent skill for exe.dev is available at skill/SKILL.md.
This skill gives your agent a quick reference for exe.dev and points it to the docs index for details. The docs are structured for progressive discovery to keep your context window sweet and clean.
Use Cases
Intro
The use cases in this section are recipes to set up common
software on an exe.dev VM. Since creating a new VM is as
simple as ssh exe.dev new, trying them out is easy.
We also recommend using your preferred coding agent (or, Shelley, the one built into our default image) to give this a shot, and produce a script to reproduce itself.
Dev, Test, Prod: Choose One, Two, or Three
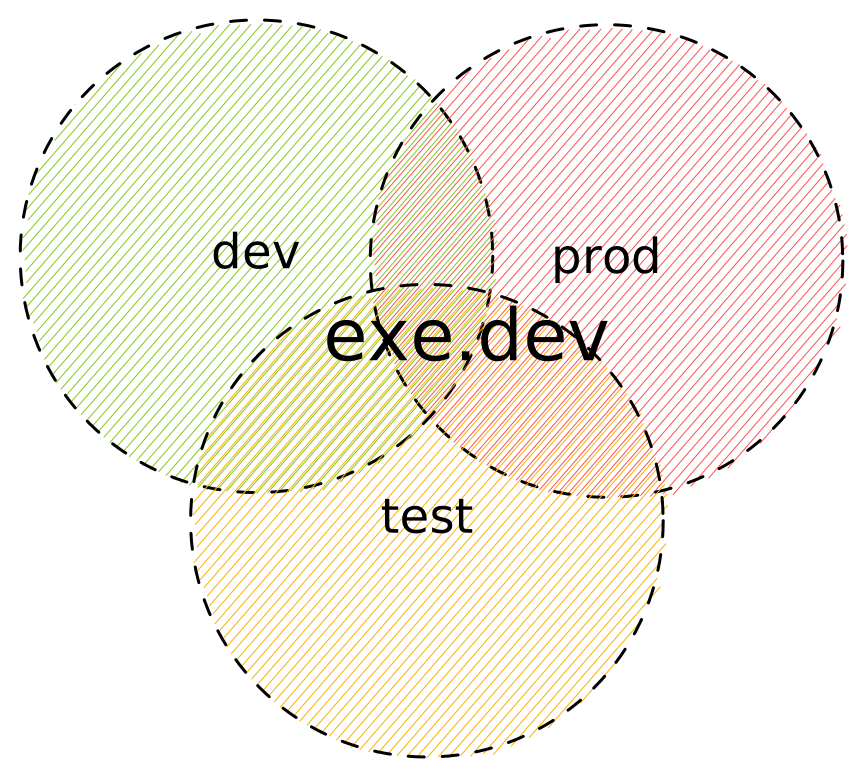
Industry-wide, we often develop our software in three distinct environments. Perhaps your laptop is a Mac; your CI system is hosted GitHub Actions, and your prod is k8s.
Three-in-One
For some use cases, you need not bother with the complexity; use one exe.dev vm for all three. A blog, a dashboard, a link shortener, a bot, and so on: these work well with the environments collapsed. Add features by asking Shelley to do so. Set up continuous deployment by asking Shelley to poll every hour. Use git for a backup if it calls for it. Voila!
Just Dev
Use an exe.dev vm (or many) to work on your software. Set up the GitHub integration (docs) to make cloning easy. Some people work serially. Some people work using multiple worktrees on one vm. Some people have one vm per task or project. Clone your VMs using ‘cp’ or configure them using setup scripts.
Using remote VMs opens up the convenience of mobile, opportunities for sharing, not to mention isolation from your other projects.
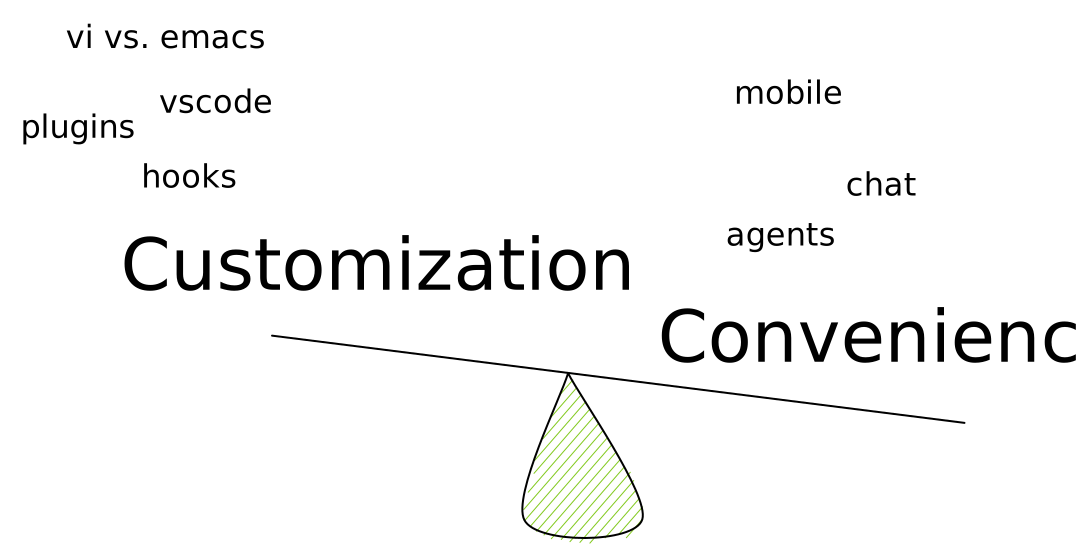
Why now? Many, many companies have tried remote development before. There is an entire graveyard of failed startups in this space. The big difference is agents. If your development is increasingly chat-based, the old arguments about getting your environment and dot-rc files just right fade away. The convenience of starting a task from your phone overwhelms the decades-old bashrc file and finely crafted PS1. As a bonus, you get the ability to share with your co-workers. Pull requests are so yesterday; send them a link to a working demo instead.
Just Test
Exe.dev VMs are a great place to riff on an idea. Perhaps you want to explore a particular open source project. Or you want to do some data analysis and share it with your co-workers? Or prototype your next idea? Or find your flakes by running your tests over and over again. Or let loose Shelley, our agent, on your app with its built-in browser? Or send off a security review. Or even just run a GitHub Actions runner.
Because you pick what access you want to give your VMs, and because they’re persistent, exe.dev VMs are great places to test stuff out.
Just Prod
You can host real, production software in exe. We support custom domains with a bit of DNS configuration (docs).
If you’re incredulous that this is a good idea, the entirety of Stack Overflow ran on just a few machines. Reach out to us if you want to enlarge your VM as far as modern hardware can go.
Private, Internal, or Public
Once you build it, you'll want to share it. You can keep it to yourself, and that's the default. Or you can share it with your team or with share links. Or you can share it publically. Sharing a VM's website is as easy as sharing any other online doc.
Cal.diy
Run Cal.diy on an exe.dev VM.
Cal.diy is an open-source, MIT-licensed scheduling platform from Cal.com. It works well for personal booking pages, team scheduling, and testing calendar workflows without needing a hosted Cal.com account.
Quick start
Create a new Cal.diy VM from the Cal.diy starter.
How it works
The starter installs Docker and runs the official Cal.diy Docker image with a PostgreSQL container. It writes the required runtime variables, generates secrets, and starts the stack with Docker Compose.
Cal.diy runs on port 3000. Use exe.dev's port-qualified proxy URL to open it in your browser:
https://<vm-name>.exe.xyz:3000/
This is different from many exe.dev starters that put nginx on port 8000. The Cal.diy starter keeps Next.js on port 3000 and exposes that port directly through the exe.dev proxy.
If you want Cal.diy to use the default URL with no port suffix, change the VM's default HTTP proxy port with the SSH lobby command:
ssh exe.dev share port <vm-name> 3000
After that, https://<vm-name>.exe.xyz/ will proxy to Cal.diy on port 3000. See the share port command docs for details.
Runtime variables
The official Docker image supports runtime variables such as DATABASE_URL, NEXT_PUBLIC_WEBAPP_URL, NEXTAUTH_URL, NEXTAUTH_SECRET, and CALENDSO_ENCRYPTION_KEY. exe.dev VMs run Docker normally, so Docker Compose can pass these values through an .env file.
The Cal.diy README notes that if NEXT_PUBLIC_WEBAPP_URL differs from the value baked into the image at build time, startup may take a little longer while the container updates statically built files. That is expected.
First-time setup
Open the app and complete the setup wizard to create your first user.
If the calendar connection step appears required and you do not want to connect a calendar yet, go directly to:
https://<vm-name>.exe.xyz:3000/event-types
Calendar integrations such as Google Calendar and Outlook require their own API credentials.
Operations
The project lives at /home/exedev/cal.diy on the VM. Useful commands:
sudo docker compose ps
sudo docker compose logs -f caldiy
sudo docker compose restart caldiy
sudo docker compose pull
sudo docker compose up -d
Flue
Flue is an agentic app framework for building AI agents that run code, manage files, and serve web apps.
Flue agents need a sandbox to execute code safely. Our exe.dev VMs are ideal for this because they are isolated by default, with a protected, authenticated HTTPS endpoint, SSH access, and persistent storage.
The exe.dev sandbox connector gives your Flue agent a full Linux VM over SSH + SFTP, with optional auto-creation and cleanup via the exe.dev API.
To wire it up, pipe the connector install prompt into your coding agent:
flue add https://exe.dev/flue/exedev.md --category sandbox --print | claude
flue add https://exe.dev/flue/exedev.md --category sandbox --print | codex
The connector source is at https://exe.dev/flue/exedev.ts.
Forgejo
Run Forgejo on an exe.dev VM.
Forgejo is a lightweight, self-hosted Git forge and a community fork of Gitea. It works well as a private Git server, a team forge, or a mirror for GitHub repositories.
Quick start
Create a new Forgejo VM from the Forgejo starter.
How it works
exe.dev's HTTPS proxy handles TLS and forwards requests to port 8000 on your VM.
For authenticated users, exe.dev adds the X-ExeDev-UserID and X-ExeDev-Email headers. See Login with exe.dev for details.
Forgejo can use reverse proxy authentication with X-WEBAUTH-USER and X-WEBAUTH-EMAIL. nginx translates the exe.dev headers into the names Forgejo expects.
With auto-registration enabled, any exe.dev user you share the VM with gets a Forgejo account the first time they visit.
Mirroring from GitHub
Forgejo can mirror repositories from GitHub.
In the Forgejo UI, choose New Migration, then GitHub. Enter the repository URL and a personal access token with read access. Forgejo will clone the repo and keep it in sync.
For private repos, use a fine-grained GitHub PAT with read-only Contents permission for the repos you want to mirror.
Forgejo vs Gitea
Forgejo and Gitea are very similar on exe.dev.
Forgejo is a community fork of Gitea. Both use the same config format, the same reverse proxy auth flow, and the same basic setup. Pick the project you prefer.
Gitea
Run Gitea on an exe.dev VM.
Gitea is a lightweight Git forge that is easy to run and simple to administer. It works well for private repos, small teams, and GitHub mirrors.
Quick start
Create a new Gitea VM from the Gitea starter.
How it works
exe.dev's HTTPS proxy handles TLS and forwards requests to port 8000 on your VM.
For authenticated users, exe.dev adds the X-ExeDev-UserID and X-ExeDev-Email headers. See Login with exe.dev for details.
Gitea can use reverse proxy authentication with X-WEBAUTH-USER and X-WEBAUTH-EMAIL. nginx translates the exe.dev headers into the names Gitea expects.
With auto-registration enabled, any exe.dev user you share the VM with gets a Gitea account the first time they visit.
Mirroring from GitHub
Gitea can mirror repositories from GitHub.
In the Gitea UI, choose New Migration, then GitHub. Enter the repository URL and a personal access token with read access. Gitea will clone the repo and keep it in sync.
For private repos, use a fine-grained GitHub PAT with read-only Contents permission for the repos you want to mirror.
Gitea vs Forgejo
Gitea and Forgejo are very similar on exe.dev.
Forgejo is a community fork of Gitea. Both use the same config format, the same reverse proxy auth flow, and the same basic setup. Pick the project you prefer.
Hermes
Hermes Agent is an open-source, self-hosted agent from Nous Research. It keeps persistent memory across sessions, builds reusable skills from the tasks it completes, and talks to you over Telegram, Discord, Slack, WhatsApp, Signal, or the CLI through a single gateway.
An always-on agent needs an always-on home. Our exe.dev VMs are ideal places to run it, because they are isolated by default, with a protected, authenticated HTTPS endpoint by default.
To set it up, create a VM with ssh exe.dev new, SSH in, and run the
one-line installer:
curl -fsSL https://hermes-agent.nousresearch.com/install.sh | bash
Then run hermes setup to pick a model provider and configure the messaging
gateway, and hermes doctor to verify the install. Run hermes to start
chatting.
Coming from Openclaw? hermes claw migrate
imports your existing settings, memories, and skills.
Jev
Jev is TypeSafe's model for making structured decisions from text. You send state and typed questions, and Jev returns values your code can use directly.
Create an HTTP proxy integration so the API key stays outside your VM. Get a key from the TypeSafe dashboard, export it in your local shell, and attach the integration to your VM:
printf '%s' "$TYPESAFE_API_KEY" | \
  ssh exe.dev integrations add http-proxy \
    --name typesafe \
    --target https://api.typesafe.ai \
    --bearer=- \
    --attach vm:<vm-name>
From the attached VM, call the integration hostname instead of
api.typesafe.ai. The proxy adds the bearer token before forwarding the
request:
curl --fail-with-body https://typesafe.int.exe.xyz/v1/systemone \
  --json '{
    "state": "My payout has been delayed for three days. Please help ASAP.",
    "model": "jev-latest",
    "questions": {
      "is_urgent": {
        "type": "noul",
        "instructions": "Does this message express urgency?"
      }
    }
  }'
The response contains an answers.is_urgent.noul value between 0 and 1.
See TypeSafe's API reference for Choice, Score,
and Noul questions.
Openclaw
Openclaw is an agent that actually does things.
If you want to play with it, our exe.dev VMs are ideal places to run it, because they are isolated by default, with a protected, authenticated HTTPS endpoint by default.
To set it up quickly, start with our prompt at https://exe.new/openclaw.
Running Agents
When you create a VM with ssh exe.dev new, claude, codex, and pi are
pre-installed, as well as the Shelley agent at
https://vmname.shelley.exe.xyz/.
For long-lived VMs, see Updating coding agents to keep the installed agents current.
Use the agent to do research, build prototypes, install other software, and so on.
Running a self-hosted GitHub Actions Runner
There's very little to it; you're following the GitHub instructions, but then doing a little bit of systemd work to make sure the runner keeps running.
First, create a new VM with ssh exe.dev new. This will create
a new VM. SSH into it with ssh vmname.exe.xyz. The trickiest
bit is to find the GitHub URLs. Replace the placeholders in the following:
- https://github.com/organizations/ORG/settings/actions/runners/new?arch=x64&os=linux
- https://github.com/USER/REPO/settings/actions/runners/new?arch=x64&os=linux
Copy and paste the instructions from GitHub's instructions into your shell session. It's pretty quick and easy until "run.sh".
To make sure the runner restarts after a reboot, we can create a systemd service:
Create the service file at /home/exedev/actions-runner/gh-actions-runner.service:
cat > /home/exedev/actions-runner/gh-actions-runner.service << 'EOF'
[Unit]
Description=GitHub Actions Runner
After=network.target

[Service]
Type=simple
User=exedev
WorkingDirectory=/home/exedev/actions-runner
ExecStart=/home/exedev/actions-runner/run.sh
Restart=always
RestartSec=10

[Install]
WantedBy=multi-user.target
EOF
Then copy the service file to systemd directory
sudo cp /home/exedev/actions-runner/gh-actions-runner.service /etc/systemd/system/
And start the service:
sudo systemctl daemon-reload
sudo systemctl enable --now gh-actions-runner.service
Verify the service is running
sudo systemctl status gh-actions-runner.service

gh-actions-runner.service - GitHub Actions Runner
     Loaded: loaded (/etc/systemd/system/gh-actions-runner.service; enabled; preset: enabled)
     Active: active (running) since Sun 2025-11-09 04:33:28 UTC; 41s ago
   Main PID: 1151 (run.sh)
      Tasks: 15 (limit: 2384)
     Memory: 93.2M (peak: 101.6M)
        CPU: 1.447s
     CGroup: /system.slice/gh-actions-runner.service
             /bin/bash /home/exedev/actions-runner/run.sh
             /bin/bash /home/exedev/actions-runner/run-helper.sh
             /home/exedev/actions-runner/bin/Runner.Listener run

Nov 09 04:33:30 ...exe.dev run.sh[1159]: Connected to GitHub
Nov 09 04:33:31 ...exe.dev run.sh[1159]: Current runner version: '2.329.0'
Nov 09 04:33:31 ...exe.dev run.sh[1159]: 2025-11-09 04:33:31Z: Listening for Jobs
You're all set!
Spinning up a Marimo Notebook
tl;dr: ssh exe.dev new --image=ghcr.io/marimo-team/marimo:latest-sql
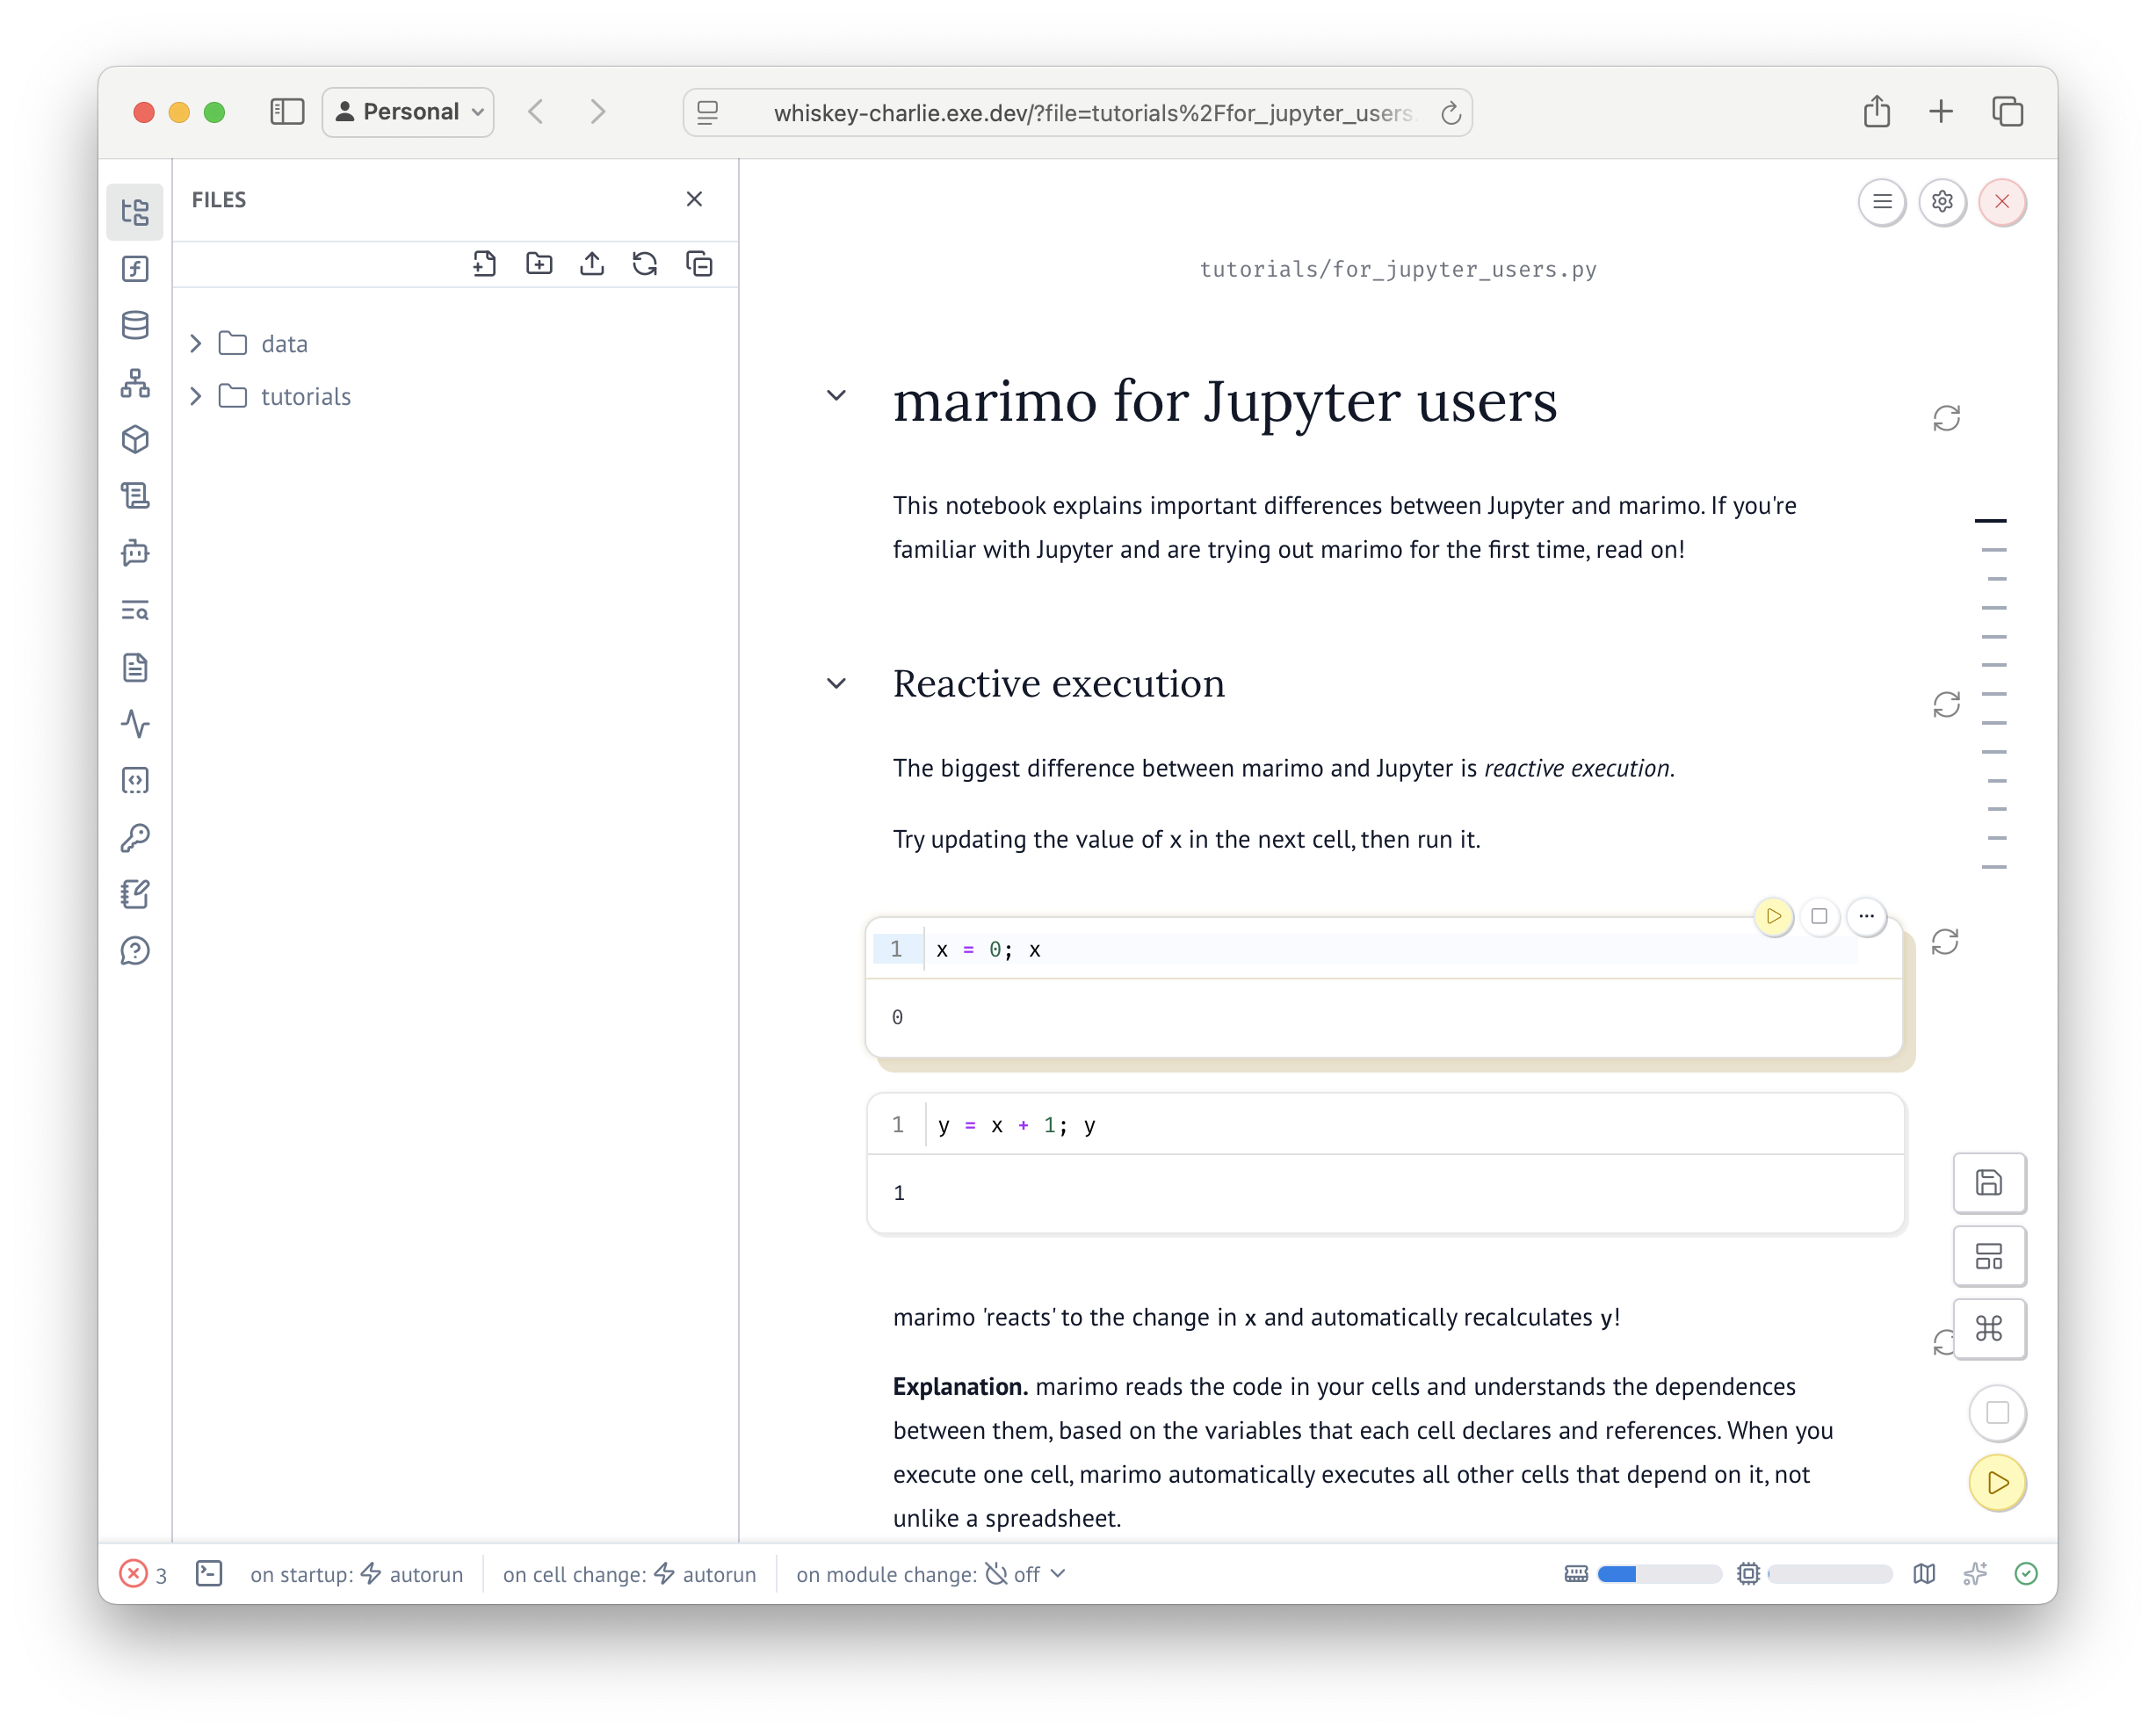
Marimo is a reactive Python notebook. To run it on exe.dev, register
for exe.dev with ssh exe.dev, and then run
ssh exe.dev new --image=ghcr.io/marimo-team/marimo:latest-sql in your terminal.
It'll look like so:
$ ssh exe.dev new --image=ghcr.io/marimo-team/marimo:latest-sql
Creating nan-tango using image marimo-team/marimo:latest-sql...

App (HTTPS proxy → :8080)
https://nan-tango.exe.xyz

SSH
ssh nan-tango.exe.xyz
Finally, follow the https://vmname.exe.xyz/ provided. You're all set.
When you're done, ssh exe.dev rm <vm-name> to clean up.
Editorials
Lock-in on exe.dev
As long as it runs on Linux, exe.dev supports it. It's just a computer, after all.
Our platform and our coding agent don't believe in limiting you to just one
framework. If you have a set of frameworks and libraries you prefer, use them.
If you need to migrate off to another provider, rsync will get you pretty
far.
Our default VM image is exeuntu. The Dockerfile is right there. If you prefer a different flavor, that's great, go for it.
Persistent disks, not serverless
Most serverless Platform-as-a-Service offerings don't give you a persistent disk. This is a productivity killer.
At exe.dev, your VM comes with a normal, boring file system. Run a database on it. Write logs to it. Use sqlite. Store files.
Immutable infrastructure has its place, but it's not the only way to go.
Put your agent in a VM and let it be
exe.dev is a great place to run a coding agent securely, with minimal supervision. Each exe.dev VM has little access to your data (see below), except for the data that you put in it, so there's very little to exfiltrate.
As such, install your coding agent of choice, and let it do its thing, whether that be to build you a web site (that you can access directly using our HTTPS proxy) or take some screenshots or do some math or prototype some software.
The GUTS Stack
If you use our default exeuntu image and our Shelley coding agent, you'll
start with a GUTS template: the "welcome" server we wrote is implemented in Go
and uses SQLite as its database. (At time of writing, we haven't built out much UI,
so the TypeScript is rather minimal; coming soon.) If you don't
specify an alternative, Shelley will build on that architecture, and we think
you'll have good, performant results.
Whether your VM is running a sandbox or prod, we believe this simpler stack makes sense. Websites are inherently distributed systems (the client is a browser), but a single, simple back end can scale for a long time. Modern machines are fast and disks are big. (exe.dev disks are persisted and backed up.)
Kubernetes, serverless functions, distributed transactions, edge computing, and so on all have their place, but we place our bets on the humble monolith.
Why exe.dev?
Developers need computers. Sometimes we need those computers to be on the internet, to keep running when we close our laptop lid or when our desktop goes to sleep. We need that because they have work to do in a cron job, or our colleagues or friends need access to them.
These computers need to be secure. Only we should be able to ssh into them and do things. We should be able to run a web server on port 80 and make sure only people we want can reach it. Having to build a password database (remember to hash and salt and build a rigorous email recovery flow), or oauth integration, or fiddle with any other sort of auth and how it works with the language and framework you chose, is a huge distraction.
Other than that, it should just be a computer. We don’t need config files filled with options. It should be some kind of stock linux, the disk should be persistent, the disk should be fast. Setup should be an easy one-liner, that is scriptable. It should have a domain name. It should not, in isolation, cost some dollars a month and have dedicated resources, it should be a fully functional VM that shares CPU and RAM out of my fixed-price allotment.
Just a computer.
Want to build a soccer scheduling app for your kids school? Want a VM to try out agent-of-the-week on a project where it cannot trash your laptop's dot files (or bug you for permission to ls every five seconds)? Run ssh exe.dev new
That is what exe.dev gives you. Pay a monthly fee for some compute resources. Spin up as many VMs as you like. Resource management and auth are taken care of for you.
CLI Reference
help
Show help information
Usage
help [command ...]
Options
--json: output in JSON format
Examples
help              # overview of common commands
help all          # every command, one line each
help new          # details and flags for one command
doc
Browse documentation
Usage
doc [slug-or-query...]
ls
List your VMs
Usage
ls [-l] [--group=tag|region|type] [name|pattern]
Options
--group: group VMs by none|tag|region|type--json: output in JSON format-l: show detailed information
new
Create a new VM
Options
--comment: short note about the VM (max 200 bytes)--cpu: number of CPUs (default 2; run 'billing plan' for plan limits)--disk: disk size (e.g., 20, 20GB, 50G)--env: environment variable in KEY=VALUE format (can be specified multiple times)--image: container image--integration: integration name to attach (can be specified multiple times or comma-separated)--json: output in JSON format--memory: memory allocation (e.g., 4, 4GB, 8G)--name: VM name (auto-generated if not specified)--no-email: do not send email notification--no-pool: use ordinary placement (not available on plans that place new VMs in pools)--pool: create the VM in one of your team's pools (see 'pool list')--prompt: initial prompt to send to Shelley after VM creation (requires an image with Shelley, like exeuntu); use /dev/stdin to read from stdin--registry-auth: private container registry credentials as USERNAME:PASSWORD (e.g. octocat:ghp_xxx) for the registry hosting --image--sandbox: alias for --standalone--setup-script: setup script to run on first boot (max 10KiB); supports \n for newlines; use /dev/stdin to pipe from stdin--standalone: create a standalone VM with its own reserved capacity (requires a plan with standalone VMs and team approval)--tag: tag to add to the VM (can be specified multiple times or comma-separated)
Examples
new                                     # just give me a computer
new --name=b --image=ubuntu:22.04       # custom image and name
new --cpu=4 --memory=16GB               # 4 CPUs, 16GB RAM
new --disk=50GB                         # 50GB disk
new --tag=prod,staging                  # create with tags
new --env FOO=bar --env BAZ=qux         # with environment variables
new --integration=myproxy               # attach an integration
echo 'build me a web app' | ssh exe.dev new --prompt=/dev/stdin
rm
Delete a VM
Usage
rm <vmname>...
Options
--json: output in JSON format
restart
Restart a VM
Usage
restart <vmname>
Options
--json: output in JSON format
rename
rename a vm
Usage
rename <oldname> <newname>
Options
--json: output in JSON format
tag
Add or remove tags on a VM
Usage
tag [-d] <vm> <tag-name> [tag-name...]
Options
-d: delete tag--json: output in JSON format
Examples
tag my-vm prod web        # add tags
tag -d my-vm prod web     # remove tags
cp
Copy an existing VM
Usage
cp <source-vm> [new-name] [--pool=<name>] [--memory=<size>] [--cpu=<count>] [--disk=<size>]
Options
--copy-tags: copy tags from source VM (use --copy-tags=false to disable)--cpu: number of CPUs--disk: disk size (e.g., 20, 20GB, 50G)--json: output in JSON format--memory: memory allocation (e.g., 4, 4GB, 8G)--pool: create the copy in one of your team's pools (see 'pool list')--sandbox: alias for --standalone--standalone: create the copy as a standalone VM with its own reserved capacity (requires a plan with standalone VMs and team approval)
Examples
cp my-vm                          # copy with auto-generated name
cp my-vm my-vm-copy               # copy with specific name
cp my-vm --cpu=4 --memory=16GB    # copy with different resources
cp my-vm my-pool-copy --pool=build # copy into a team pool
cp my-vm --copy-tags=false        # copy without tags
resize
Resize a VM's resources (memory, CPU, disk)
Usage
resize <vmname> [--memory=<size>] [--cpu=<count>] [--disk=<size>]
Options
--cpu: number of CPUs--disk: new total disk size (e.g., 25, 25GB) - must be larger than current size--json: output in JSON format--memory: memory allocation (e.g., 4, 4GB, 8G)
comment
Set or clear a short comment on a VM
Usage
comment <hostname> <text>
Options
--json: output in JSON format
Examples
comment my-vm staging copy
comment my-vm "" # clear the comment
domain
Register custom domains for your VMs
Usage
domain <add|rm|ls> ...
Options
--json: output in JSON format
Examples
domain add my-vm app.example.com  # register a CNAME you've already set up
domain add --wildcard my-vm app.example.com  # also issue a *.example.com cert
domain ls my-vm                   # list domains on one VM
domain ls -a                      # list domains across all your VMs
domain rm my-vm app.example.com   # remove a domain
Subcommands
domain add
Link a custom domain to a VM
Usage:
domain add [--wildcard] <vm> <domain>
Options:
--json: output in JSON format--wildcard: issue a wildcard (*.) certificate via DNS-01 delegation
domain rm
Remove a custom domain from a VM
Usage:
domain rm <vm> <domain>
Options:
--json: output in JSON format
domain ls
List custom domains for a VM (or -a for all your VMs)
Usage:
domain ls <vm> | domain ls -a
Options:
-a: list domains across all your VMs--json: output in JSON format
share
Share HTTPS VM access with others
Usage
share <subcommand> <vm> [args...]
Options
--json: output in JSON format
Subcommands
share show
Show current shares for a VM
Usage:
share show <vm>
Options:
--json: output in JSON format--qr: show QR code for the URL
share port
Set the HTTP proxy port for a VM
Usage:
share port <vm> [port]
Options:
--json: output in JSON format
Examples:
share port mybox 8080
share set-public
Make the HTTP proxy publicly accessible
Usage:
share set-public <vm>
Options:
--json: output in JSON format
share set-private
Restrict the HTTP proxy to authenticated users
Usage:
share set-private <vm>
Options:
--json: output in JSON format
share add
Share VM with a user via email, or grant shell access with --root
Usage:
share add <vm> <email|team> [--root] [--message='...']
Options:
--json: output in JSON format--message: message to include in share invitation--qr: show QR code for the URL--root: grant/revoke shell (SSH, Terminal, Shelley) access instead of web-only
Examples:
share add mybox user@example.com
share add mybox user@example.com --message='Check this out'
share add mybox team
share add mybox teammate@example.com --root
share add mybox team --root
share remove
Revoke a user's access to a VM, or downgrade shell access to web with --root
Usage:
share remove <vm> <email|team> [--root]
Options:
--json: output in JSON format--root: grant/revoke shell (SSH, Terminal, Shelley) access instead of web-only
Examples:
share remove mybox user@example.com
share remove mybox team
share remove mybox teammate@example.com --root
share remove mybox team --root
share add-link
Create a shareable link for a VM
Usage:
share add-link <vm>
Aliases: add-share-link
Options:
--json: output in JSON format--qr: show QR code for the URL
share remove-link
Revoke a shareable link
Usage:
share remove-link <vm> <token>
Aliases: remove-share-link
Options:
--json: output in JSON format
share receive-email
Enable or disable inbound email for a VM
Usage:
share receive-email <vm> [on|off] [--reply-policy=all|known|owner|none]
Options:
--json: output in JSON format--reply-policy: restrict who the VM may email: all|known|owner|none
Examples:
share receive-email mybox on
share receive-email mybox off
share receive-email mybox --reply-policy=known
share receive-email mybox
whoami
Show user information (email, keys, etc)
Usage
whoami
Options
--json: output in JSON format
ssh-key
Manage SSH keys for your account
Usage
ssh-key <subcommand> [args...]
Options
--json: output in JSON format
Subcommands
ssh-key list
List all SSH keys associated with your account
Usage:
ssh-key list
Options:
--json: output in JSON format
ssh-key add
Add a new SSH key to your account
Usage:
ssh-key add [--tag=TAG] <public-key>
Options:
--json: output in JSON format--tag: scope key to VMs with this tag
Examples:
ssh-key add 'ssh-ed25519 AAAA... my-laptop'

To generate a new key locally:
  ssh-keygen -t ed25519 -C "mnemonic-for-this-key" -f ~/.ssh/id_exe

The -C flag sets a name for the key.

Then add the public key from your local shell:
  cat ~/.ssh/id_exe.pub | ssh exe.dev ssh-key add

Or from the exe.dev shell:
  ssh-key add 'ssh-ed25519 AAAA... my-laptop'
ssh-key remove
Remove an SSH key from your account
Usage:
ssh-key remove <name|fingerprint|public-key>
Options:
--json: output in JSON format
ssh-key rename
Rename an SSH key
Usage:
ssh-key rename <old-name> <new-name>
Options:
--json: output in JSON format
ssh-key generate-api-key
Generate an API key for the exe.dev HTTPS API or for a specific VM
Usage:
ssh-key generate-api-key [--label=NAME] [--vm=VMNAME] [--cmds=CMD1,CMD2] [--exp=30d]
Options:
--cmds: comma-separated list of allowed commands (empty = defaults)--exp: expiry duration (e.g. 30d, 1y) or 'never'--json: output in JSON format--label: label for this token's SSH key--vm: scope key to a VM (authenticates to its HTTPS endpoints instead of exe.dev commands)
Examples:
# Generate a key for the exe.dev API (lobby commands like ls, new, whoami):
ssh-key generate-api-key --label=ci --cmds=ls,new --exp=90d

# Generate a key scoped to a VM (authenticates to its HTTPS proxy):
ssh-key generate-api-key --vm=my-vm --label=deploy
set-region
Set your preferred region for new VMs.
Usage
set-region <region-code>
Options
--json: output in JSON format
integrations
Manage integrations
Usage
integrations <subcommand> [args...]
Aliases
int
Subcommands
integrations list
List your integrations
Usage:
integrations list [--json [--usage]]
Options:
--json: output in JSON format--usage: include per-VM usage (lastUsedAt, usedByVMs); JSON only
integrations setup
Set up a service integration
Usage:
integrations setup <type> [args...]
integrations setup github
Set up GitHub integration
Usage:
integrations setup github [--list|--verify|-d]
Options:
-d: disconnect GitHub account--delete: disconnect GitHub account--list: list connected GitHub accounts--verify: verify GitHub connections are working
integrations setup chatgpt
Set up ChatGPT account access for LLM integrations
Usage:
integrations setup chatgpt [--name=<account-name>|--list|--verify|-d]
Options:
-d: disconnect ChatGPT account--delete: disconnect ChatGPT account--list: list connected ChatGPT accounts--name: local ChatGPT account name (default chatgpt)--verify: verify ChatGPT connections are working
integrations add
Add a new integration
Credential value flags (keys, tokens, passwords, bearer tokens, and webhook URLs) accept - to read from stdin.
Usage:
integrations add <type> --name=<name> [--team] [args...]
Options:
--act-as-user: authenticate as your GitHub user instead of the exe.dev app (github only); pushes and API calls are attributed to your GitHub account--attach: attach to a spec (vm:, tag: , or auto:all); can be repeated --bearer: bearer token (shorthand for --header="Authorization:Bearer TOKEN"; combines with --header)--comment: optional free-form comment stored with the integration--fields: comma-separated reflection fields to expose (email, integrations, tags, comment, default_port); 'all' exposes every field including ones added in the future; 'none' disables every field--for: time-box every --attach to a duration from now (e.g. 2h, 45m); access lapses automatically--header: header to inject (e.g. X-Auth:secret); can be repeated--name: integration name (required)--no-auth: create an endpoint integration with no injected authentication--peer: authenticate with a generated API key scoped to the target VM; combines with --header/--bearer--readonly: restrict the integration to read access (github only); git push and write API calls are rejected--repository: GitHub repository in owner/repo format (required for github)--strip-prefix: path prefix to strip from each request before forwarding (http-proxy only; e.g. /api/v3 makes /api/v3/users reach the target as /users)--target: target URL (required for http-proxy)--team: create as a team integration
integrations remove
Remove an integration
Usage:
integrations remove <name> [--team]
Options:
--team: operate on a team integration
integrations test
Test an integration's credential (connection check)
Usage:
integrations test <name> [--team]
Options:
--team: operate on a team integration
integrations edit
Edit an integration
Credential value flags (keys, tokens, passwords, bearer tokens, and webhook URLs) accept - to read from stdin.
Usage:
integrations edit <name> [--team] [args...]
Options:
--act-as-user: authenticate as your GitHub user instead of the exe.dev app (github only)--bearer: bearer token (shorthand for --header="Authorization:Bearer TOKEN"; combines with --header)--clear-header: remove injected headers for http-proxy--comment: free-form comment stored with the integration--fields: comma-separated reflection fields to expose (email, integrations, tags, comment, default_port); 'all' exposes every field including ones added in the future; 'none' disables every field--header: header to inject for http-proxy; can be repeated; replaces all existing headers--no-auth: remove injected authentication for http-proxy--readonly: restrict the integration to read access (github only)--repository: GitHub repository in owner/repo format--strip-prefix: path prefix to strip from each request before forwarding (http-proxy only; e.g. /api/v3; empty clears it)--target: target URL for http-proxy--team: edit a team integration--webhook-url: replacement Slack or Discord webhook URL
integrations attach
Attach an integration to a VM, tag, or all VMs
A
You can attach the same integration multiple times with different specs.
Team integrations only support tag:
A grant can be time-boxed with --for
Usage:
integrations attach <name> <spec> [--team] [--for <duration> | --until <time>]
Options:
--for: time-box the attachment to a duration from now (e.g. 2h, 45m); access lapses automatically--team: operate on a team integration--until: time-box the attachment until an RFC3339 instant (e.g. 2026-08-03T20:00:00Z)
Examples:
int attach my-mcp vm:dev1
int attach my-mcp tag:production
int attach my-mcp auto:all
int attach shared-mcp tag:production
int attach gmail vm:dev1 --for 2h
integrations detach
Detach an integration from a VM, tag, or all VMs
Usage:
integrations detach <name> <spec> [--team]
Options:
--team: operate on a team integration
integrations rename
Rename an integration
Usage:
integrations rename <name> <new-name> [--team]
Options:
--team: operate on a team integration
integrations catalog
Browse the catalog of ready-made service integrations
Usage:
integrations catalog [service-or-search-term]
Examples:
int catalog
int catalog stripe
team
View and manage your team
Options
--json: output in JSON format
Subcommands
team disable
Disband your team
Usage:
team disable
Options:
--json: output in JSON format--yes: skip the confirmation prompt (required for non-interactive use, e.g. the web UI)
team members
List team members
Usage:
team members
Aliases: ls
Options:
--json: output in JSON format
team usage
Show team pool, disk, and bandwidth usage for the billing period
Usage:
team usage
Options:
--json: output in JSON format
team add
Add a user to the team
Usage:
team add <email> [<user|admin|billing_owner>]
Options:
--json: output in JSON format
team remove
Remove a user from the team
Usage:
team remove <email> [--transfer-vms-to <email>]
Options:
--json: output in JSON format--transfer-vms-to: transfer the member's VMs to this team member before removing them
team role
Change a team member's role
Usage:
team role <email> <user|admin|billing_owner>
Options:
--json: output in JSON format
team rename
Rename your team
Usage:
team rename <name>
Options:
--json: output in JSON format
team billing
Manage team billing information
Usage:
team billing
Options:
--json: output in JSON format
team billing plan
Show your team's plan
Usage:
team billing plan [--all]
Options:
--all: list the plans you can switch to--json: output in JSON format
Examples:
team billing plan
team billing plan --all   # plans your team can switch to
team billing update
Update team billing information
Usage:
team billing update [--email=<email>] [--name=<name>] [--business-name=<name>] [--phone=<phone>] [--address-line1=<line>] [--address-line2=<line>] [--address-city=<city>] [--address-state=<state>] [--address-postal-code=<code>] [--address-country=<country>] [--tax-id-type=<type>] [--tax-id-value=<value>]
Options:
--address-city: billing address city--address-country: billing address country code--address-line1: billing address line 1--address-line2: billing address line 2--address-postal-code: billing address postal code--address-state: billing address state or province--business-name: business name shown on invoices--email: billing email shown on invoices--json: output in JSON format--name: customer name shown on invoices--phone: phone number shown on invoices--tax-id-type: tax ID type shown on invoices (e.g. eu_vat, pl_nip, us_ein)--tax-id-value: tax ID value shown on invoices
team transfer
Transfer a VM to another team member
Usage:
team transfer <vm_name> <target_email>
Options:
--json: output in JSON format
team auth
View and manage team auth settings
Usage:
team auth
Options:
--json: output in JSON format
team auth require-oidc
Require OIDC for web login (web|off)
Usage:
team auth require-oidc <web|off>
Options:
--json: output in JSON format
team auth set
Set the team auth provider (default, google, oidc)
Usage:
team auth set <default|google|oidc> [--issuer-url=<url> --client-id=<id> --client-secret=<secret>]
Options:
--client-id: OIDC client ID--client-secret: OIDC client secret--display-name: display name for the SSO provider--issuer-url: OIDC issuer URL (e.g. https://accounts.google.com)--json: output in JSON format
team settings
View and manage team settings
Usage:
team settings
Options:
--json: output in JSON format
team settings vm-placement
View and manage automatic VM placement
Usage:
team settings vm-placement
Options:
--json: output in JSON format
team settings vm-placement default
Use ordinary VM placement
Usage:
team settings vm-placement default
Options:
--json: output in JSON format
team settings vm-placement pool
Send bare new commands to a shared team pool
Usage:
team settings vm-placement pool <name>
Options:
--json: output in JSON format
team settings vm-placement member-pool
Create or reuse one team pool per member for bare new commands
Usage:
team settings vm-placement member-pool --cpus=N [--max-vms=N] [--host=alias]
Options:
--cpus: CPUs to reserve for each member pool (required)--host: dedicated host for each member pool (see 'pool hosts')--json: output in JSON format--max-vms: maximum VMs in each member pool (default 100)
team settings vm-placement poolless
Keep bare new commands outside pools while migrating (legacy)
Usage:
team settings vm-placement poolless
Options:
--json: output in JSON format
team settings standalone
Set who can create standalone VMs
Usage:
team settings standalone <off|admins-only|all-users>
Options:
--json: output in JSON format
team settings llm-gateway
Allow or block the exe.dev LLM gateway (your own API keys are unaffected)
Usage:
team settings llm-gateway <on|off>
Options:
--json: output in JSON format
team settings vm-sharing
Set who can share team VMs
Usage:
team settings vm-sharing <admins-only|all-members>
Options:
--json: output in JSON format
team settings auto-join
Allow users from your email domain to join this team on signup
Usage:
team settings auto-join <on|off>
Options:
--json: output in JSON format
team vm
View team members' VMs
Usage:
team vm
Options:
--json: output in JSON format
team vm ls
List all VMs across your team
Usage:
team vm ls [-l] [--group=tag|region|type|user|access] [name|pattern]
Aliases: list
Options:
--group: group VMs by none|tag|region|type|user|access--json: output in JSON format-l: show detailed information
pool
Interested in trying pools out? Reach out to support@exe.dev to ask for access.
Manage your team's VM pools (reserved capacity slices)
Usage
pool <subcommand>
Subcommands
pool new
Create a pool: reserved capacity for your team's VMs
Usage:
pool new <name> --cpus=N --region=<region> [--max-vms=M] | pool new <name> --cpus=N --host=<alias> [--max-vms=M]
Options:
--cpus: number of CPUs reserved for the pool (required; an even number of vCPUs from 4 through 512 (4, 6, 8, and so on; memory is 2 GiB per vCPU))--host: dedicated host to place the pool on (see 'pool hosts'; cannot be combined with --region)--json: output in JSON format--max-vms: maximum number of VMs in the pool (default 100)--region: region code for the pool (required unless --host is given)
pool hosts
List the dedicated hosts assigned to your team
Usage:
pool hosts
Options:
--json: output in JSON format
pool list
List your team's pools, or show historical usage with --usage
Usage:
pool list [pool-name] [--usage [--range=24h|7d|30d]]
Aliases: ls
Options:
--json: output in JSON format--range: statistics range: 24h, 7d, or 30d (requires --usage)--usage: show historical CPU and starvation statistics
pool adopt
Adopt a VM into a pool; this can take several minutes
Usage:
pool adopt --vm=<vm-name> --pool=<pool-name>
Options:
--json: output in JSON format--pool: pool to adopt into (required)--vm: VM to adopt (required)
Examples:
pool adopt --vm=builder --pool=compile
pool detach
Detach a VM from its pool into its own standalone capacity
Usage:
pool detach --vm=<vm-name>
Options:
--json: output in JSON format--vm: VM to detach into its own standalone capacity (required)
Examples:
pool detach --vm=builder
pool resize
Change a pool's CPU capacity or VM cap
Usage:
pool resize <name> --cpus=N | pool resize <name> --max-vms=N [--force]
Options:
--cpus: new pool size in vCPUs (required unless --max-vms is set; even, from 4 up to the placement limit)--force: allow --max-vms below the current VM count (does not stop or evict VMs)--json: output in JSON format--max-vms: maximum number of VMs in the pool (required unless --cpus is set)
pool delete
Delete a pool (refused while it has VMs; --force detaches them)
Usage:
pool delete <name> [--force]
Options:
--json: output in JSON format
billing
View and manage your billing
Options
--json: output in JSON format
Subcommands
billing plan
Show your current plan and resource limits
Usage:
billing plan [--all]
Options:
--all: list the plans you can switch to--json: output in JSON format
Examples:
billing plan
billing plan --all   # plans you can switch to
billing usage
Show VM resource usage against your plan quotas
Usage:
billing usage [--range=cycle|24h|7d|30d] [--group=vm]
Options:
--group: group usage by: vm--json: output in JSON format--range: time range: cycle (current billing cycle), 24h, 7d, or 30d
Examples:
billing usage --range=7d
billing credits usage   # Shelley/LLM credit spend instead
billing credits
Show Shelley credit balances
Usage:
billing credits [usage|transactions|buy]
Options:
--json: output in JSON format
billing credits usage
Show Shelley (LLM) credit spend by model, day, or VM
Usage:
billing credits usage [--month=YYYY-MM] [--group=model|day|box] [--detail]
Options:
--detail: break each group down: models under a day or VM, VMs under a model--group: group spend by model, day, or box--json: output in JSON format--month: calendar month to report, as YYYY-MM (default: this month, UTC)
Examples:
billing credits usage --group=day
billing credits usage --group=box --detail
billing credits usage --month=2026-05 --group=box
billing credits transactions
Show your credit purchases and gifts
Usage:
billing credits transactions [--limit=N]
Options:
--json: output in JSON format--limit: how many transactions to show, 1-100 (default 20)
billing credits buy
Buy Shelley credits with your personal payment method
Usage:
billing credits buy <dollars> [--yes]
Options:
--idempotency-key: retry key so a repeated purchase of the same amount charges once--json: output in JSON format--yes: skip the confirmation prompt (required when not running interactively)
Examples:
billing credits buy 25
billing credits buy 100 --yes
billing rewards
Show invite rewards you've earned
Usage:
billing rewards
Options:
--json: output in JSON format
billing capacity
Change your subscription capacity
Usage:
billing capacity [--cpu=N] [--yes]
Options:
--cpu: Personal capacity in vCPUs: 2, 4, 8, or 16--json: output in JSON format--yes: skip interactive confirmation (required for non-interactive changes)
Examples:
billing capacity
billing capacity --cpu=4 --yes
billing payment
Show your payment methods
Usage:
billing payment [list]
Options:
--json: output in JSON format
billing payment list
List all payment methods on file
Usage:
billing payment list
Options:
--json: output in JSON format
billing payment remove
Remove a saved payment method
Usage:
billing payment remove <ref>
Options:
--json: output in JSON format
Examples:
billing payment remove 4f1c2a9b8d3e
billing payment default
Make a saved payment method the default
Usage:
billing payment default <ref>
Options:
--json: output in JSON format
Examples:
billing payment default 4f1c2a9b8d3e
billing manage
Open the billing management page
Usage:
billing manage
Options:
--json: output in JSON format
billing update
Update your billing contact information
Usage:
billing update [--email=<email>] [--name=<name>] [--business-name=<name>] [--phone=<phone>] [--address-line1=<line>] [--address-line2=<line>] [--address-city=<city>] [--address-state=<state>] [--address-postal-code=<code>] [--address-country=<country>] [--tax-id-type=<type>] [--tax-id-value=<value>]
Options:
--address-city: billing address city--address-country: billing address country code--address-line1: billing address line 1--address-line2: billing address line 2--address-postal-code: billing address postal code--address-state: billing address state or province--business-name: business name shown on invoices--email: billing email shown on invoices--json: output in JSON format--name: customer name shown on invoices--phone: phone number shown on invoices--tax-id-type: tax ID type shown on invoices (e.g. eu_vat, pl_nip, us_ein)--tax-id-value: tax ID value shown on invoices
billing invoices
Show recent invoices
Usage:
billing invoices
Options:
--json: output in JSON format
billing receipts
Show credit purchase receipts and purchases (this billing account only)
Usage:
billing receipts [--from=<YYYY-MM-DD>] [--to=<YYYY-MM-DD>]
Options:
--from: start of the period, YYYY-MM-DD--json: output in JSON format--to: end of the period, YYYY-MM-DD
Examples:
billing receipts --from=2026-01-01 --to=2026-06-30
billing statement
Open a consolidated credit purchase statement
Usage:
billing statement [--from=<YYYY-MM-DD>] [--to=<YYYY-MM-DD>]
Options:
--from: start of the period, YYYY-MM-DD--json: output in JSON format--to: end of the period, YYYY-MM-DD
Examples:
billing statement --from=2026-01-01 --to=2026-06-30
billing provider
Connect a cloud marketplace subscription
Usage:
billing provider link <aws|azure>
Options:
--json: output in JSON format
billing provider link
Connect a marketplace subscription to your team
Usage:
billing provider link <aws|azure> --token=<link-token> [--size=default] [--team-name=<name>]
Options:
--json: output in JSON format--size: team size: default--team-name: name for the team to create (only when you have no team yet)--token: marketplace link token from the exe.dev link page
Examples:
billing provider link aws --token=mpl_... --size=default
billing provider link azure --token=mpl_... --size=default --team-name="Acme Engineering"
invite
Manage your invite link and rewards
Options
--json: output in JSON format
Subcommands
invite show
Show your active invite link and reward
Usage:
invite show
Options:
--json: output in JSON format
invite link
Print only your active invite link
Usage:
invite link
Options:
--json: output in JSON format
invite rewards
List invite rewards you can use
Usage:
invite rewards
Options:
--json: output in JSON format
invite set-reward
Choose the reward for your invite link
Usage:
invite set-reward standard|bonus-credits|extra-memory|extra-disk
Options:
--json: output in JSON format
invite activity
Show signups, upgrades, and reward status
Usage:
invite activity
Options:
--json: output in JSON format
invite request
Request more trial invites
Usage:
invite request
Options:
--json: output in JSON format
invite manage
Open the invites page
Usage:
invite manage
Options:
--json: output in JSON format
shelley
Manage Shelley agent on VMs
Usage
shelley <subcommand> [args...]
Subcommands
shelley install
Install or upgrade Shelley to the current version
Usage:
shelley install <vm>
shelley prompt
Send a prompt to Shelley on a VM
Usage:
shelley prompt [--model=<model>] [--reasoning=<level>] <vm> <prompt>
Options:
--model: model for the conversation--reasoning: reasoning level for the conversation: one of off, minimal, low, medium, high, xhigh, max (model support varies)
browser
Generate a magic link to log in to the website
Usage
browser
Options
--json: output in JSON format--qr: show QR code for the URL
ssh
SSH into a VM
Usage
ssh [-l user] [user@]vmname [command...]
grant-support-root
Allow exe.dev support to log in to a VM
Usage
grant-support-root <vmname> on|off
exit
Exit
stat
Show vCPU, disk, IO, and network (RX/TX) metrics for a VM
Usage
stat <vm-name> [--range=24h|7d|30d]
Options
--json: output in JSON format--range: time range: 24h, 7d, or 30d
Examples
stat my-vm             # last 24 hours (default)
stat my-vm --range=7d  # last 7 days
stat my-vm --range=30d # last 30 days
Other
Help & Community
Join our Discord community.
Privacy Notice
Last Updated: 2026-01-01
This Privacy Notice explains how Bold Software, Inc. (“exe.dev”) collects, uses, discloses, and otherwise processes personal data in connection with any specific product, service, or application that references or links to this Privacy Notice.
This Privacy Notice does not address our privacy practices relating to exe.dev job applicants, employees and other employment-related individuals, nor data that is not subject to applicable data protection laws (such as deidentified or publicly available information in certain jurisdictions). This Privacy Notice is also not a contract and does not create any legal rights or obligations not otherwise provided by law.
Our Role in Processing Personal Data
Data protection laws sometimes differentiate between “controllers” and “processors” of personal data. A “controller” determines the purposes and means (the why and how) of processing personal data. A “processor,” which is sometimes referred to as a “service provider,” processes personal data on behalf of a controller subject to the controller’s instructions.
This Privacy Notice describes our privacy practices where we are acting as the controller of personal data. However, this Privacy Notice does not cover or address how our customers may process personal data when they use our services, or how we may process personal data on their behalf in accordance with their instructions where we are acting as their processor. As a result, we recommend referring to the privacy notice of the customer with which you have a relationship for information on how they engage processors, like us, to process personal data on their behalf. In addition, we are generally not permitted to respond to individual requests relating to personal data we process on behalf of our customers, so we recommend directing any requests to the relevant customer.
Our Collection and Use of Personal Data
The categories of personal data we collect depend on how you interact with us and our services. For example, you may provide us your personal data directly when you sign up for our mailing list, register for an account or otherwise contact us or interact with us.
We also collect personal data automatically when you interact with our websites and other services and may also collect personal data from other sources and third parties.
Personal Data Provided by Individuals
We collect the following categories of personal data individuals provide us:
-
Contact Information, including first and last name, phone number, email address, mailing address, and communication preferences. We use this information primarily to fulfill your request or transaction, to communicate with you directly, and to send you marketing communications in accordance with your preferences.
-
Account Information, including first and last name, email address, phone number, account credentials or one-time passcodes, and the products or services you are interested in, purchased, or have otherwise used. We use this information primarily to administer your account, provide you with our products and services, communicate with you regarding your account and your use of our products and services, and for customer support purposes.
-
Payment Information, including payment card information, billing address, and other financial information (such as, routing and account number). Please note that we use third-party payment providers, including Stripe, to process payments made to us. We do not retain any personally identifiable financial information, such as payment card number, you provide these third-party payment providers in connection with payments. Rather, all such information is provided directly by you to our third-party payment providers. The payment provider’s use of your personal data is governed by their privacy notice. To view Stripe’s privacy policy, please click here.
-
Feedback and Support Information, including the contents of custom messages sent through the forms, chat platforms, including our online live chat or automated chat functions, email addresses, or other contact information we make available to customers, as well as recordings of calls with us, where permitted by law (including through the use of automated or artificial intelligence tools provided by us or our third-party providers). We use this information primarily to investigate and respond to your inquiries, to communicate with you via online chat, email, phone, text message or social media, and to improve our products and services.
Personal Data Automatically Collected
We, and our third-party partners, automatically collect information you provide to us and information about how you access and use our products and services when you engage with us. We typically collect this information through the use of a variety of our own and our third-party partners’ automatic data collection technologies, including (i) cookies or small data files that are stored on an individual’s computer and (ii) other, related technologies, such as web beacons, pixels, embedded scripts, mobile SDKs, location-identifying technologies and logging technologies. Information we collect automatically about you may be combined with other personal data we collect directly from you or receive from other sources.
We, and our third-party partners, use automatic data collection technologies to automatically collect the following data when you use our services or otherwise engage with us:
-
Information About Your Device and Network, including the device type, manufacturer, and model, operating system, IP address, browser type, Internet service provider, and unique identifiers associated with you, your device, or your network (including, for example, a persistent device identifier or advertising ID). We employ third-party technologies designed to allow us to recognize when two or more devices are likely being used by the same individual and may leverage these technologies (where permitted by law) to link information collected from different devices.
-
Information About the Way Individuals Use Our Services and Interact With Us, including the site from which you came, the site to which you are going when you leave our services, how frequently you access our services, whether you open emails or click the links contained in emails, whether you access our services from multiple devices, and other browsing behavior and actions you take on our services (such as the pages you visit, the content you view, videos you watch, the communications you have through our services, and the content, links and ads you interact with). We employ third-party technologies designed to allow us to collect detailed information about browsing behavior and actions that you take on our services, which may record your mouse movements, scrolling, and clicks on our services and other browsing, search or purchasing behavior. These third-party technologies may also record information you enter when you interact with our products or services, or engage in chat features or other communication platforms we provide.
-
Information About Your Location, including general geographic location that we or our third-party providers may derive from your IP address.
All of the information collected automatically through these tools allows us to improve your experience. For example, we may use this information to enhance and personalize your user experience, to monitor and improve our products and services, to offer communications features such as live and automated chat, and to improve the effectiveness of our products, services, offers, advertising, communications and customer service. We may also use this information to: (a) remember information so that you will not have to re-enter it during your visit or the next time you visit the site; (b) provide custom, personalized content and information, including targeted content and advertising; (c) identify you across multiple devices; (d) provide and monitor the effectiveness of our services; (e) monitor aggregate metrics such as total number of visitors, traffic, usage, and demographic patterns on our website; (f) diagnose or fix technology problems; and (g) otherwise to plan for and enhance our products and services.
For information about the choices you may have in relation to our use of automatic data collection technologies, please refer to the Your Privacy Choices section below.
Personal Data from Other Sources and Third Parties
We may receive the same categories of personal data as described above from the following sources and other parties:
-
Single Sign-On: We may provide you the ability to log in to our services through certain third-party accounts you maintain. When you use these single sign-on protocols to access our services, we do not receive your login credentials for the relevant third-party service. Instead, we receive tokens from the single sign-on protocol to help identify you in our system (such as by your username) and confirm you successfully authenticated through the single sign-on protocol. This information allows us to more easily provide you access to our products and services.
-
Mobile Sign-On: We may provide you the ability to log in to our mobile applications or authenticate yourself using facial, fingerprint, or other biometric recognition technology available through your mobile device. If you choose to utilize these login features, information about your facial geometry, your fingerprint, or other biometric information will be collected by your mobile device for authentication purposes. We do not store or have access to this biometric information. Instead, your mobile device will perform the biometric authentication process and only let us know whether the authentication was successful. If the authentication was successful, you will be able to access the applicable mobile application or feature without separately providing your credentials. For more details, please refer to the biometric authentication guides offered by your device provider.
-
Other Customers: We may receive your personal data from our other customers. For example, a customer may provide us with your contact information as a part of a referral.
-
Advertisers, Influencers, and Publishers: We engage in advertising both on our services and through third-party services. Advertisers, influencers, and publishers may share personal data with us in connection with our advertising efforts. For example, we may obtain information about whether an advertisement for our services led to a successful engagement between you and us.
-
Business Partners: We may receive your information from our business partners, such as companies that offer their products and/or services as a part of or in connection with our services. For example, certain of our products and services allow our customers to integrate third-party services. If you choose to leverage these third-party service integrations, we may receive confirmation from our business partner regarding whether you are an existing customer of their services.
-
Service Providers: Our service providers that perform services on our behalf, such as analytics and certain marketing providers, collect personal data and often share some or all of this information with us. For example, we receive personal data you may submit in response to requests for feedback to our survey providers.
-
Other Sources: We may also collect personal data about you from other sources, including through transactions such as mergers and acquisitions.
-
Inferences: We may generate inferences or predictions about you and your interests and preferences based on the other personal data we collect and the interactions we have with you.
Additional Uses of Personal Data
In addition to the primary purposes for using personal data described above, we may also use personal data we collect to:
-
Fulfill or meet the reason the information was provided, such as to fulfill our contractual obligations, to facilitate payment for our products and services, or to deliver the services requested;
-
Manage our organization and its day-to-day operations;
-
Communicate with you, including via email, text message, chat, social media and/or telephone calls;
-
Facilitate the relationship we have with you and, where applicable, the company you represent;
-
Request you provide us feedback about our product and service offerings;
-
Address inquiries or complaints made by or about an individual in connection with our products or services;
-
Create and maintain accounts for our users;
-
Verify your identity and entitlement to our products and services;
-
Market our products and services to you, including through email, phone, text message, push notification, and social media;
-
Administer, improve, and personalize our products and services, including by recognizing you and remembering your information when you return to our products and services;
-
Develop, operate, improve, maintain, protect, and provide the features and functionality of our products and services;
-
Identify and analyze how you use our products and services;
-
Create aggregated or de-identified information that cannot reasonably be used to identify you, which information we may use for purposes outside the scope of this Privacy Notice;
-
Improve and customize our products and services to address the needs and interests of our user base and other individuals we interact with;
-
Test, enhance, update, and monitor the products and services, or diagnose or fix technology problems;
-
Help maintain and enhance the safety, security, and integrity of our property, products, services, technology, assets, and business;
-
Defend, protect, or enforce our rights or applicable contracts and agreements (including our Terms of Service), as well as to resolve disputes, to carry out our obligations and enforce our rights, and to protect our business interests and the interests and rights of third parties;
-
Detect, prevent, investigate, or provide notice of security incidents or other malicious, deceptive, fraudulent, or illegal activity and protect the rights and property of exe.dev and others;
-
Facilitate business transactions and reorganizations impacting the structure of our business;
-
Comply with contractual and legal obligations and requirements;
-
Fulfill any other purpose for which you provide your personal data, or for which you have otherwise consented.
Our Disclosure of Personal Data
We disclose or otherwise make available personal data in the following ways:
-
To Marketing Providers: We coordinate and share personal data with our marketing providers in order to advertise and communicate with you about the products and services we make available.
-
To Ad Networks and Advertising Partners: We work with third-party ad networks and advertising partners to deliver advertising and personalized content on our services, on other websites and services, and across other devices. These parties may collect information automatically from your browser or device when you visit our websites and other services through the use of cookies and related technologies. This information is used to provide and inform targeted advertising, as well as to provide advertising-related services such as reporting, attribution, analytics, and market research.
-
To Business Partners: We may share personal data with our business partners, or we may allow our business partners to collect personal data directly from you in connection with our services. Our business partners may use your personal data for their own business and commercial purposes, including to send you information about their products and services.
-
To Service Providers: We engage other third parties to perform certain services on our behalf in connection with the uses of personal data described in the sections above. Depending on the applicable services, these service providers may process personal data on our behalf or have access to personal data while performing services on our behalf.
-
To Other Businesses as Needed to Provide Services: We may share personal data with third parties you engage with through our services or as needed to fulfill a request or transaction including, for example, payment processing services.
-
In Connection with a Business Transaction or Reorganization: We may take part in or be involved with a business transaction or reorganization, such as a merger, acquisition, joint venture, or financing or sale of company assets. We may disclose, transfer, or assign personal data to a third party during negotiation of, in connection with, or as an asset in such a business transaction or reorganization. Also, in the unlikely event of our bankruptcy, receivership, or insolvency, your personal data may be disclosed, transferred, or assigned to third parties in connection with the proceedings or disposition of our assets.
-
To Facilitate Legal Obligations and Rights: We may disclose personal data to third parties, such as legal advisors and law enforcement:
-
in connection with the establishment, exercise, or defense of legal claims;
-
to comply with laws or to respond to lawful requests and legal process;
-
to protect our rights and property and the rights and property of our agents, customers, and others, including to enforce our agreements, policies, and terms of use;
-
to detect, suppress, or prevent fraud;
-
to reduce credit risk and collect debts owed to us;
-
to protect the health and safety of us, our customers, or any person; or
-
as otherwise required by applicable law.
-
-
With Your Consent or Direction: We may disclose your personal data to certain other third parties or publicly with your consent or direction. For example, with your permission, we may post your testimonial on our websites.
Your Privacy Choices
Communication Preferences
-
Email Communication Preferences: You can stop receiving promotional email communications from us by clicking on the “unsubscribe” link provided in any of our email communications. Please note you cannot opt-out of service-related email communications (such as, account verification, transaction confirmation, or service update emails).
-
Push Notification Preferences: You can stop receiving push notifications from us by changing your preferences in your device’s notification settings menu or in the applicable service-specific application. Please note we do not have any control over your device’s notifications settings and are not responsible if they do not function as intended.
Withdrawing Your Consent
Where we have your consent for the processing of your personal data (e.g., when you opt in to receive certain types of marketing communications from us), you may withdraw your consent by following the instructions provided when your consent was requested or by contacting us as set forth in the Contact Us section below.
Automatic Data Collection Preferences
You may be able to utilize third-party tools and features to restrict our use of automatic data collection technologies. For example, (i) most browsers allow you to change browser settings to limit automatic data collection technologies on websites, (ii) most email providers allow you to prevent the automatic downloading of images in emails that may contain automatic data collection technologies, and (iii) many devices allow you to change your device settings to limit automatic data collection technologies for device applications. Please note that blocking automatic data collection technologies through third-party tools and features may negatively impact your experience using our services, as some features and offerings may not work properly or at all. Depending on the third-party tool or feature you use, you may not be able to block all automatic data collection technologies or you may need to update your preferences on multiple devices or browsers. We do not have any control over these third-party tools and features and are not responsible if they do not function as intended.
Targeted Advertising Preferences
We engage third parties to help us facilitate targeted advertising designed to show you personalized ads based on predictions of your preferences and interests developed using personal data we maintain and personal data our third-party partners obtain from your activity over time and across nonaffiliated websites and other services. The data we and our third-party partners use for purposes of facilitating targeted advertising, as well as to provide advertising-related services such as reporting, attribution, analytics, and market research, are primarily collected through the use of a variety of automatic data collection technologies, including cookies, web beacons, pixels, embedded scripts, mobile SDKs, location-identifying technologies and logging technologies. We may share a common account identifier (such as a hashed email address or user ID) with our third-party advertising partners to help link the personal data we and our third-party partners collect to the same person, or otherwise target advertising to an individual on a third-party website or platform.
In addition to taking the steps set forth in the Automatic Data Collection Preferences section above, you may be able to further exercise control over the advertisements that you see by leveraging one or more targeted advertising opt-out programs. For example:
-
Device-Specific Opt-Out Programs: Certain devices provide individuals the option to turn off targeted advertising for the entire device (such as Apple devices through their App Tracking Transparency framework or Android devices through their opt out of ads personalization feature). Please refer to your device manufacturer’s user guides for additional information about implementing any available device-specific targeted advertising opt-outs.
-
Digital Advertising Alliance: The Digital Advertising Alliance allows individuals to opt out of receiving online interest-based targeted advertisements from companies that participate in their program. Please follow the instructions at https://optout.aboutads.info/?c=2&lang=EN for browser-based advertising and https://www.youradchoices.com/appchoices for app-based advertising to opt out of targeted advertising carried out by our third-party partners and other third parties that participate in the Digital Advertising Alliance’s self-regulatory program.
-
Network Advertising Initiative: The Network Advertising Initiative also provides individuals instructions for further controlling how information is used for online advertising. Please follow the instructions at https://thenai.org/how-to-opt-out/ to exercise these controls.
-
Platform-Specific Opt-Out Programs: Certain third-party platforms provide individuals the option to turn off targeted advertising for the entire platform (such as certain social media platforms). Please refer to your platform provider’s user guides for additional information about implementing any available platform-specific targeted advertising opt-outs.
Please note that when you opt out of receiving interest-based advertisements through one of these programs, this does not mean you will no longer see advertisements from us or on our services. Instead, it means that the online ads you do see from relevant program participants should not be based on your interests. We are not responsible for the effectiveness of, or compliance with, any third parties’ opt-out options or programs or the accuracy of their statements regarding their programs. In addition, program participants may still use automatic data collection technologies to collect information about your use of our services, including for analytics and fraud prevention as well as any other purpose permitted under the applicable advertising industry program.
Modifying or Deleting Your Personal Data
If you have any questions about reviewing, modifying, or deleting your personal data, you can contact us as set forth in the Contact Us section below. We may not be able to modify or delete your personal data in all circumstances.
Partner-Specific Preferences
Certain of our third-party providers and partners offer additional ways that you may exercise control over your personal data, or automatically impose limitations on the way we can use personal data in connection with the services they provide:
- Device-Specific / Platform-Specific Preferences: The device and/or platform you use to interact with us (such as your mobile device or social media provider), may provide you additional choices with regard to the data you choose to share with us. For example, many mobile devices allow you to change your device permissions to prevent our products and services from accessing certain types of information from your device (such as your contact lists or precise geolocation data), and many social media platforms allow you to change your platform permissions to prevent integrated products and services from accessing certain types of information connected with your profile. Please refer to your device or platform provider’s user guides for additional information about implementing any available platform-specific targeted advertising opt-outs.
Children’s Personal Data
Our services are not directed to, and we do not intend to, or knowingly, collect or solicit personal data from children under the age of 13. If an individual is under the age of 13, they should not use our services or otherwise provide us with any personal data either directly or by other means. If a child under the age of 13 has provided personal data to us, we encourage the child’s parent or guardian to contact us to request that we remove the personal data from our systems. If we learn that any personal data we collect has been provided by a child under the age of 13, we will promptly delete that personal data.
Security of Personal Data
We have implemented reasonable physical, technical, and organizational safeguards that are designed to protect your personal data. In addition, we take steps designed to ensure any third party with whom we share personal data provides a similar level of protection. However, despite these controls, we cannot completely ensure or warrant the security of your personal data.
Third-Party Websites and Services
Our websites and other services may include links to or redirect you to third-party websites, plug-ins, applications, or other services. Third-party websites and other services may also reference or link to our websites and services. This Privacy Notice does not apply to any personal data practices of these third-party websites, plug-ins, applications, or other services. To learn about these third parties’ personal data practices, please visit their respective privacy notices.
Updates to This Privacy Notice
We may update this Privacy Notice from time to time. When we make changes to this Privacy Notice, we will change the date at the beginning of this Privacy Notice. If we make material changes to this Privacy Notice, we will notify individuals by email to their registered email address, by prominent posting on this website or our other platforms, or through other appropriate communication channels. All changes shall be effective from the date of publication unless otherwise provided.
Contact Us
If you have any questions or requests in connection with this Privacy Notice or other privacy-related matters, please contact us at: support@exe.dev.
Terms of Service
Last Modified: 2026-01-01
These Terms of Service (these “Terms”) describe the terms and conditions by which you may access and/or use the website(s), including https://exe.dev, and any and all related software, documentation, and online, mobile-enabled, and/or digital services (collectively, the “Service”) provided by Bold Software, Inc. (including its successors and assigns, “Company,” “we,” “our,” or “us”). By accessing and/or using the Service, you’re agreeing to these Terms and acknowledging that you have read and understood our Privacy Notice. If you don’t agree to these Terms, you may not use the Service. We reserve the right to modify these Terms, as described below. These Terms apply to all visitors and users of the Service, and to all others who access the Service (collectively, “Users,” and, as applicable to you, “you” or “your”).
PLEASE READ THESE TERMS CAREFULLY TO ENSURE THAT YOU UNDERSTAND EACH PROVISION. THESE TERMS CONTAIN A MANDATORY INDIVIDUAL ARBITRATION PROVISION IN SECTION 14.2 (THE "ARBITRATION AGREEMENT") AND A CLASS ACTION/JURY TRIAL WAIVER PROVISION IN SECTION 14.3 (THE "CLASS ACTION/JURY TRIAL WAIVER") THAT REQUIRE, UNLESS YOU OPT OUT PURSUANT TO THE INSTRUCTIONS IN THE ARBITRATION AGREEMENT, THE EXCLUSIVE USE OF FINAL AND BINDING ARBITRATION ON AN INDIVIDUAL BASIS TO RESOLVE DISPUTES BETWEEN YOU AND US, INCLUDING ANY CLAIMS THAT AROSE OR WERE ASSERTED BEFORE YOU AGREED TO THESE TERMS. TO THE FULLEST EXTENT PERMITTED BY APPLICABLE LAW (AS DEFINED BELOW), YOU EXPRESSLY WAIVE YOUR RIGHT TO SEEK RELIEF IN A COURT OF LAW AND TO HAVE A JURY TRIAL ON YOUR CLAIMS, AS WELL AS YOUR RIGHT TO PARTICIPATE AS A PLAINTIFF OR CLASS MEMBER IN ANY CLASS, COLLECTIVE, PRIVATE ATTORNEY GENERAL, OR REPRESENTATIVE ACTION OR PROCEEDING.
-
How We Administer the Service
-
Eligibility. This is a contract between you and Company. You must read and agree to these Terms before using the Service. You may use the Service only if you can form a legally binding contract with us, and only in compliance with these Terms and all applicable local, state, national, and international laws, rules, and regulations (“Applicable Law”). To use the Service, you must be at least 18 years old (or the age of majority in your jurisdiction). The Service is not available to any Users we previously removed from the Service.
-
User Accounts
-
Your User Account; Suspension and Termination. Your account on the Service (your “User Account”) gives you access to certain services and functionalities that we may, in our sole discretion, establish and maintain as part of the Service from time to time. We may, with or without prior notice, permanently terminate or temporarily suspend your access to your User Account and/or the Service without liability and for any or no reason, including if you violate any provision of these Terms. Additionally, you may deactivate your User Account at any time. We may, with or without prior notice, change or stop providing the Service, to you or to Users generally, or create usage limits for the Service.
-
Organizational Accounts. An individual may access and/or use the Service on behalf of a company or other entity, such as that individual’s employer (such entity, an “Organization”). In such cases, notwithstanding anything to the contrary herein: (a) these Terms are an agreement between (i) us and such individual and (ii) us and that Organization; (b) “you,” as used in these Terms in the context of a license grant, assignment, restriction, obligation, acknowledgment, representation, warranty, or covenant, or in any similar context, means (i) such individual and (ii) “the Organization, on behalf of the Organization and its subsidiaries and affiliates, and its and their respective directors, officers, employees, contractors, agents, and other representatives who access and/or use the Service (collectively, “Org Users”)”; and “your” has the corresponding meanings; (c) such individual represents and warrants to having the authority to bind that Organization to these Terms (and, in the absence of such authority, such individual may not access, nor use, the Service); (d) such individual’s acceptance of these Terms will bind that Organization to these Terms; (e) we may disclose information regarding such individual and such individual’s access to and use of the Service to that Organization; (f) such individual’s right to access and use the Service may be suspended or terminated (and the administration of the applicable User Account may be transferred) if such individual ceases to be associated with, or ceases to use an email address associated with or provisioned by, that Organization; (g) that Organization will make all Org Users aware of these Terms’ provisions, as applicable to such Org Users, and will cause each Org User to comply with such provisions; and (h) that Organization will be solely responsible and liable for all acts and omissions of the Org Users, and any act or omission by any Org User that would constitute a breach of these Terms had it been taken by that Organization will be deemed a breach of these Terms by that Organization. Without limiting the generality of the foregoing, if an individual opens a User Account using an email address associated with or provisioned by an Organization, or if an Organization pays fees due in connection with such individual’s access to or use of the Service (or reimburses such individual for payment of such fees), then we may, in our sole discretion, deem such individual to be accessing and using the Service on behalf of that Organization.
-
Account Security. You may never use another User’s User Account without such User’s permission. You are solely responsible for the activity that occurs on your User Account, you will keep your User Account password(s) and/or any other authentication credentials secure, and you will not share your password(s) and/or any other authentication credentials with anyone else. We encourage you to use “strong” passwords (passwords that use a combination of upper- and lower-case letters, numbers, and symbols) to protect your User Account. Any Org User with administrator-level access to your User Account can modify your User Account settings, access, and billing information. We will not be liable for, and expressly disclaim liability for, any losses caused by any unauthorized use of your User Account and/or any changes to your User Account. You will notify us immediately of any breach of security or unauthorized use of your User Account.
-
Account Settings. You may control certain aspects of your User Account and any associated User profile, and of the way you interact with the Service, by changing the settings in your settings page. By providing us with your email address, you consent to our using that email address to send you Service-related notices. If we send you marketing-related emails, you may opt out of receiving them or change your preferences by contacting the Service support team at support@exe.dev or by clicking on the “unsubscribe” link within a marketing email. Opting out will not prevent you from receiving Service-related notices.
-
-
Your Interactions with Other Users. YOU ARE SOLELY RESPONSIBLE FOR YOUR INTERACTIONS, INCLUDING SHARING OF INFORMATION, WITH OTHER USERS. WE RESERVE THE RIGHT TO MONITOR DISPUTES BETWEEN YOU AND OTHER USERS. WE EXPRESSLY DISCLAIM ALL LIABILITY ARISING FROM YOUR INTERACTIONS WITH OTHER USERS, AND FOR ANY USER'S ACTION OR INACTION, INCLUDING RELATING TO USER CONTENT (AS DEFINED BELOW).
-
-
Access to the Service; Service Restrictions
-
Access to the Service. Subject to your compliance with these Terms and any documentation we may make available to you, you are hereby granted a non-exclusive, limited, non-transferable, and freely revocable right to access and use the Service, solely for your personal use or internal business purposes, as permitted by the features of the Service. We reserve all rights not expressly granted herein in and to the Service. Notwithstanding anything to the contrary herein, certain portions of the Service may be available only during the Subscription Term(s) (as defined below), as further described in Section 6.4 (Subscription Plans).
-
Restrictions and Acceptable Use. Except to the extent a restriction is prohibited by Applicable Law, you will not do, and will not enable any third party to do, any of the following:
-
disassemble, reverse engineer, decode, or decompile any part of the Service or license or resell or modify any part of the Service;
-
use any automated or non-automated means to access the Service for “scraping” (except that public search engines may use spiders to create searchable indices of public materials, only as specified in the robots.txt file);
-
use the Service to disable, override, or otherwise interfere with any Company-implemented communications to end users, consent screens, user settings, alerts, warning, or the like;
-
impose an unreasonable or disproportionately large load on Company infrastructure, including without limitation intentionally uploading excessive amounts of data or otherwise abusing the Service in a manner that degrades performance for others, especially for the purpose of evading payment or financial obligations;
-
use the Service for cryptocurrency mining or other unauthorized commercial purposes;
-
use the Service in any manner that impacts the stability of the servers or the operation or performance of the Service or any User’s use of the Service;
-
copy, rent, lease, sell, loan, transfer, assign, sublicense, resell, distribute, modify, alter, or create derivative works of any part of the Service or any of our intellectual property;
-
use the Service in any manner that (i) violates any Applicable Law, contractual obligation, or right of any person, (ii) is fraudulent, false, deceptive, or defamatory, (iii) promotes hatred, violence, or harm against, or (iv) otherwise may be harmful or objectionable to us or any other third party;
-
use the Service in competition with us, to develop competing products or services, for benchmarking or competitive analysis of the Service, or otherwise to our detriment or disadvantage;
-
bypass the measures we may use to prevent or restrict access to the Service;
-
use the Service to transmit spam or other unsolicited email (and we may immediately remove any content that we believe to be spam) or use the Service for commercial solicitation;
-
access any content available on or via the Service through any technology or means other than those provided by the Service or authorized by us;
-
attempt to interfere with, compromise the system integrity or security of, or decipher any transmissions to or from, the servers running the Service;
-
transmit invalid data, viruses, worms, or other software agents through the Service;
-
collect or harvest any personal information from the Service; or
-
refer to us or to the Service in a manner that could imply a relationship that involves endorsement, affiliation, or sponsorship between you (or a third party) and us without our consent.
-
-
-
User Content
-
As between us and you, you (or your licensors) will own any and all information, data, and other content that is collected or otherwise received by us from you through the Service (“User Content”).
-
We claim no ownership rights over User Content, and, as between you and us, all User Content that is submitted, posted, displayed, provided, shared, or otherwise made available on or via the Service by you is and will remain yours. We have the right (but not the obligation) in our sole discretion to remove any of your User Content that is shared via the Service. You grant, and you represent and warrant that you have all rights necessary to grant, to us, under all of your intellectual property rights, a non-exclusive and royalty-free right and license to use, copy, store, modify, distribute, reproduce, and display your User Content and Output: (i) to maintain and provide the Service; (ii) to exercise our rights and enforce our obligations under these Terms; and (iii) to perform such other actions authorized by you in connection with your use of the Service.
-
You affirm, represent, and warrant the following: (a) you have obtained, and are solely responsible for obtaining, all consents required by Applicable Law to provide User Content relating to third parties; (b) your User Content and Output and our use thereof as contemplated by these Terms and the Service will not violate any Applicable Law or infringe any rights of any third party, including, but not limited to, any intellectual property rights, privacy rights and confidentiality rights; (c) you will not upload or make available through the Service, either directly or by other means, any personal information of children under 13 or the applicable age of digital consent; and (d) your User Content does not include sexually suggestive content; hate speech or direct attacks on an individual or group; content that is abusive, harassing, defamatory, vulgar, libelous, or invasive of another’s privacy; sexist or racially, ethnically, or otherwise discriminatory content; content that contains self-harm or excessive violence; impostor profiles; content in furtherance of harmful or illegal activities; malicious programs or code; any person’s personal information without such person’s consent; spam messages; and/or otherwise objectionable content.
-
You own your User Content and we claim no ownership rights over your user content. We take no responsibility and assume no liability for any user content. You will be solely responsible for your user content and the consequences of submitting, posting, displaying, providing, sharing, or otherwise making it available on or through the service, and you understand and acknowledge that we are acting only as a passive conduit for your online distribution and publication of your user content. WE TAKE NO RESPONSIBILITY AND ASSUME NO LIABILITY FOR ANY USER CONTENT. YOU WILL BE SOLELY RESPONSIBLE FOR YOUR USER CONTENT AND THE CONSEQUENCES OF SUBMITTING, POSTING, DISPLAYING, PROVIDING, SHARING, OR OTHERWISE MAKING IT AVAILABLE ON OR THROUGH THE SERVICE, AND YOU UNDERSTAND AND ACKNOWLEDGE THAT WE ARE ACTING ONLY AS A PASSIVE CONDUIT FOR YOUR ONLINE DISTRIBUTION AND PUBLICATION OF YOUR USER CONTENT. YOU UNDERSTAND AND ACKNOWLEDGE THAT THE SERVICE MAY EXPOSE YOU TO CONTENT THAT IS INACCURATE, OBJECTIONABLE, INAPPROPRIATE FOR CHILDREN, OR OTHERWISE UNSUITED TO YOUR PURPOSE, AND YOU UNDERSTAND AND ACKNOWLEDGE THAT WE WILL NOT BE LIABLE FOR ANY DAMAGES YOU ALLEGE TO INCUR AS A RESULT OF OR RELATING TO ANY CONTENT ACCESSED ON OR THROUGH THE SERVICE.
-
-
Intellectual Property
-
Company Intellectual Property. You understand and acknowledge that we (or our licensors (including other Users), as applicable) own and will continue to own all rights (including intellectual property rights), title, and interest in and to the Service, all materials and content displayed or otherwise made available on and/or through the Service (excluding your User Content), and all software, algorithms, code, technology, and intellectual property underlying and/or included in or with the Service. Use of any intellectual property for any purpose not expressly permitted by these Terms is strictly prohibited.
-
Generated Content. You may be allowed to submit text, documents, images and other materials to the Services for processing, and receive output from the Services based on such materials (“Output”). Due to the nature of machine learning, use of the service may result in incorrect Output. You must evaluate the accuracy of any Output as appropriate for your use case, including by using human review of the output. You agree that we shall not be liable for any damages you or any third party alleges to incur as a result of or relating to any Output or other content generated by or accessed on or through the service.
-
Usage Data. We may collect, or you may provide to us, diagnostic, technical, usage, and/or related information, including information about your computers, mobile devices, systems, and software (collectively, “Usage Data”). All Usage Data is and will be owned solely and exclusively by us, and, to the extent any ownership rights in or to the Usage Data vest in you, you hereby assign to us all rights (including intellectual property rights), title, and interest in and to same. Accordingly, we may use, maintain, and/or process the Usage Data or any portion thereof for any lawful purpose, including, without limitation: (a) to provide and maintain the Service; (b) to improve our products and services (including the Service), and to develop new products, services, and/or features; (c) to monitor your usage of the Service; (d) for research and analytics, including, without limitation, data analysis, identifying usage trends, and/or customer research; and (e) to share analytics and other derived Usage Data with third parties, solely in de-identified or aggregated form. The Service may contain technological measures designed to prevent unauthorized or illegal use of the Service; you understand and acknowledge that we may use these and other lawful measures to verify your compliance with these Terms and to enforce our rights, including intellectual property rights, in and to the Service.
-
Open Source Software. Some software used in our Service may be offered under an open source license that we make available to you. There may be provisions in an open source license that expressly override some of these terms, so please be sure to read those licenses.
-
Feedback. To the extent you provide us any suggestions, recommendations, or other feedback relating to the Service or to any other Company products or services (collectively, “Feedback”), you hereby assign to us all rights (including intellectual property rights), title, and interest in and to the Feedback, without providing any attribution or compensation to you or to any third party. Please treat Feedback as our Confidential Information (as defined below).
-
-
Confidential Information
The Service may include non-public, proprietary, or confidential information of Company and/or of other Users (“Confidential Information”). Confidential Information includes any information that should reasonably be understood to be confidential given the nature of the information and the circumstances of disclosure, including non-public business, product, technology, and marketing information. You will: (a) protect and safeguard the confidentiality of all Confidential Information with at least the same degree of care as you would use protect your own highly sensitive confidential information, but in no event with less than a reasonable degree of care; (b) not use any Confidential Information for any purpose other than to exercise your rights, or to perform your obligations, under these Terms; and (c) not disclose any Confidential Information to any person or entity, except your service providers or financial or legal advisors who/that (i) need to know the Confidential Information and (ii) are bound by non-use and non-disclosure restrictions at least as restrictive as those set forth in this Section.
-
Payments, Billing, and Subscription Plans
-
Billing Policies; Taxes. Certain aspects of the Service may be provided for free, while certain other aspects of the Service may be provided for a fee (“Fee”). Each Fee (including each Subscription Fee (as defined below)) is the sum of the applicable Company Fee (as defined below) and any applicable Third-Party Fees (as defined below). By electing to use non-free aspects of the Service, including enrolling in Subscription(s) (as defined below), you agree to the pricing and payment terms applicable to you, as may be made available on our website (including without limitation at https://exe.dev/docs/pricing) or via your User Account, and as incorporated by reference herein. We may add new products and/or services for additional Fees, add or amend Fees for existing products and/or services, and/or discontinue offering any Subscriptions at any time; provided, however, that if we have agreed to a specific Subscription Term and a corresponding Subscription Fee, then that Subscription will remain in force for that Subscription Fee during that Subscription Term. Any change to our pricing and payment terms will become effective in the billing cycle following our provision of notice of such change. Except as may be expressly stated in these Terms, all Fees must be paid in advance, payment obligations are non-cancelable once incurred (subject to any cancellation rights set forth in these Terms), and Fees paid are non-refundable. Fees are stated exclusive of any taxes, levies or duties (collectively, but, for clarity, excluding taxes based on our net income, “Taxes”). You will be responsible for paying all Taxes associated with your purchases and/or Subscriptions in connection with the Service.
-
Definitions
-
“Company Fee” means the portion of the Fee (including any Subscription Fee) that Company may retain as consideration for providing the Service or any portion thereof (including any particular Subscription), as applicable.
-
“Subscription” means a particular portion of the Service that is available on an automatically renewing subscription basis, and your access thereto, as applicable.
-
“Subscription Fee” means the recurring amount due as consideration for a Subscription.
-
“Third-Party Fees” means the portion of the Fee (including any Subscription Fee) retained by one (1) or more third parties, including Payment Processor, that we may engage from time to time, in our sole discretion.
-
“Payment Processors” means the third-party payment processors which we engage to process payments Users make in connection with the Service.
-
-
Your Payment Method
-
General. To use non-free aspects of the Service, you must provide us with at least one (1) valid payment card that is accepted by us and Payment Processor (each such card, a “Payment Method”). By providing a Payment Method, you authorize each of Company and Payment Processor to charge that Payment Method the applicable Fees and Taxes, including, if applicable, on a recurring basis until you cancel your Subscription (including any notice period specified in the Cancellation Procedures section below). Fees and Taxes will be charged to your Payment Method on the specific payment date indicated in your User Account. The length of your billing cycle will depend on the type of Subscription in which you are enrolled, if applicable. We may authorize your Payment Method in anticipation of Service-related charges through various methods.
-
Third-Party Payment Processor. We or Payment Processor will attempt to verify your Payment Method(s), and may do so by processing an authorization hold, which is standard practice. To the extent Payment Processor processes payments made by you, you will be subject to terms and conditions governing the use of Payment Processor’s service. Please review such terms and conditions as well as Payment Processor’s privacy notice (each of which is available on Payment Processor’s website). You acknowledge and understand that Payment Processor may collect and retain Third-Party Fees whenever you pay Fees (including Subscription Fees). Payment must be received by Payment Processor before our acceptance of an order. For all payments, Payment Processor will collect your Payment Method details and charge your chosen Payment Method in connection with an order. If any of your account, order, or Payment Method information changes, you will promptly update such information, so that we or Payment Processor may complete your transaction(s) and/or contact you, as needed. By using our Service, you agree to be bound by the Services Agreement of Stripe, one of our Payment Processors, available at https://stripe.com/us/legal.
-
Payment Representations and Warranties. You represent and warrant that: (i) the account, order, and Payment Method information you supply to us and/or to Payment Processor, as applicable, is true, accurate, correct, and complete; (ii) you are duly authorized to use the Payment Method(s); (iii) you will pay any and all charges incurred by users of your Payment Method in connection with the Service, including any applicable Fees (at the prices in effect when such charges are incurred) and Taxes; (iv) charges incurred by you will be honored by your Payment Method company; (v) you will not allow or enable anyone else to use your Subscription (including, without limitation, by sharing your password(s) or any other authentication credentials with anyone else, or by attempting to transfer your Subscription to anyone else); and (vi) you will report to us any unauthorized or prohibited access to or use of your Subscription and/or password(s) or other authentication credentials.
-
Disclaimer. WE DISCLAIM ANY AND ALL LIABILITY WITH RESPECT TO, AND YOU UNDERSTAND AND ACKNOWLEDGE THAT WE ARE NOT RESPONSIBLE FOR: (I) ANY SECURITY OR PRIVACY BREACHES RELATED TO YOUR CREDIT CARD OR OTHER PAYMENT METHOD, (II) ANY FEES THAT MAY BE CHARGED TO YOU BY YOUR BANK IN CONNECTION WITH THE COLLECTION OF FEES, AND/OR (III) ANY UNAUTHORIZED USE OF YOUR CREDIT CARD, DEBIT CARD, OR OTHER PAYMENT METHOD BY A THIRD PARTY.
-
-
Subscription Plans
-
Automatic Renewals. Subscriptions are available on an automatically renewing subscription basis and entail payment of Subscription Fees. YOUR SUBSCRIPTION WILL AUTOMATICALLY RENEW AT THE END OF EACH SUBSCRIPTION TERM IDENTIFIED IN YOUR ACCOUNT FOR SUBSEQUENT TERMS EQUAL IN LENGTH TO THAT INITIAL SUBSCRIPTION TERM (EACH SUCH PERIOD, A “SUBSCRIPTION TERM”) UNLESS AND UNTIL YOU CANCEL THE APPLICABLE SUBSCRIPTION IN ACCORDANCE WITH THE CANCELLATION PROCEDURES IDENTIFIED BELOW. YOU UNDERSTAND THAT UNLESS AND UNTIL YOU NOTIFY US OF YOUR INTENT TO CANCEL, YOUR SUBSCRIPTION AND THE CORRESPONDING SUBSCRIPTION FEE WILL AUTOMATICALLY RENEW, AND YOU AUTHORIZE EACH OF Company AND PAYMENT PROCESSOR (WITHOUT NOTICE TO YOU, UNLESS REQUIRED BY APPLICABLE LAW) TO CHARGE YOU THE APPLICABLE SUBSCRIPTION FEE AND ANY APPLICABLE TAXES, USING ANY OF YOUR PAYMENT METHODS.
-
Automatic Billing and Policies. When you enroll in a Subscription, you expressly acknowledge and agree that: (i) each of Company and Payment Processor is authorized to charge you, at the beginning of each Subscription Term, the Subscription Fee for the applicable Subscription, any applicable Taxes, and any other charges you may incur in connection with such Subscription, subject to adjustment in accordance with these Terms; and (ii) your Subscription is continuous until the earlier of: (A) your cancellation of such Subscription (including any notice period specified in the Cancellation Procedures section below) and (B) the suspension, discontinuation, or termination of your access to such Subscription or to the Service in accordance with these Terms. You understand and acknowledge that the amounts billed may vary due to Promotional Offers (as defined below), changes to the Subscription Fee in accordance with the payment terms set forth via the Service, and/or changes in applicable Taxes, and you authorize each of Company and Payment Processor to charge your Payment Method the changed amounts.
-
Cancellation Procedures. To cancel any Subscription, you must notify us before the start of the next Subscription Term by using the appropriate functionalities of the Service, including through the same method you used to sign up (for example, if you signed up online, you may cancel online through your User Account settings), or by contacting us at support@exe.dev. You will continue to have access to the Subscription through the end of the then-current Subscription Term. You understand that unless and until you notify us of your intent to cancel, your subscription and the corresponding subscription fee will automatically renew, and you authorize each of COMPANY and payment processor (without notice to you, unless required by applicable law) to charge you the applicable subscription fee and any applicable taxes, using any of your payment methods.
-
Cancellation; Refunds. You may de-activate your User Account or any Subscription at any time and we may suspend or terminate your Subscription, your User Account, or the Service at any time, in our sole discretion. HOWEVER, YOU UNDERSTAND AND ACKNOWLEDGE THAT, UNLESS REQUIRED BY APPLICABLE LAW, YOU WILL NOT BE ENTITLED TO RECEIVE ANY REFUND OR CREDIT FOR ANY SUCH CANCELLATION, SUSPENSION, OR TERMINATION, NOR FOR ANY UNUSED TIME ON YOUR SUBSCRIPTION, ANY PRE-PAYMENTS MADE IN CONNECTION WITH YOUR SUBSCRIPTION, ANY USAGE OR SUBSCRIPTION FEES FOR ANY PORTION OF THE SERVICE, ANY CONTENT OR DATA ASSOCIATED WITH YOUR USER ACCOUNT, OR ANYTHING ELSE, AND THAT ANY SUCH REFUNDS OR CREDITS MAY BE GRANTED AT OUR SOLE OPTION AND IN OUR SOLE DISCRETION. If you believe you have been improperly charged and would like to request a refund, please contact us at support@exe.dev.
-
Free Trials. We may, at our sole option and in our sole discretion, offer free trials to a particular portion of the Service, subject to the terms of the offer. If you are signed up to such a free trial, we or Payment Processor will automatically bill your Payment Method on the day that follows the last day of your free trial (which day will be the first day of your first Subscription Term), and on the first day of each subsequent Subscription Term, subject to these Terms. If you wish to avoid charges to your Payment Method, you must cancel your free trial by 11:59 PM Eastern Time on the last day of your free trial period, using the same method you used to sign up or any other method we make available to you. If you cancel your free trial while it is ongoing, your access to the applicable portion of the Service may be terminated immediately upon such cancellation.
-
-
Promotional Offers. We may from time to time offer special promotional offers, plans, or memberships (“Promotional Offers”). Promotional Offer eligibility is determined by us in our sole discretion, and we reserve the right to revoke a Promotional Offer in the event that we determine you are not eligible. We may use information such as device ID, method of payment, and/or an email address used in connection with your User Account to determine eligibility. The eligibility requirements and other limitations and conditions will be disclosed when you sign-up for the Promotional Offer or in other communications made available to you. You understand and acknowledge that any Promotional Offers, including, without limitation, relating to Subscriptions, are subject to change at any time and from time to time.
-
-
Privacy; Data Security
-
Privacy. We care about your privacy. To provide and enhance the Service, we may need to be able to identify you and your interests, and we use your personal data to do this. By using the Service, you acknowledge that we may collect, use, and disclose your personal information and aggregated and/or anonymized data as set forth in our Privacy Notice, and that your personal information may be transferred to, and/or processed in, the United States.
-
Security. We care about the integrity and security of your personal information. However, we cannot guarantee that unauthorized third parties will never be able to defeat our security measures or to use your data for improper purposes. You acknowledge that you provide your data at your own risk.
-
-
Text Messaging and Calls
-
General. You may provide us with your telephone number as part of creating your User Account or otherwise. By providing a telephone number, you consent to receiving autodialed or prerecorded calls and/or text messages from us, or on our behalf, at such telephone number. We may place such calls or send such texts to (a) help keep your User Account secure through the use of multi-factor authentication (“MFA”); (b) help you access your User Account if you are experiencing difficulties; and/or (c) as otherwise necessary to service your account or enforce these Terms, our policies, Applicable Law, or any other agreement we may have with you. Part of the MFA identity-verification process may involve Company sending text messages containing security codes to the telephone number you provided, and you agree to receive such texts from or on behalf of Company.
-
Consent to Transactional Communications. You expressly consent and agree to Company contacting you using written, electronic, and/or verbal means, including manual dialing, emails, prerecorded/artificial voice messages, and/or using an automatic telephone dialing system to call or text your mobile/cellular telephone number, as necessary to complete transactions requested by you and to service your account, and as permitted by Applicable Law, in each case even if the phone number is registered on any United States federal and/or state Do-Not-Call/Do-Not-email registry/ies. Message and data rates apply. For purposes of clarity, the text messages described in this paragraph are transactional text messages, not promotional text messages.
-
Consent to Promotional Messages. Additionally, we offer you the chance to enroll to receive recurring SMS/text messages from Company. You may enroll to receive text messages about account-related news and alerts and/or Promotional Offers (including cart reminders) and marketing related to Company products and/or services. By enrolling in Company’s SMS/text messaging service, you agree to receive text messages from Company to the mobile phone number provided by you, and you certify that such mobile number is true and accurate and that you are authorized to enroll such mobile number to receive such texts. You acknowledge and agree that the texts may be sent using an automatic telephone dialing system and that message and data rates apply. Check your mobile plan and contact your wireless provider for details. You are solely responsible for all charges related to SMS/text messages, including charges from your wireless provider. Message frequency varies. Consent is not required as a condition of purchase. To the extent permitted by Applicable Law, we are not responsible for any delays upon sending or receiving text messages.
-
Unsubscribing From Promotional Messages. You may opt out from promotional text messages at any time. To unsubscribe from promotional text messages, text or reply “STOP,” “QUIT,” “END,” “CANCEL,” or “UNSUBSCRIBE” to the number from which you received the text from the mobile device receiving the messages, or to the other phone number provided by Company (if any) for such purpose. You consent that following such a request to unsubscribe, you may receive one (1) final text message from or on behalf of Company confirming your request. For help, please contact us at support@exe.dev.
-
-
Your Use of Third-Party Services
The service may contain links to third-party sites, materials, and/or services (collectively, “Third-Party Services”) that are not owned or controlled by us, and certain functionalities of the service may require your use of third-party services, to which you are subject to and agree to the third party’s terms and conditions made available via its services. We do not endorse or assume any responsibility for any third-party services. If you access a third-party service from the service or share your user content OR OUTPUT on or through any third-party service, you do so at your own risk, and you understand that these terms and our privacy notice do not apply to your use of any third-party service. You expressly relieve us from any and all liability arising from your access to and/or use of any third-party service. Additionally, your dealings with, or participation in promotions of, advertisers found on the service are solely between you and such advertisers. You understand and acknowledge that we will not be responsible for any loss or damage of any sort relating to your dealings with such advertisers.
-
Release
You hereby release us from all claims, damages (whether direct, indirect, incidental, consequential, or otherwise), obligations, losses, liabilities, costs, debts, and expenses, in each case of every kind and nature, known and unknown, arising out of a dispute between you and a third party (including any other User) in connection with the Service. In addition, you waive any Applicable Law that says, in substance: “a general release does not extend to claims which the releasing party does not know or suspect to exist in his or her favor at the time of executing the release, which, if known by him or her, would have materially affected his or her settlement with the released party.”
-
Indemnity
You will defend, indemnify, and hold us and our subsidiaries and affiliates, and our and their respective agents, suppliers, licensors, employees, contractors, officers, and directors (collectively, including Company, the “Company Indemnitees”) harmless from and against any and all claims, damages (whether direct, indirect, incidental, consequential, or otherwise), obligations, losses, liabilities, costs, debts, and expenses (including, but not limited to, legal fees) arising from: (a) your access to and/or use of the Service, including your use of Output; (b) your violation of any term of these Terms; (c) your violation of any third-party right, including, without limitation, any privacy right or intellectual property right; (d) your violation of any Applicable Law; (e) User Content or any content that is submitted via your User Account; (f) your willful misconduct; or (g) any third party’s access to and/or use of the Service with your authentication credential(s).
- No Warranty; Disclaimers
The service is provided on an “as is” and “as available” basis. To the maximum extent permitted by applicable law, the service, the intellectual property, and any other information available on or through the service are provided without warranties of any kind, whether express or implied, including, but not limited to, implied warranties of merchantability, fitness for a particular purpose, and/or non-infringement. NO ADVICE OR INFORMATION, WHETHER ORAL OR WRITTEN, OBTAINED BY YOU FROM US OR THROUGH THE SERVICE WILL CREATE ANY WARRANTY NOT EXPRESSLY STATED HEREIN. WITHOUT LIMITING THE GENERALITY OF THE FOREGOING, NONE OF THE Company INDEMNITEES WARRANTS THAT ANY CONTENT OR ANY OTHER INFORMATION CONTAINED IN, OR AVAILABLE VIA, THE SERVICE IS ACCURATE, COMPREHENSIVE, RELIABLE, USEFUL, OR CORRECT; THAT THE SERVICE WILL MEET YOUR REQUIREMENTS; THAT THE SERVICE WILL BE AVAILABLE AT ANY PARTICULAR TIME OR LOCATION, UNINTERRUPTED, OR SECURE; THAT ANY DEFECTS OR ERRORS IN THE SERVICE WILL BE CORRECTED; OR THAT THE SERVICE IS FREE OF VIRUSES OR OTHER HARMFUL COMPONENTS. ANY CONTENT DOWNLOADED OR OTHERWISE OBTAINED THROUGH THE USE OF THE SERVICE IS SO OBTAINED AT YOUR OWN RISK, AND YOU WILL BE SOLELY RESPONSIBLE FOR ANY DAMAGE TO YOUR COMPUTER SYSTEM(S) OR MOBILE DEVICE(S) AND/OR FOR LOSS OF DATA THAT RESULTS FROM SAME OR FROM YOUR ACCESS TO AND/OR USE OF THE SERVICE. YOU MAY HAVE OTHER STATUTORY RIGHTS, BUT THE DURATION OF STATUTORILY REQUIRED WARRANTIES, IF ANY, WILL BE LIMITED TO THE SHORTEST PERIOD PERMITTED BY APPLICABLE LAW.
Further, Company does not warrant, endorse, guarantee, recommend, or assume responsibility for any product or service advertised or offered by any third party through the service or any hyperlinked website or service, and Company will not be a party to, or in any way monitor, any transaction between you and third-party providers of products or services.
- Limitation of Liability
To the maximum extent permitted by applicable law, in no event will any Company indemnitee be liable for any indirect, punitive, incidental, special, consequential, or exemplary damages, including, without limitation, damages for loss of profits, goodwill, use, or data, or other intangible losses, arising out of or relating to the use of, or inability to use, the service or any portion thereof. Under no circumstances will we be responsible for any damage, loss, or injury resulting from hacking, tampering, or other unauthorized access to or use of the service or your user account or the information contained therein. In no event will any Company indemnitee be liable to you for any claims, proceedings, liabilities, obligations, damages, losses, or costs in an amount exceeding the amount you paid to us hereunder or one hundred U.S. Dollars ($100.00), whichever is greater. THIS LIMITATION OF LIABILITY SECTION APPLIES WHETHER THE ALLEGED LIABILITY IS BASED ON CONTRACT, TORT, NEGLIGENCE, STRICT LIABILITY, OR ANY OTHER BASIS, EVEN IF WE HAVE BEEN ADVISED OF THE POSSIBILITY OF SUCH DAMAGE.
TO THE MAXIMUM EXTENT PERMITTED BY APPLICABLE LAW, WE ASSUME NO LIABILITY OR RESPONSIBILITY FOR ANY (A) ERRORS, MISTAKES, OR INACCURACIES OF CONTENT; (B) PERSONAL INJURY OR PROPERTY DAMAGE, OF ANY NATURE WHATSOEVER, RESULTING FROM YOUR ACCESS TO OR USE OF THE SERVICE; (C) ANY UNAUTHORIZED ACCESS TO OR USE OF THE SERVERS RUNNING THE SERVICE AND/OR ANY AND ALL PERSONAL INFORMATION STORED THEREIN; (D) ANY INTERRUPTION OR CESSATION OF TRANSMISSION TO OR FROM THE SERVICE; (E) ANY BUGS, VIRUSES, TROJAN HORSES, OR THE LIKE THAT MAY BE TRANSMITTED TO OR THROUGH THE SERVICE BY ANY THIRD PARTY; (F) ANY ERRORS OR OMISSIONS IN ANY CONTENT, OR ANY LOSS OR DAMAGE INCURRED AS A RESULT OF THE USE OF ANY CONTENT POSTED, EMAILED, TRANSMITTED, OR OTHERWISE MADE AVAILABLE THROUGH THE SERVICE; AND/OR (G) YOUR DATA, ANY USER CONTENT, OR THE DEFAMATORY, OFFENSIVE, OR ILLEGAL CONDUCT OF ANY THIRD PARTY.
The disclaimers, exclusions, and limitations of liability under these terms will not apply to the extent prohibited by applicable law.
-
Governing Law, Arbitration, and Class Action/Jury Trial Waiver
-
Governing Law. These Terms will be governed by the laws of the State of California, without respect to its conflict of laws principles. Notwithstanding the preceding sentences with respect to the substantive law governing these Terms, the Federal Arbitration Act (9 U.S.C. §§ 1-16) (as it may be amended, “FAA”) governs the interpretation and enforcement of the Arbitration Agreement below and preempts all state laws (and laws of other jurisdictions) to the fullest extent permitted by Applicable Law. If the FAA is found to not apply to any issue that arises from or relates to the Arbitration Agreement, then that issue will be resolved under and governed by the law of the U.S. state where you live (if applicable) or the jurisdiction mutually agreed upon in writing by you and us. The application of the United Nations Convention on Contracts for the International Sale of Goods is expressly excluded. You agree to submit to the exclusive personal jurisdiction of the federal and state courts located in California for any actions for which we retain the right to seek injunctive or other equitable relief in a court of competent jurisdiction to prevent the actual or threatened infringement, misappropriation, or violation of our data security, Confidential Information, or intellectual property rights, as set forth in the Arbitration Agreement below, including any provisional relief required to prevent irreparable harm. You agree that California is the proper and exclusive forum for any appeals of an arbitration award, or for trial court proceedings in the event that the Arbitration Agreement below is found to be unenforceable. These Terms were drafted in the English language and this English language version of the Terms is the original, governing instrument of the understanding between you and us. In the event of any conflict between the English version of these Terms and any translation, the English version will prevail.
-
Arbitration Agreement
-
General. READ THIS SECTION CAREFULLY BECAUSE IT REQUIRES THE PARTIES TO ARBITRATE THEIR DISPUTES AND LIMITS THE MANNER IN WHICH YOU CAN SEEK RELIEF FROM US. This Arbitration Agreement applies to and governs any dispute, controversy, or claim between you and us that arises out of or relates to, directly or indirectly: (i) these Terms; (ii) access to or use of the Service, including receipt of any advertising or marketing communications; (iii) any transactions through, by, or using the Service; or (iv) any other aspect of your relationship or transactions with us as a User or consumer (each, a “Claim,” and, collectively, “Claims”). This Arbitration Agreement will apply, without limitation, to all Claims that arose or were asserted before or after your consent to these Terms.
-
Opting Out of Arbitration Agreement. If you are a new User, you can reject and opt out of this Arbitration Agreement within thirty (30) days of accepting these Terms by emailing us at support@exe.dev with your full, legal name and stating your intent to opt out of this Arbitration Agreement. Opting out of this Arbitration Agreement does not affect the binding nature of any other part of these Terms, including the provisions regarding controlling law or the courts in which any disputes must be brought.
-
Dispute-Resolution Process. For any Claim, you will first contact us at support@exe.dev and attempt to resolve the Claim with us informally. In the unlikely event that we have not been able to resolve a Claim after sixty (60) days, we each agree to resolve such Claim exclusively through binding arbitration by JAMS before a single arbitrator (the “Arbitrator”), under the Optional Expedited Arbitration Procedures then in effect for JAMS (the “Rules”), except as provided herein. JAMS may be contacted at www.jamsadr.com, where the Rules are available. In the event of any conflict between the Rules and this Arbitration Agreement, this Arbitration Agreement will control. The arbitration will be conducted in the U.S. county where you live (if applicable) or Alameda County, California, unless you and Company agree otherwise. If you are using the Service for commercial purposes, each party will be responsible for paying any JAMS filing and administrative fees and Arbitrator fees in accordance with the Rules, and the award rendered by the Arbitrator will include costs of arbitration, reasonable attorneys’ fees, and reasonable costs for expert and other witnesses. If you are an individual using the Service for non-commercial purposes: (i) JAMS may require you to pay a fee for the initiation of your case, unless you apply for and successfully obtain a fee waiver from JAMS; (ii) the award rendered by the Arbitrator may include your costs of arbitration, your reasonable attorneys’ fees, and your reasonable costs for expert and other witnesses; and (iii) you may sue in a small claims court of competent jurisdiction without first engaging in arbitration, but this would not absolve you of your commitment to engage in the informal dispute resolution process. Any judgment on the award rendered by the Arbitrator may be entered in any court of competent jurisdiction. You and we agree that the Arbitrator, and not any federal, state, or local court or agency, will have exclusive authority to resolve any disputes relating to the scope, interpretation, applicability, enforceability, or formation of this Arbitration Agreement, including any claim that all or any part of this Arbitration Agreement is void or voidable. The Arbitrator will also be responsible for determining all threshold arbitrability issues, including issues relating to whether these Terms are, or whether any provision of these Terms is, unconscionable or illusory, and any defense to arbitration, including waiver, delay, laches, unconscionability, and/or estoppel.
-
Equitable Relief. NOTHING IN THIS ARBITRATION AGREEMENT WILL BE DEEMED AS: PREVENTING US FROM SEEKING INJUNCTIVE OR OTHER EQUITABLE RELIEF FROM THE COURTS AS NECESSARY TO PREVENT THE ACTUAL OR THREATENED INFRINGEMENT, MISAPPROPRIATION, OR VIOLATION OF OUR DATA SECURITY, CONFIDENTIAL INFORMATION, OR INTELLECTUAL PROPERTY RIGHTS; OR PREVENTING YOU FROM ASSERTING CLAIMS IN A SMALL CLAIMS COURT, PROVIDED THAT YOUR CLAIMS QUALIFY AND SO LONG AS THE MATTER REMAINS IN SUCH COURT AND ADVANCES ON ONLY AN INDIVIDUAL (NON-CLASS, NON-COLLECTIVE, AND NON-REPRESENTATIVE) BASIS.
-
Severability. If this Arbitration Agreement is found to be void, unenforceable, or unlawful, in whole or in part, the void, unenforceable, or unlawful provision, in whole or in part, will be severed. Severance of the void, unenforceable, or unlawful provision, in whole or in part, will have no impact on the remaining provisions of this Arbitration Agreement, which will remain in force, or on the parties’ ability to compel arbitration of any remaining Claims on an individual basis pursuant to this Arbitration Agreement. Notwithstanding the foregoing, if the Class Action/Jury Trial Waiver below is found to be void, unenforceable, or unlawful, in whole or in part, because it would prevent you from seeking public injunctive relief, then any dispute regarding the entitlement to such relief (and only that relief) must be severed from arbitration and may be litigated in a civil court of competent jurisdiction. All other claims for relief subject to arbitration under this Arbitration Agreement will be arbitrated under its terms, and the parties agree that litigation of any dispute regarding the entitlement to public injunctive relief will be stayed pending the outcome of any individual claims in arbitration.
-
-
Class Action/Jury Trial Waiver. BY ENTERING INTO THESE TERMS, YOU AND Company ARE EACH WAIVING THE RIGHT TO A TRIAL BY JURY OR TO BRING, JOIN, OR PARTICIPATE IN ANY PURPORTED CLASS ACTION, COLLECTIVE ACTION, PRIVATE ATTORNEY GENERAL ACTION, OR OTHER REPRESENTATIVE PROCEEDING OF ANY KIND AS A PLAINTIFF OR CLASS MEMBER. THE FOREGOING APPLIES TO ALL USERS (BOTH NATURAL PERSONS AND ENTITIES), REGARDLESS OF WHETHER YOU HAVE OBTAINED OR USED THE SERVICE FOR PERSONAL, COMMERCIAL, OR OTHER PURPOSES. THIS CLASS ACTION/JURY TRIAL WAIVER APPLIES TO CLASS ARBITRATION, AND, UNLESS WE AGREE OTHERWISE, THE ARBITRATOR MAY NOT CONSOLIDATE MORE THAN ONE PERSON’S OR ENTITY’S CLAIMS. YOU AND Company AGREE THAT THE ARBITRATOR MAY AWARD RELIEF ONLY TO AN INDIVIDUAL CLAIMANT AND ONLY TO THE EXTENT NECESSARY TO PROVIDE RELIEF ON YOUR INDIVIDUAL CLAIM(S). ANY RELIEF AWARDED MAY NOT AFFECT OTHER USERS.
-
-
U.S. Government Restricted Rights
To the extent the Service is being used by or on behalf of the U.S. Government, the Service will be deemed commercial computer software or commercial computer software documentation (as applicable). Accordingly, if you are an agency of the U.S. Government or any contractor therefor, you receive only those rights with respect to the Service as are granted to all other Users hereunder, in accordance with 48 C.F.R. §227.7202 and 48 C.F.R. §12.212, as applicable.
- Export Controls
You understand and acknowledge that the Service may be subject to export control laws and regulations. You will comply with all applicable import and export and re-export control and trade and economic sanctions laws and regulations, including the Export Administration Regulations maintained by the U.S. Department of Commerce, trade and economic sanctions maintained by the U.S. Treasury Department’s Office of Foreign Assets Control (“OFAC”), and the International Traffic in Arms Regulations maintained by the U.S. State Department. You represent and warrant that you are not, and that no person to whom you make the Service available or that is acting on your behalf, or, if you are an Organization, that no person or entity owning 50% or more of your equity securities or other equivalent voting interests, is (a) listed on the List of Specially Designated Nationals and Blocked Persons or on any other list of sanctioned, prohibited, or restricted parties administered by OFAC or by any other governmental entity, or (b) located in, a national or resident of, or a segment of the government of, any country or territory for which the United States maintains trade or economic sanctions or embargoes or that has been designated by the U.S. Government as a “terrorist supporting” region.
-
General Provisions
-
Assignment. These Terms, and any rights and licenses granted hereunder, may not be transferred or assigned by you without our prior express written consent, but may be assigned by us without restriction. Any attempted transfer or assignment in violation hereof will be null and void.
-
Notification Procedures and Changes to these Terms. We may provide notifications to you via email notice or through posting of such notice on the Service, as we determine in our sole discretion. We may modify or update these Terms from time to time, and you should review this page periodically. These Terms apply to and govern your access to and use of the Service effective as of the start of your access to the Service, even if such access began before publication of these Terms. Your continued use of the Service after any change to these Terms constitutes your acceptance of the new Terms of Service. If you do not agree to any part of these Terms or to any future Terms of Service, do not access or use (or continue to access or use) the Service.
-
Entire Agreement; Severability. These Terms, together with any amendments and any additional agreements you may enter into with us in connection with the Service, will constitute the entire agreement between you and us concerning the Service. Except as otherwise stated in the Arbitration Agreement, if any provision of these Terms is deemed invalid by a court of competent jurisdiction, the invalidity of such provision will not affect the validity of the remaining provisions of these Terms, which will remain in full force and effect.
-
No Waiver. No waiver of any term of these Terms will be deemed a further or continuing waiver of such term or of any other term, and our failure to assert any right or provision under these Terms will not constitute a waiver of such right or provision.
-
California Residents. The provider of the Service is Bold Software Inc, 43 Slater Ln, Berkeley, CA 94705. If you are a California resident, in accordance with Cal. Civ. Code §1789.3, you may report complaints to the Complaint Assistance Unit of the Division of Consumer Services of the California Department of Consumer Affairs by contacting it in writing at 1625 North Market Blvd., Suite N 112 Sacramento, CA 95834, or by telephone at (800) 952-5210 or (916) 445-1254.
-
Contact. If you have any questions about these Terms and/or the Service, please contact us at support@exe.dev.
-
Sub-processors
Last Updated: 2026-01-01
To provide our services, Bold Software, Inc. (“exe.dev”) engages the third-party sub-processors listed below to process personal data on behalf of our customers. We enter into a data processing agreement with each sub-processor that requires appropriate safeguards for personal data, and, where personal data is transferred outside the EEA, the UK, or Switzerland, we rely on Standard Contractual Clauses or another valid transfer mechanism.
Infrastructure sub-processors
These providers host the virtual machines and compute that our customers run. Your data is stored in the region you select.
| Sub-processor | Purpose | Entity location |
|---|---|---|
| Amazon Web Services, Inc. | Cloud compute and hosting | United States (global regions) |
| Google LLC (Google Cloud) | Cloud compute and hosting | United States (global regions) |
| Latitude.sh, Inc. | Bare-metal compute and hosting | United States / Netherlands (global regions) |
| NetActuate, Inc. | Compute and hosting | United States (global regions) |
Other sub-processors
| Sub-processor | Purpose | Entity location |
|---|---|---|
| ClickHouse, Inc. | Log storage and analytics | United States |
Changes to this list
We may update this list as our services evolve. When we add or replace a sub-processor, we will update this page. For questions, contact us at support@exe.dev.
Long Tail
What are long tail docs?
We carefully curate our main docs. But there's a long tail of information about exe.dev that isn't worth putting above the fold. This section is for those docs. Unlike our main docs, these may be LLM-generated (though still human reviewed!)...and we expect they'll mainly be LLM-consumed.
Repo buttons
Add a repo query parameter to https://exe.dev/new to spin up a VM,
open Shelley, clone the repo, and prefill the deploy instructions:
/new?repo=https://github.com/OWNER/REPO
Shelley will use repo instructions like AGENTS.md when available.
Public repos can add our buttons to their README.md:
[](https://exe.dev/new?repo=https://github.com/OWNER/REPO)
[](https://exe.dev/new?repo=https://github.com/OWNER/REPO)
Suggest links
https://exe.dev/suggest?command=<urlencoded-command> opens a page in the
exe.dev dashboard that describes an action for review and possible approval.
These links are designed for agents (and humans) to hand off actions that an agent cannot (and should not!) perform on the user's behalf.
What can be suggested
Each link suggests one exe.dev command (what follows ssh exe.dev). For example:
share set-public myboxresize mybox --memory=4Gnew --name=snazzy-new-vm
Not all commands and arguments are supported; see "preflight" below.
Checking a link before sending it
Append &preflight=1 and fetch the link:
curl -s 'https://exe.dev/suggest?command=share+set-public+mybox&preflight=1'
A 200 response means the command can be suggested, not that it will succeed.
Updating coding agents on an exe.dev VM
The default exeuntu image ships with claude, codex, and pi
pre-installed. They are installed when the image is built, not at VM boot. That
means:
- There is no
aptpackage backing them, soapt upgradewon't move them. - Long-lived VMs keep whatever versions they were created with until you update them explicitly.
Update to latest
These commands work on newer VMs created from an exeuntu image that includes
the exeuntu update agent commands. On older VMs, exeuntu update claude,
exeuntu update codex, or exeuntu update pi may not exist yet; use the
older VM fallback below.
Run these commands on the VM:
sudo exeuntu update claude
sudo exeuntu update codex
exeuntu update pi

claude --version
codex --version
pi --version
Or from your laptop, against a named VM:
ssh my-vm.exe.xyz 'sudo exeuntu update claude && sudo exeuntu update codex && exeuntu update pi'
The update commands are quiet on success. Run each agent's --version command
afterwards if you want to confirm what changed.
Claude Code and Codex are installed into /usr/local/bin, so they require
sudo. Pi is installed into the VM user's home directory under ~/.local, so
run the Pi update as the user who runs Pi. If you are updating Pi for a
different user, pass --home, for example:
sudo -u exedev exeuntu update pi --home /home/exedev
Pinning a specific version
To install a specific release instead of the latest:
sudo exeuntu update claude --version 2.1.185
sudo exeuntu update codex --version rust-v0.140.0
exeuntu update pi --version 1.2.3
Codex release tags are listed at https://github.com/openai/codex/releases.
Older VM fallback
If your VM is too old to have the exeuntu update commands, use the older
manual Codex replacement recipe. Run this on the VM:
sudo bash -c '
  set -euo pipefail
  case "$(uname -m)" in
    x86_64) A=x86_64-unknown-linux-musl ;;
    aarch64|arm64) A=aarch64-unknown-linux-musl ;;
    *) echo "unsupported arch: $(uname -m)" >&2; exit 1 ;;
  esac
  V=$(curl -fsSL https://api.github.com/repos/openai/codex/releases/latest | jq -r .tag_name)
  echo "installing codex $V ($A)"
  curl -fsSL "https://github.com/openai/codex/releases/download/$V/codex-$A.tar.gz" \
    | tar -xzC /usr/local/bin
  mv "/usr/local/bin/codex-$A" /usr/local/bin/codex
  chmod +x /usr/local/bin/codex
'
codex --version
Or from your laptop, against a named VM:
ssh my-vm.exe.xyz 'sudo bash -s' <<'EOF'
set -euo pipefail
case "$(uname -m)" in
  x86_64) A=x86_64-unknown-linux-musl ;;
  aarch64|arm64) A=aarch64-unknown-linux-musl ;;
esac
V=$(curl -fsSL https://api.github.com/repos/openai/codex/releases/latest | jq -r .tag_name)
curl -fsSL "https://github.com/openai/codex/releases/download/$V/codex-$A.tar.gz" \
  | tar -xzC /usr/local/bin
mv "/usr/local/bin/codex-$A" /usr/local/bin/codex
chmod +x /usr/local/bin/codex
EOF
The unified exeuntu update command is the supported path for newer VMs. For
older VMs that need Claude Code or Pi updates, use the agent's upstream
installer or create a new VM from the current default image.
Why not npm install -g @openai/codex?
That works too if you prefer the Node-packaged build and already have a
modern Node on the VM. The image ships the native Codex binary because it is
self-contained, smaller, and faster to start. If you mix the two, remember that
which codex will resolve to whichever appears first on PATH: the npm shim
usually lands in ~/.npm-global/bin or similar, ahead of /usr/local/bin.
Why doesn't my VM just have the latest already?
The agents are fetched during docker build of the exeuntu image, not at VM
boot. New VMs built from a freshly published image will have recent agent
versions; long-lived VMs keep whatever they were created with until you update
them explicitly.